Single-Sign-On
What Is Single Sign-On?
Single Sign-On (SSO) is a user authentication service that allows users to access multiple applications, websites, and data sets using a single set of login credentials (username and password).
This is often seen where people use Google, Facebook, or Twitter to sign in to a third-party service, saving time and effort on creating separate credentials.
In an enterprise environment, SSO serves as a powerful tool for productivity and centralized security. By using a single security token, organizations can seamlessly manage user access across various platforms, significantly reducing the risks associated with lost or weak passwords.
Why Choose SSO?
SSO removes the “password fatigue” that comes with juggling dozens of different credentials. For the user, it means a faster, frictionless login experience. For the organization, it offers:
- Reduced Overhead: Minimizes IT costs and downtime related to password resets.
- Enhanced Security: Mitigates insider threats and ensures authentication protocols are followed company-wide.
- Centralized Control: Admins can grant or revoke access to all connected resources instantly.
You can read more about the importance of SSO and how it’ll benefit you and the business in this article.
Supported Identity Providers
Creately supports both consumers and enterprise teams, integrating seamlessly with leading identity providers:
- Azure AD
- Okta
- OneLogin
How Does SSO Work?
The process happens behind the scenes in a matter of seconds. Here is the typical workflow:
- Verification: When you attempt to access an app, the site checks if you have already been authenticated by the SSO solution.
- Redirection: If not authenticated, you are redirected to your organization’s SSO login page.
- Authentication: You enter your corporate credentials. The SSO solution verifies these with your company’s identity provider.
- Access Granted: Once verified, the SSO solution sends a secure token back to the app, and you are granted access immediately.
Benefits of Using SSO in Creately
Implementing SSO within your Creately workspace offers three distinct advantages:
- Password-Free Access: By utilizing SAML (Security Assertion Markup Language), Creately uses secure tokens rather than traditional passwords. This means your team can jump straight into collaborating without repeatedly entering credentials.
- Simplified User Management: IT administrators maintain full control. You can provision (activate) or de-provision (deactivate) employee access to Creately instantly from your central dashboard.
- Automated Team Onboarding: There is no need to manually assign plans to every individual. When an employee logs in using your verified company domain, they are automatically added to your enterprise team plan.
Setting up SSO with Creately in Microsoft Entra ID (Azure AD)
Here’s a step-by-step walkthrough for configuring Microsoft Entra ID as your Identity Provider (IdP) to enable seamless Single Sign-On (SSO) for Creately.
Step 1: Create a New Enterprise Application
- Log in to the Azure Portal.
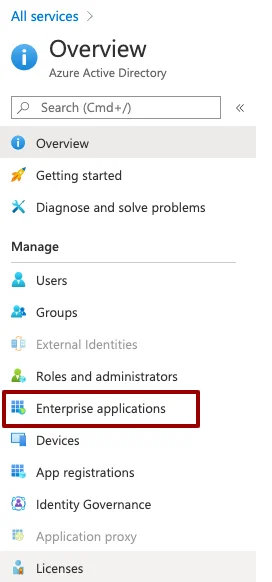
- Navigate to Microsoft Entra ID (formerly Azure Active Directory) via the Azure Services section or the search bar.
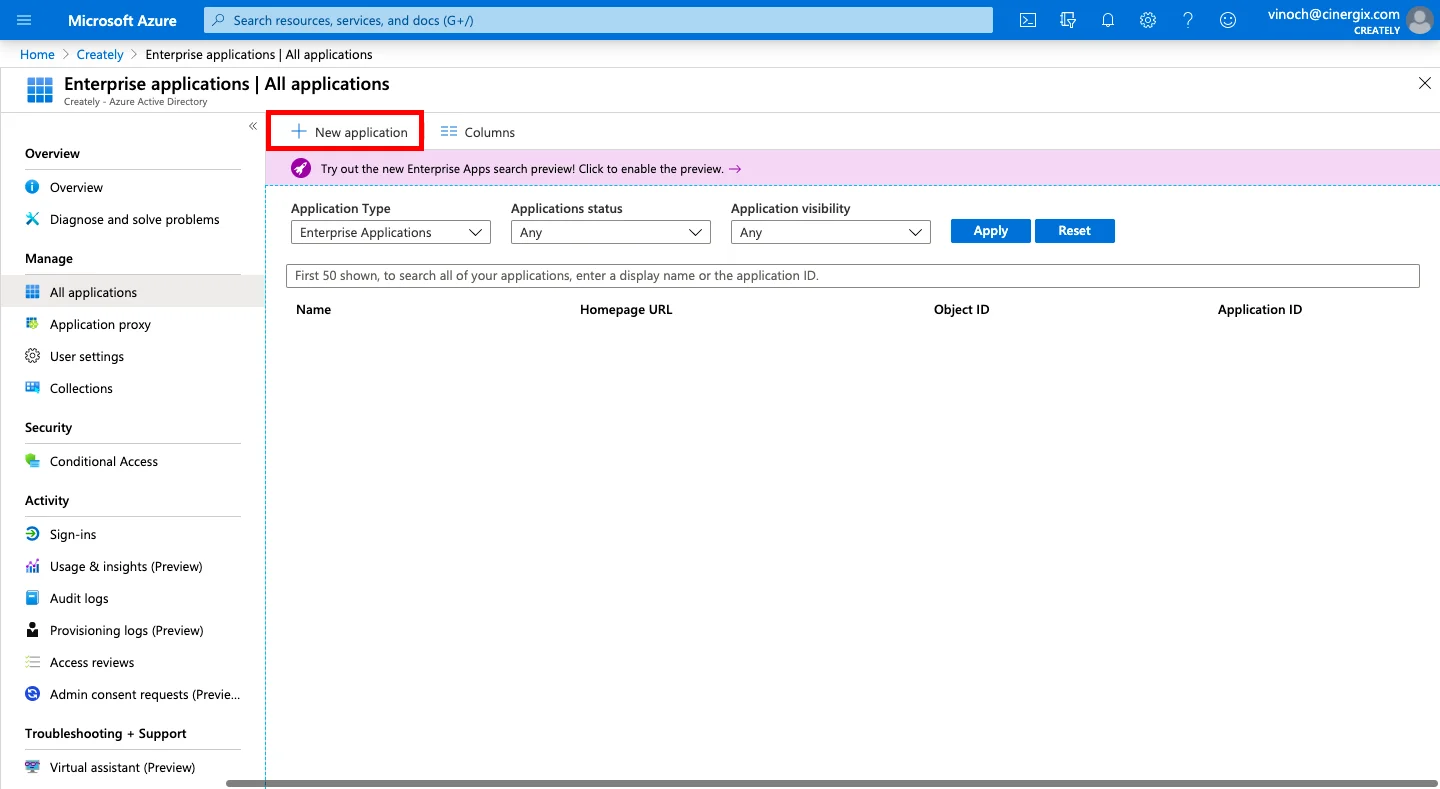
- On the left sidebar, select Enterprise applications > New application.
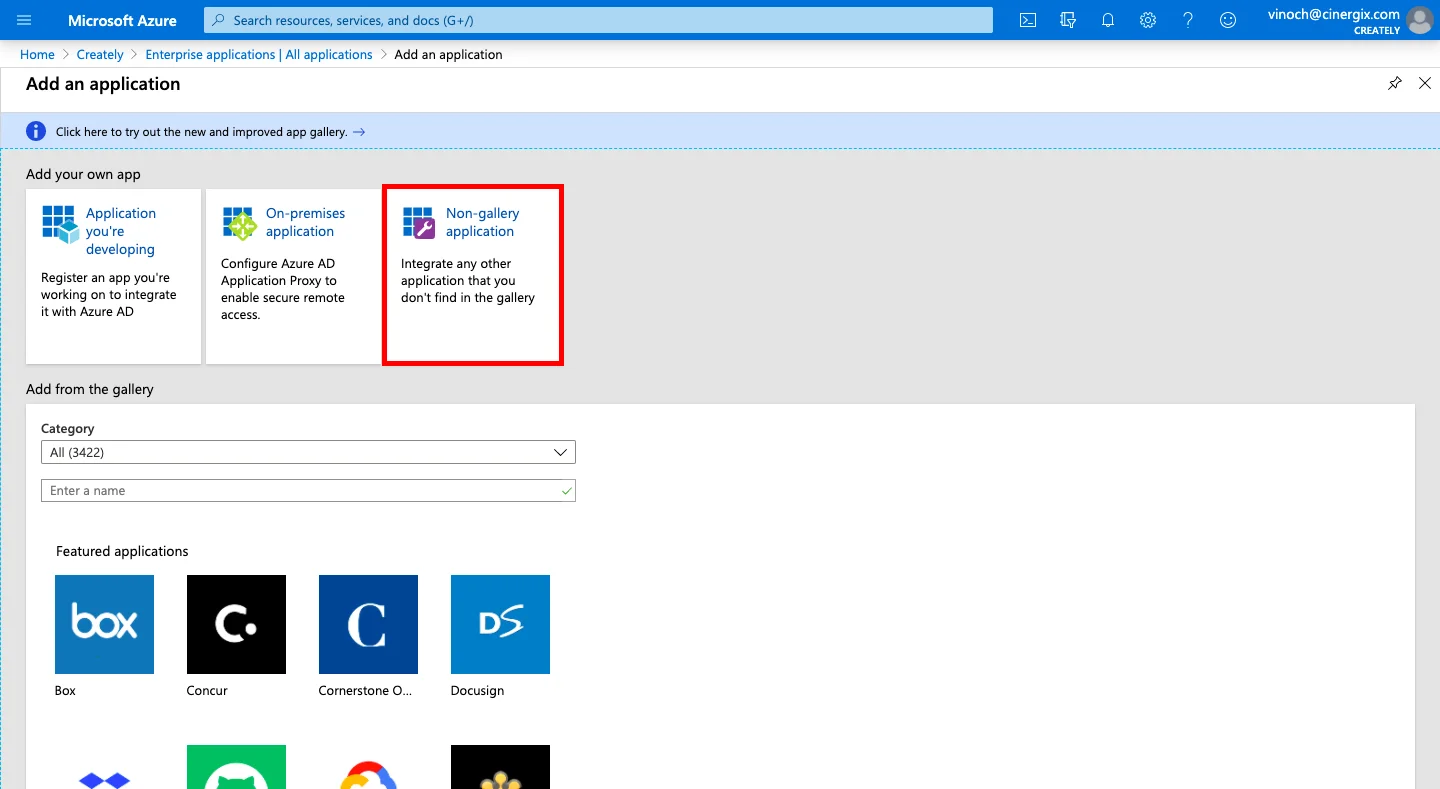
- Choose Create your own application (or Non-gallery application).
- Enter a name for the application, Creately, and click the Add button.
Step 2: Configure SAML for Single Sign-On
Once your application is created, you need to establish the connection between Entra ID and Creately:
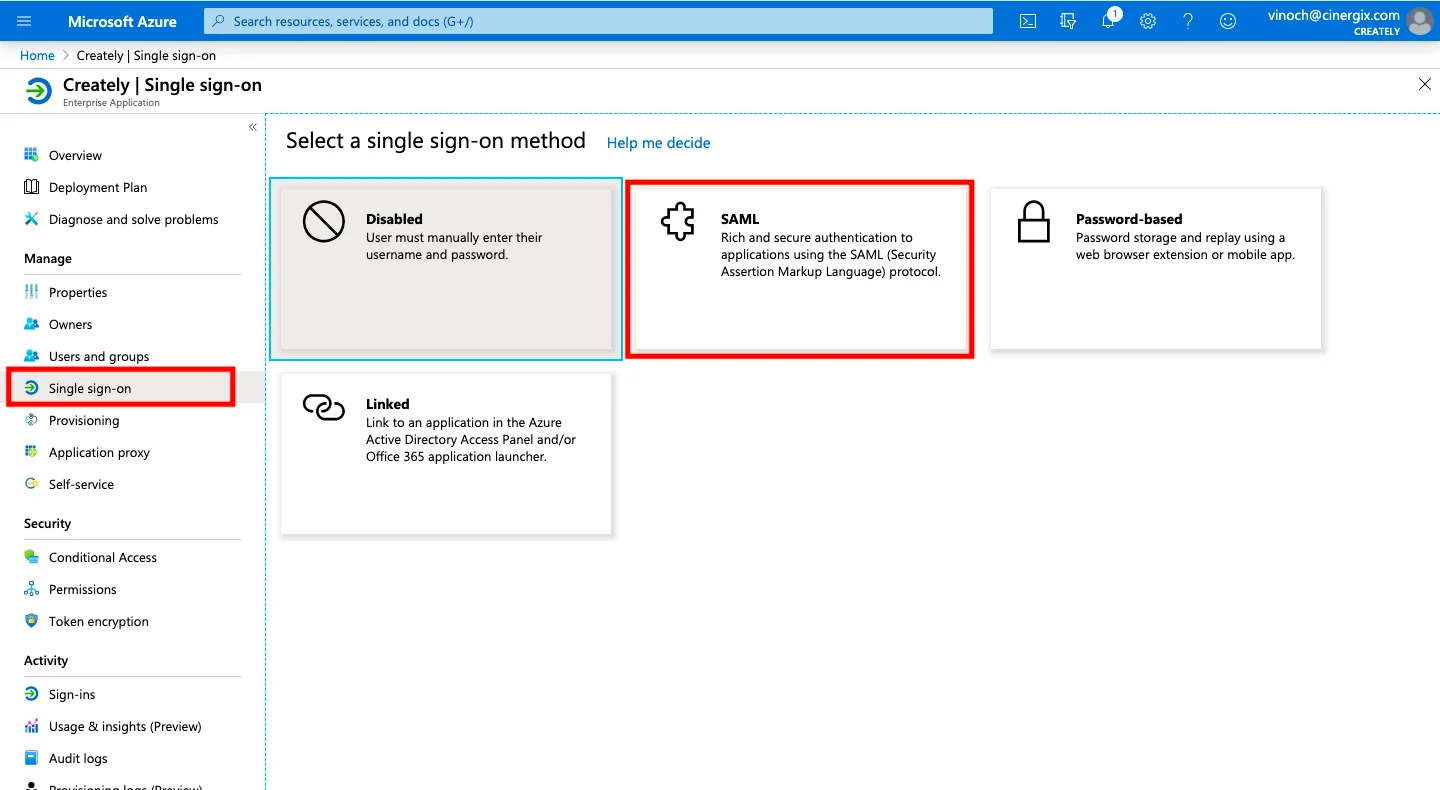
- Select Single sign-on from the left sidebar and choose SAML as the authentication method.
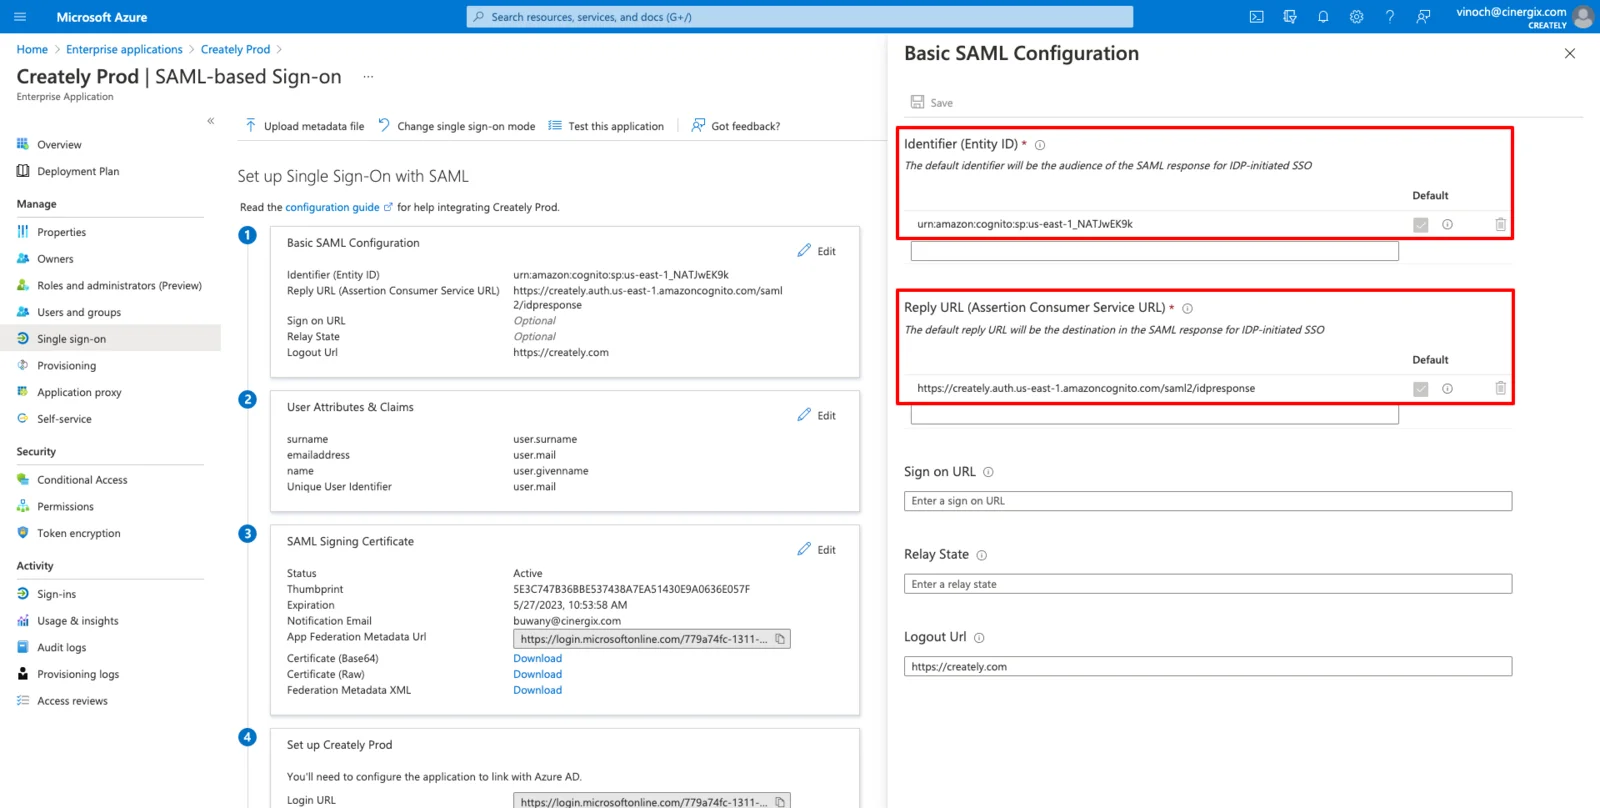
- In the Basic SAML Configuration section, click the Edit (pencil) icon.
- Enter the Identifier and Reply URL, given by Creately, based on your specific region, and save your changes.
| Region | Identifier (Entity ID) | Reply URL (Assertion Consumer Service) |
| US | urn:amazon:cognito:sp:us-east-1_NATJwEK9k | https://creately.auth.us-east-1.amazoncognito.com/saml2/idpresponse |
| EU | urn:amazon:cognito:sp:eu-west-1_zN0n85NRb | https://createlyeu.auth.eu-west-1.amazoncognito.com/saml2/idpresponse |
| AU | urn:amazon:cognito:sp:ap-southeast-2_0nUtBoFVD | https://createlyau.auth.ap-southeast-2.amazoncognito.com/saml2/idpresponse |
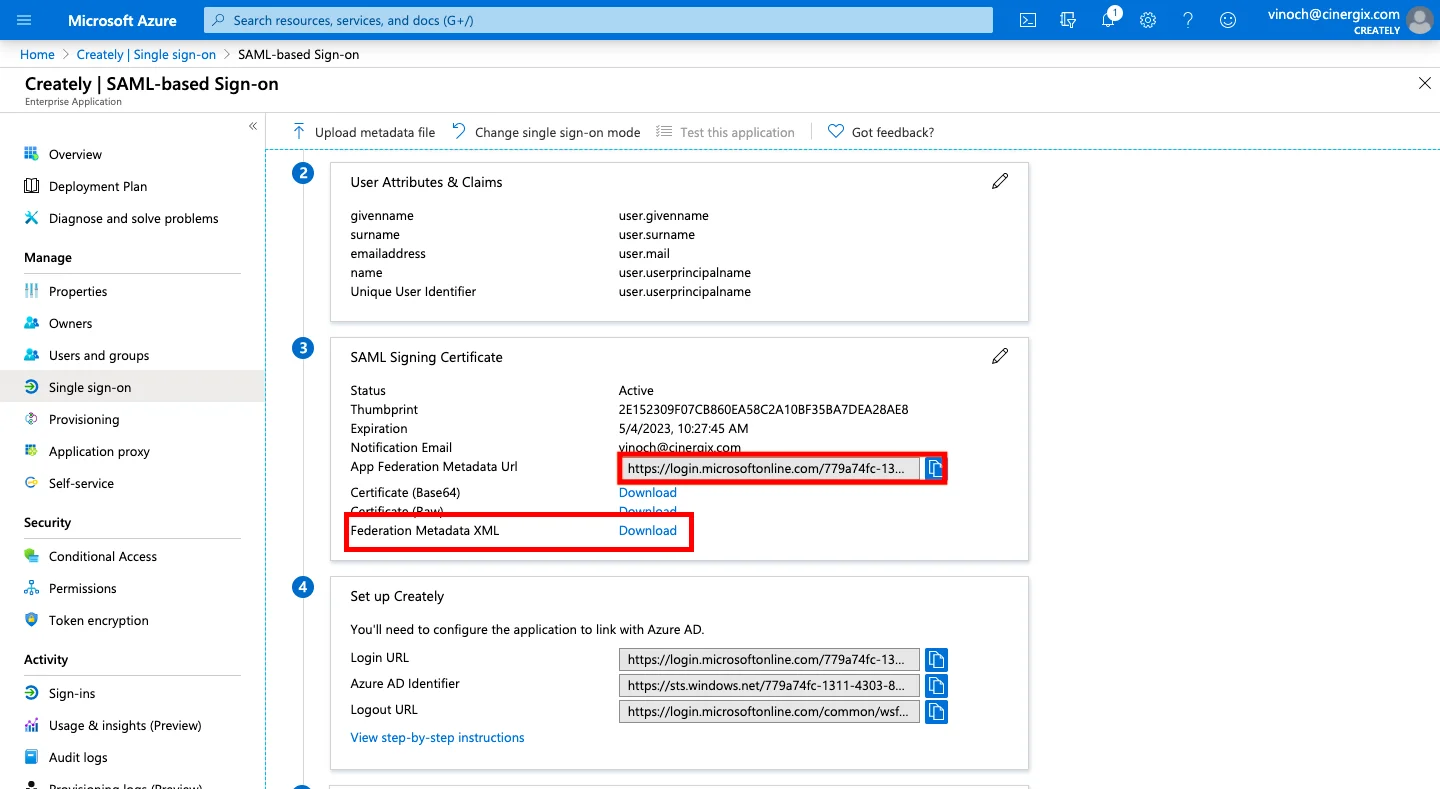
- Scroll down to the SAML Certificates section. You can either download the Federation Metadata XML or copy the App Federation Metadata URL.
NOTE We recommend providing the Metadata URL. This ensures that any certificate updates or changes made in your Active Directory are reflected in Creately automatically.
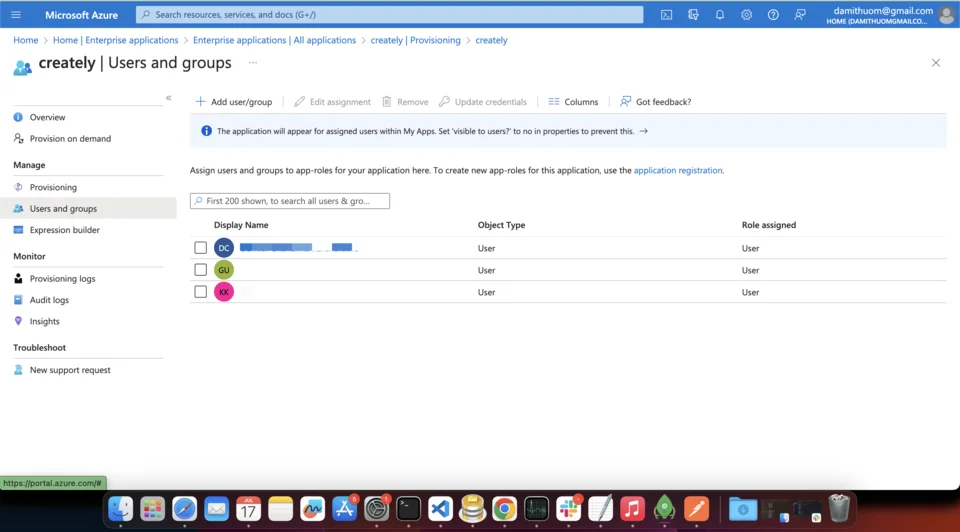
Step 3: Assign Users to Creately
Before testing, you must authorize users to use this application:
- Select Users and groups from the left sidebar.
- Click Add user/group.
- Select the specific users or groups who require access to Creately.
- Click Select and then Assign.
Login Test
To verify your configuration, copy and paste the test URL for your region into your browser:
- US Region: https://creately.auth.us-east-1.amazoncognito.com/login?response_type=token&client_id=7t8q2a01vn0eho5cavpmcni4a5&redirect_uri=https://creately.com/login/sso/success/
- EU Region: https://createlyeu.auth.eu-west-1.amazoncognito.com/login?response_type=token&client_id=64ldogn1dbs5jg3ouje2pilf3h&redirect_uri=https://creately.com/login/sso/success/
- AU Region: https://createlyau.auth.ap-southeast-2.amazoncognito.com/login?response_type=token&client_id=7ghfubmmi4ern71b06pitv9o8u&redirect_uri=https://creately.com/login/sso/success/
Automated User Management
Looking to automate your workflow? You can set up SCIM Provisioning to automatically sync users between Microsoft Entra ID and Creately.
Enabling SCIM Provisioning for Microsoft Entra ID
Automating user management via SCIM (System for Cross-domain Identity Management) allows you to automatically create, update, and deactivate user accounts in Creately based on your Microsoft Entra ID directory.
Prerequisites
Before you begin, ensure you have:
- Created a Creately Enterprise Application in Microsoft Entra ID.
- Obtained a Secret Token from the Creately team. Please contact support@creately.com to request your unique token.
Step 1: Configure Provisioning Settings
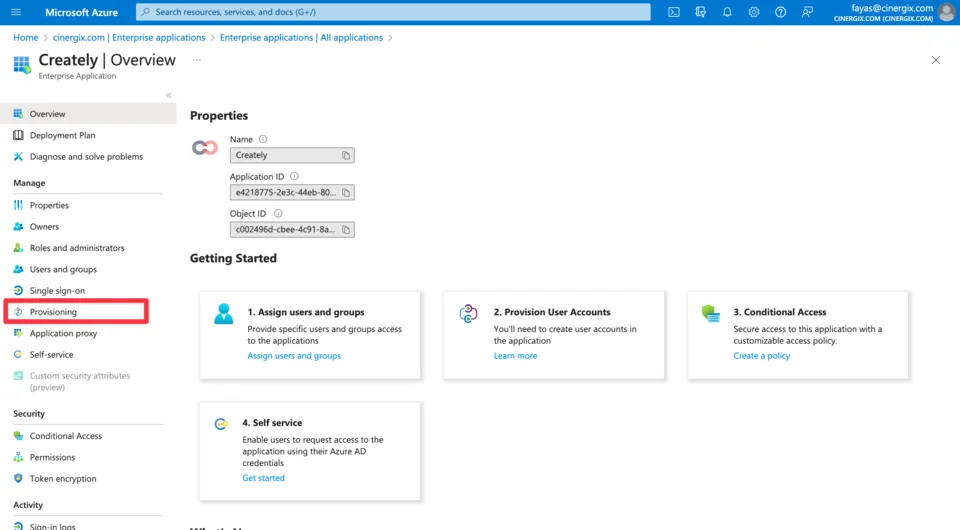
- Open your Creately Enterprise Application in the Azure Portal.
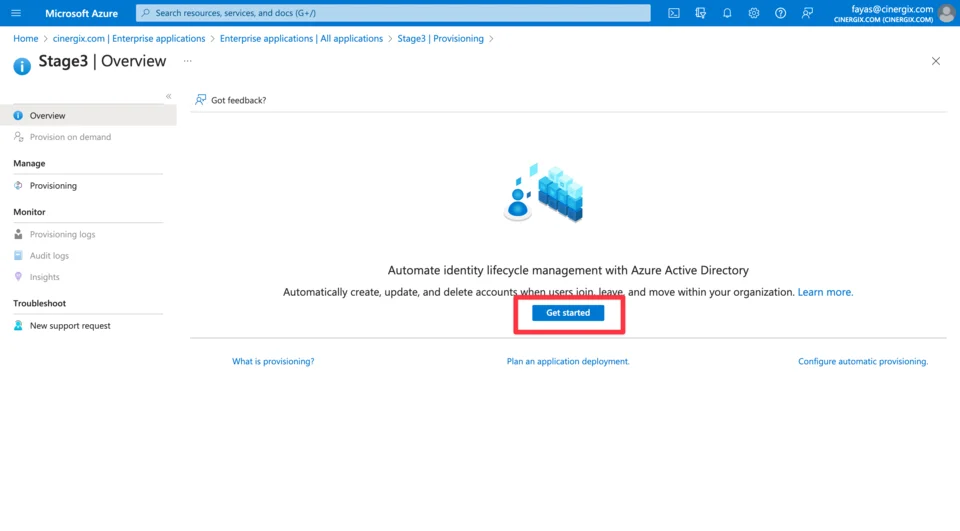
- From the left sidebar, select Provisioning and click Get started.
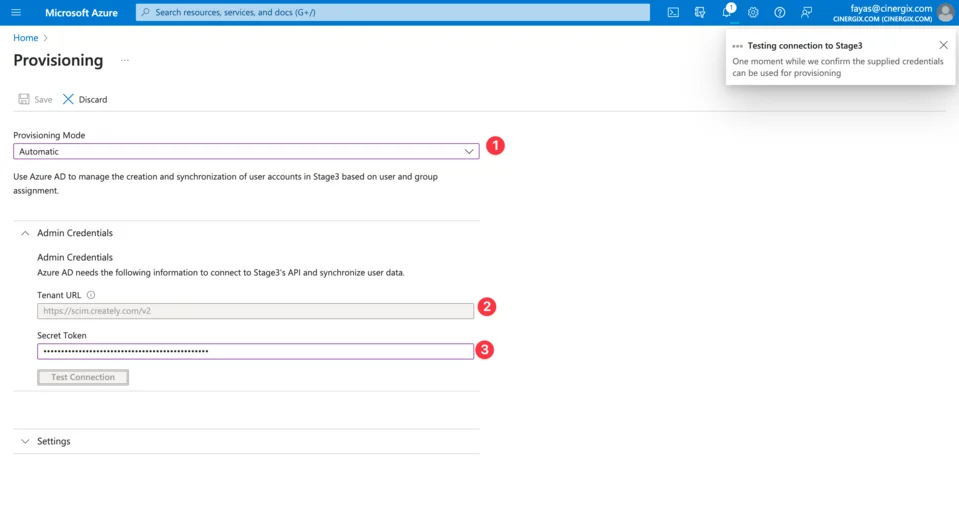
- Set the Provisioning Mode to Automatic.
- Under the Admin Credentials section, enter the following:
| Field | Description |
| Tenant URL | Use the regional URL provided in the table below. |
| Secret Token | Paste the unique token provided by Creately support. |
Regional Tenant URLs
Select the URL that matches your Creately data hosting region:
- US Region: https://scim.creately.com/v2
- EU Region: https://scim-eu.creately.com/v2
- AU Region: https://scim-au.creately.com/v2
- Click Test Connection to ensure Entra ID can communicate with Creately. Once verified, click Save.
Step 2: Define Provisioning Scope
Decide which users should be synced to Creately:
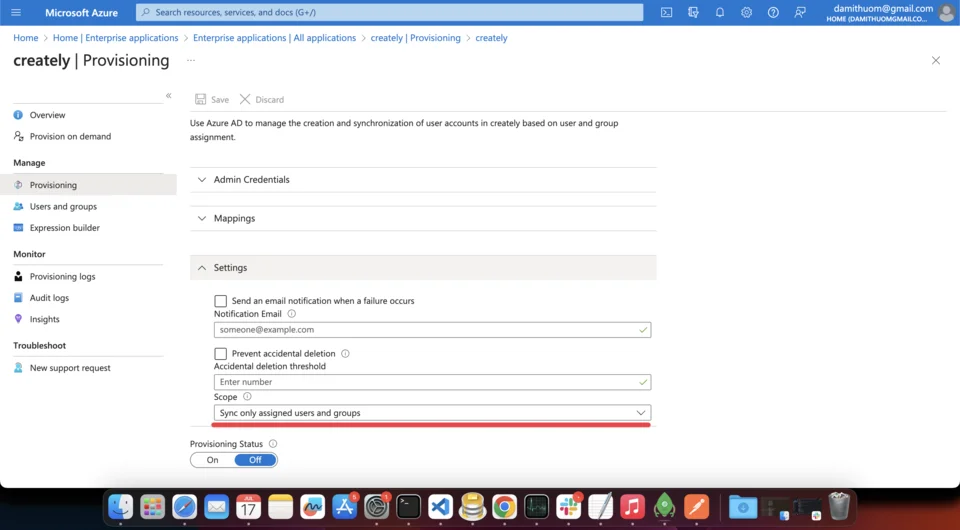
Sync all users and groups: Every user in your Microsoft Entra ID will automatically have a Creately account created.
Sync only assigned users and groups: Only users specifically assigned to the Creately application in Entra ID (under Users and Groups) will be synced.
TIP We recommend using “Sync only assigned users and groups” for better control over your seat licenses.
Step 3: Test and Activate
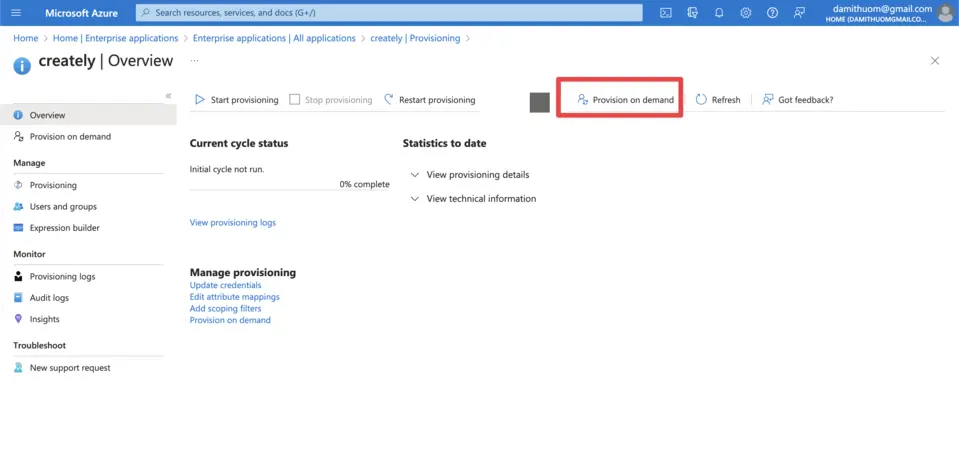
Provision on Demand: Before turning on the full sync, click Provision on Demand. Search for a specific user to test the sync process.
Verify: Check your Creately admin panel to confirm the test user was created with the correct attributes.
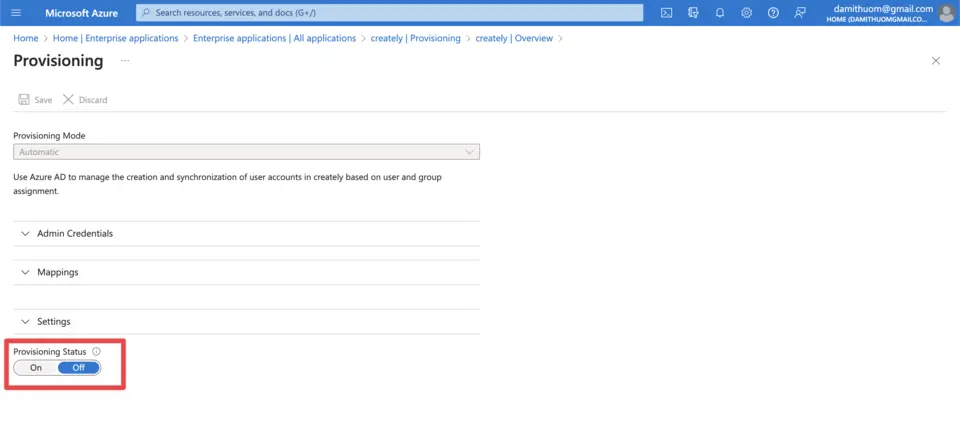
Enable Sync: Once satisfied, go back to the Provisioning main page and set the Provisioning Status to On.
Microsoft Entra ID will now sync changes (additions, updates, or removals) to Creately at regular intervals.
Setting up SSO with Creately in Okta
Here’s a step-by-step walkthrough for configuring Okta as your Identity Provider (IdP) to enable Single Sign-On (SSO) for your team to access Creately services.
Step 1: Create the Creately Application in Okta
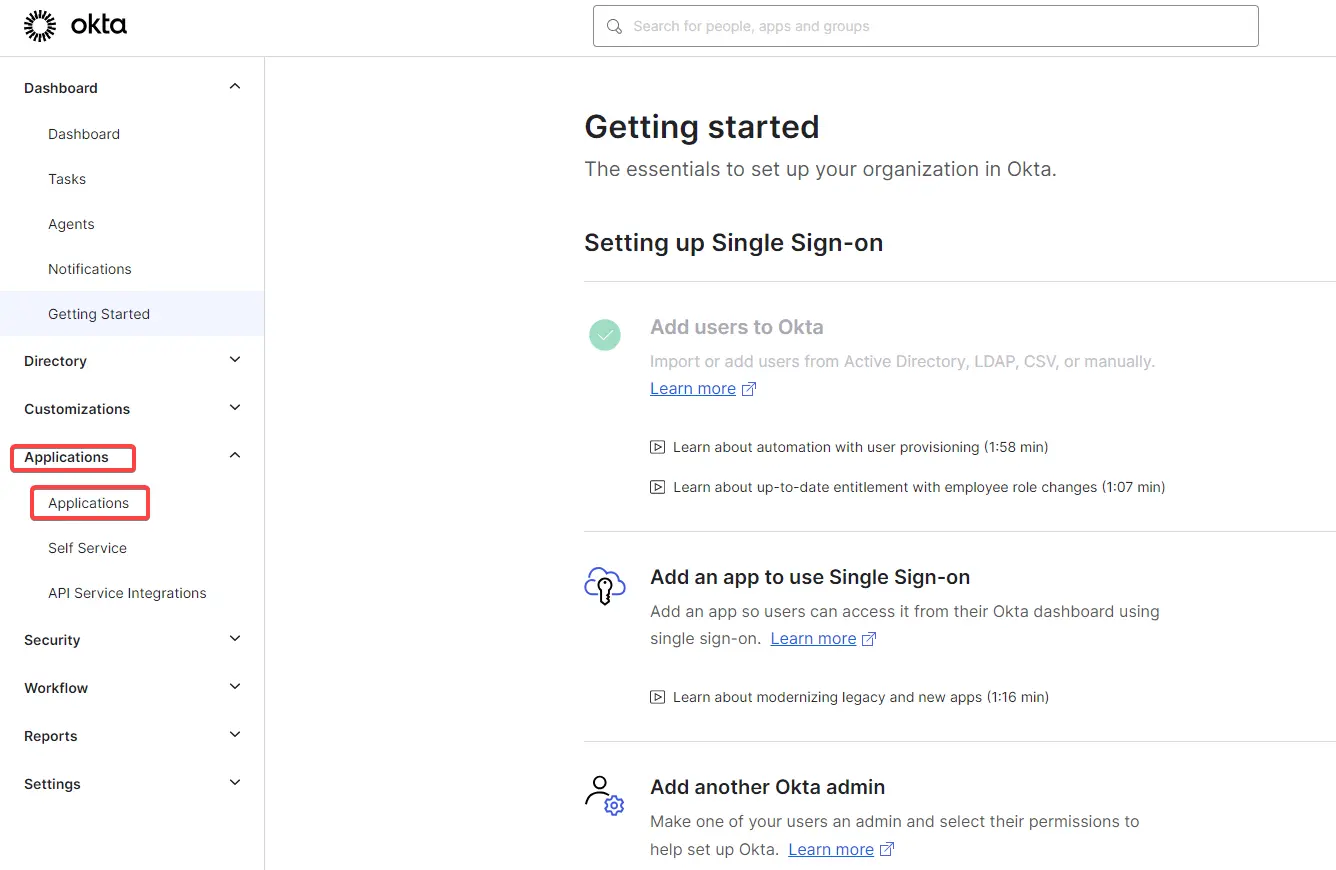

- Log in to your Okta Admin Dashboard.
- In the sidebar, navigate to Applications > Applications.
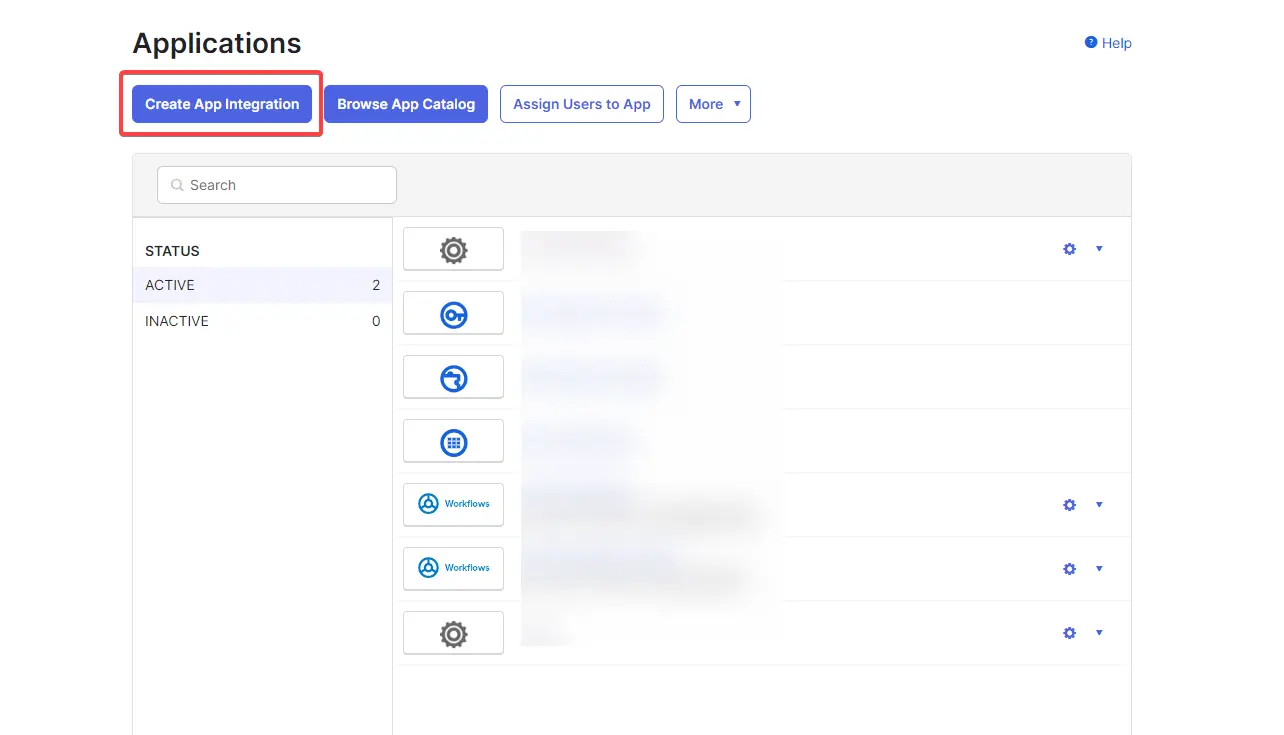
- Click Create App Integration.
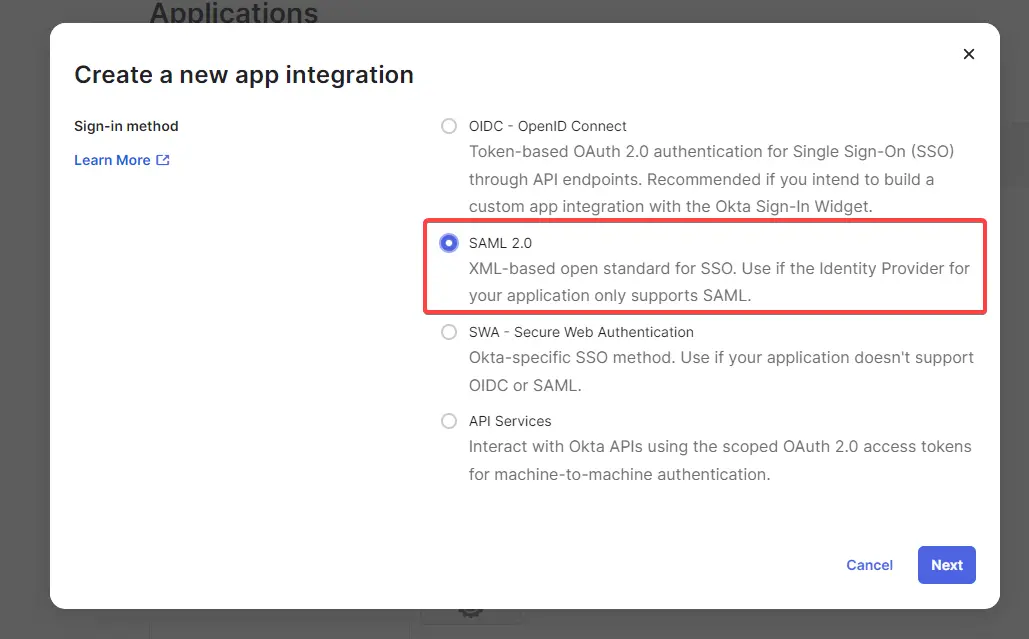
- Select SAML 2.0 as the Sign-in method and click Next.
- Under General Settings, enter Creately as the App name. You may also upload the Creately logo for easy recognition. Click Next.
Step 2: Configure SAML Settings
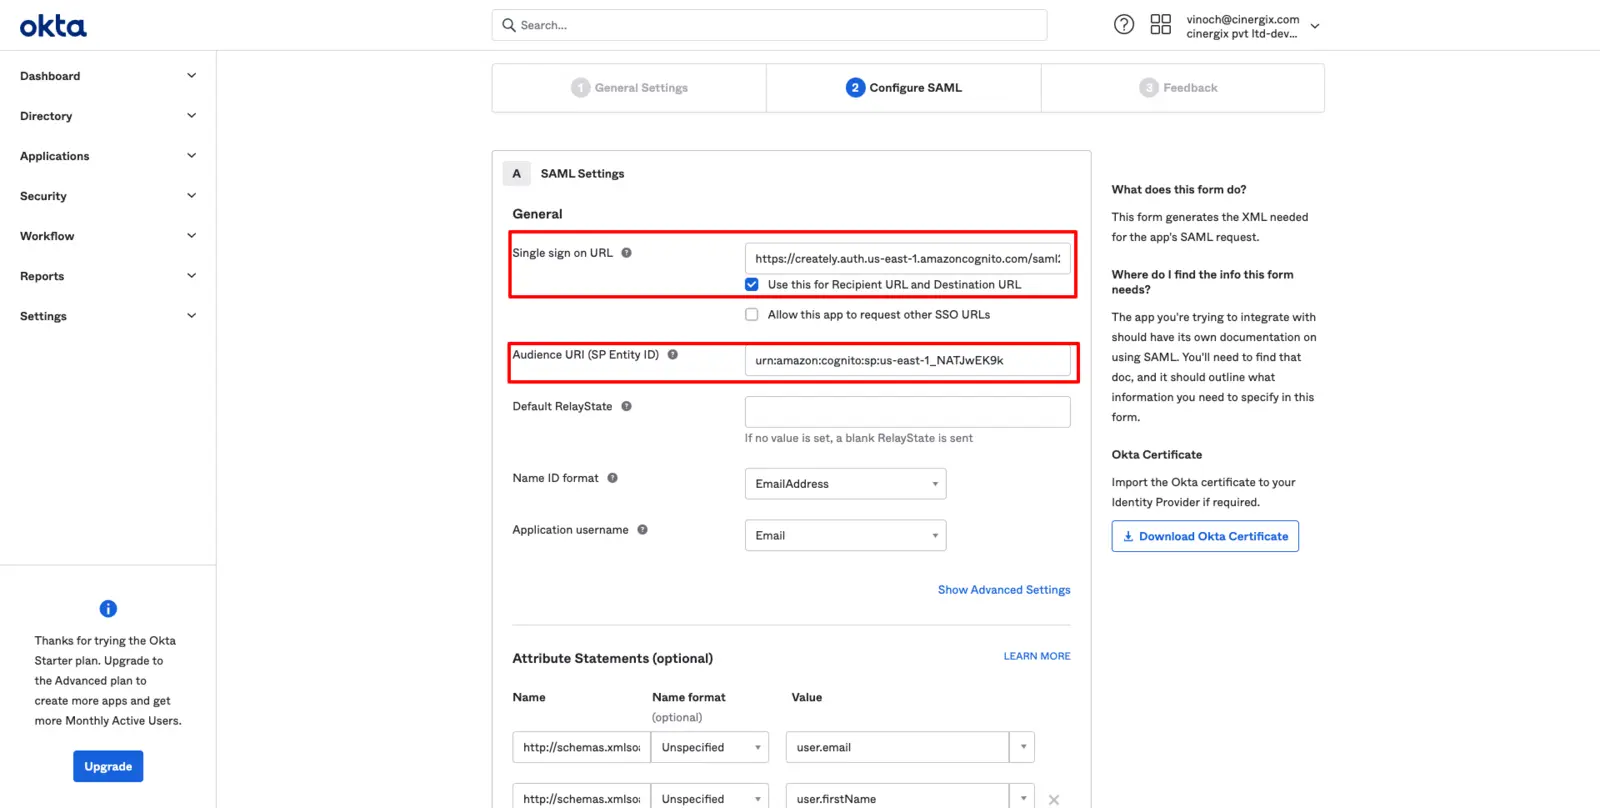

- In the Configure SAML section, enter the following details based on your specific region:
Region-Specific Configuration
| Setting | US Region | EU Region | AU Region |
| Single Sign-on URL | https://creately.auth.us-east-1.amazoncognito.com/saml2/idpresponse | https://createlyeu.auth.eu-west-1.amazoncognito.com/saml2/idpresponse | https://createlyau.auth.ap-southeast-2.amazoncognito.com/saml2/idpresponse |
| Audience URI (Entity ID) | urn:amazon:cognito:sp:us-east-1_NATJwEK9k | urn:amazon:cognito:sp:eu-west-1_zN0n85NRb | urn:amazon:cognito:sp:ap-southeast-2_0nUtBoFVD |
| Name ID Format | EmailAddress | EmailAddress | EmailAddress |
| Application Username |
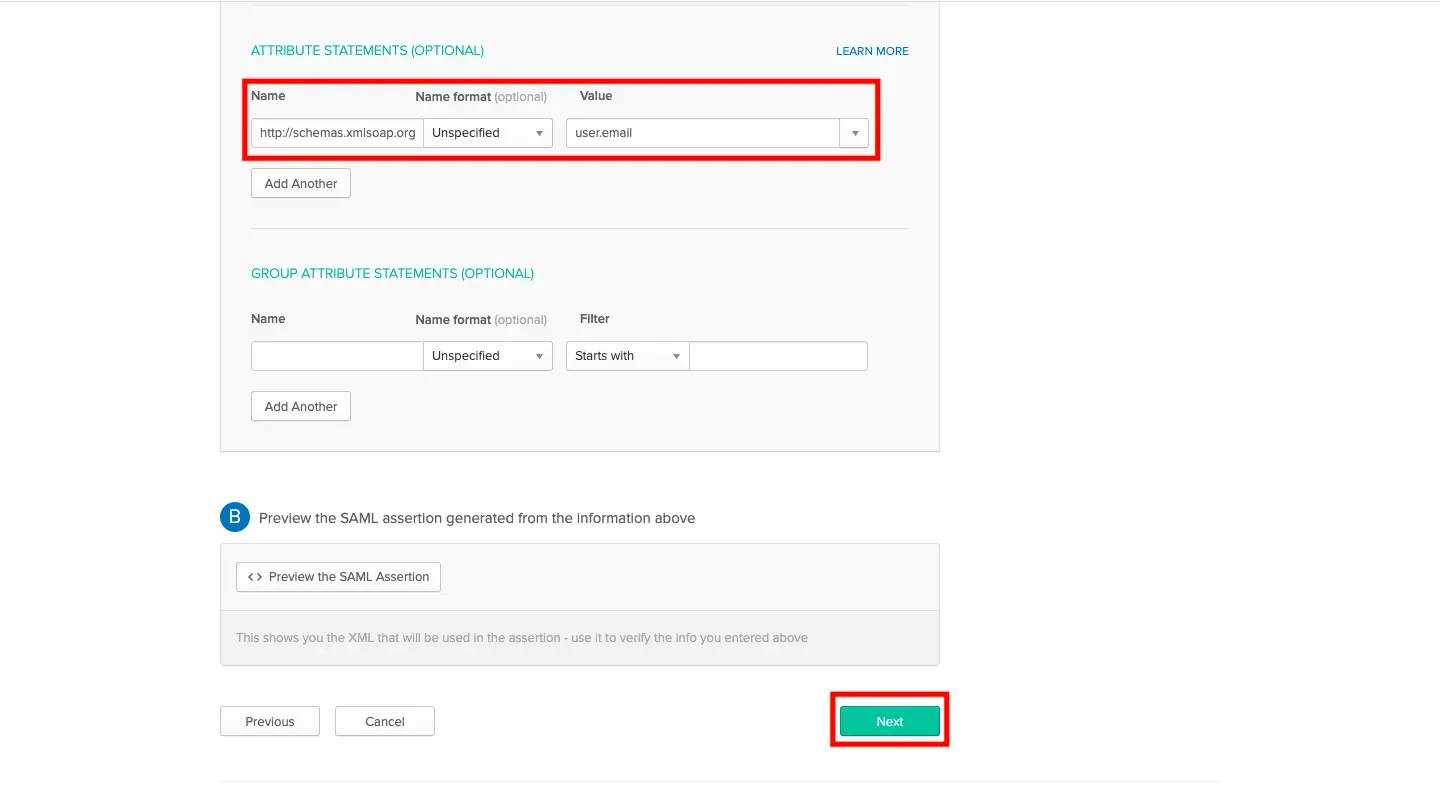
- Scroll down to the Attribute Statements section and add the following mapping:
- Name: http://schemas.xmlsoap.org/ws/2005/05/identity/claims/emailaddress
- Value: user.email
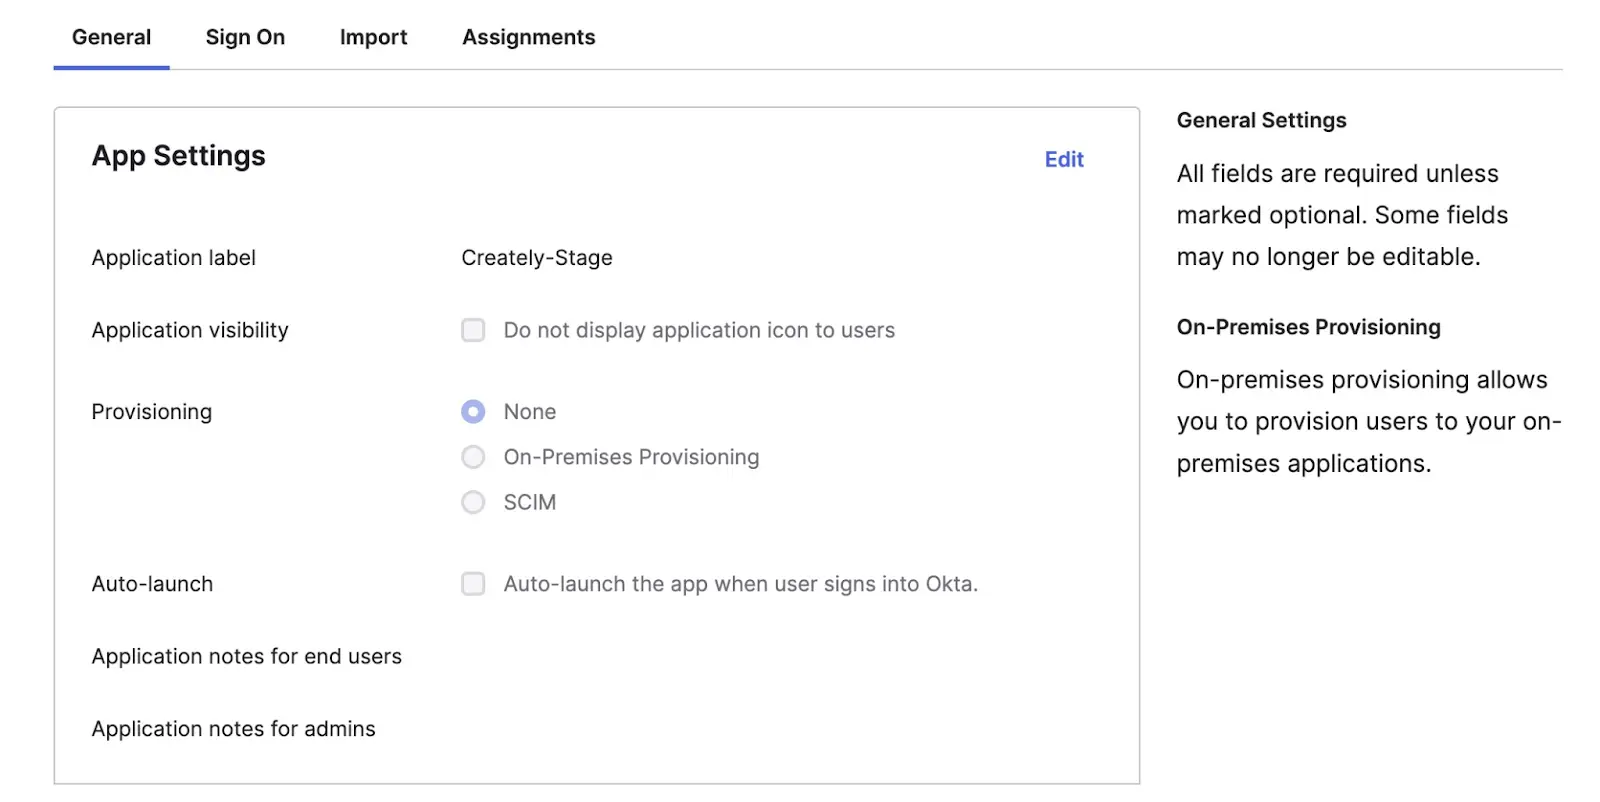
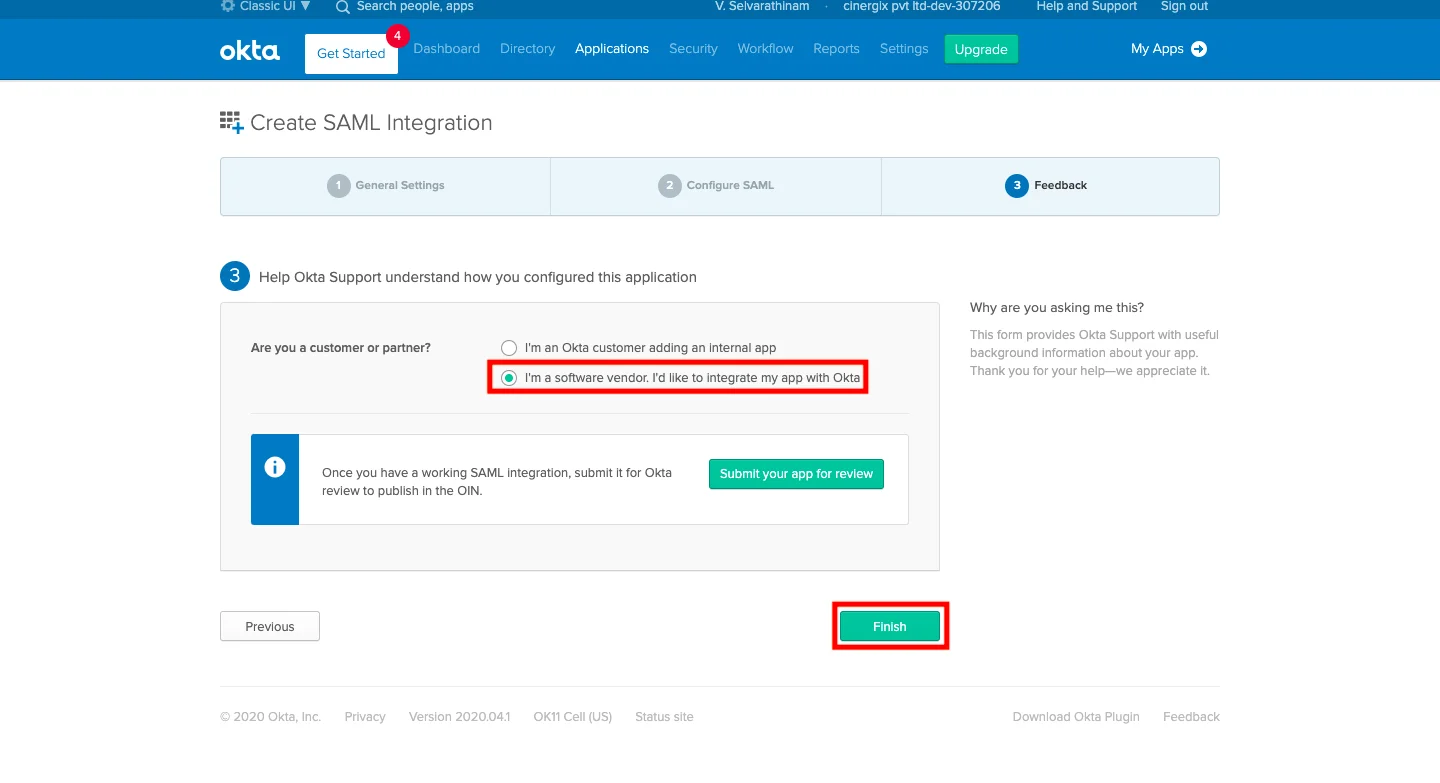
- To finalize the setup, click Next. In the Feedback section, select “I’m a software vendor. I’d like to integrate my app with Okta” and click Finish.
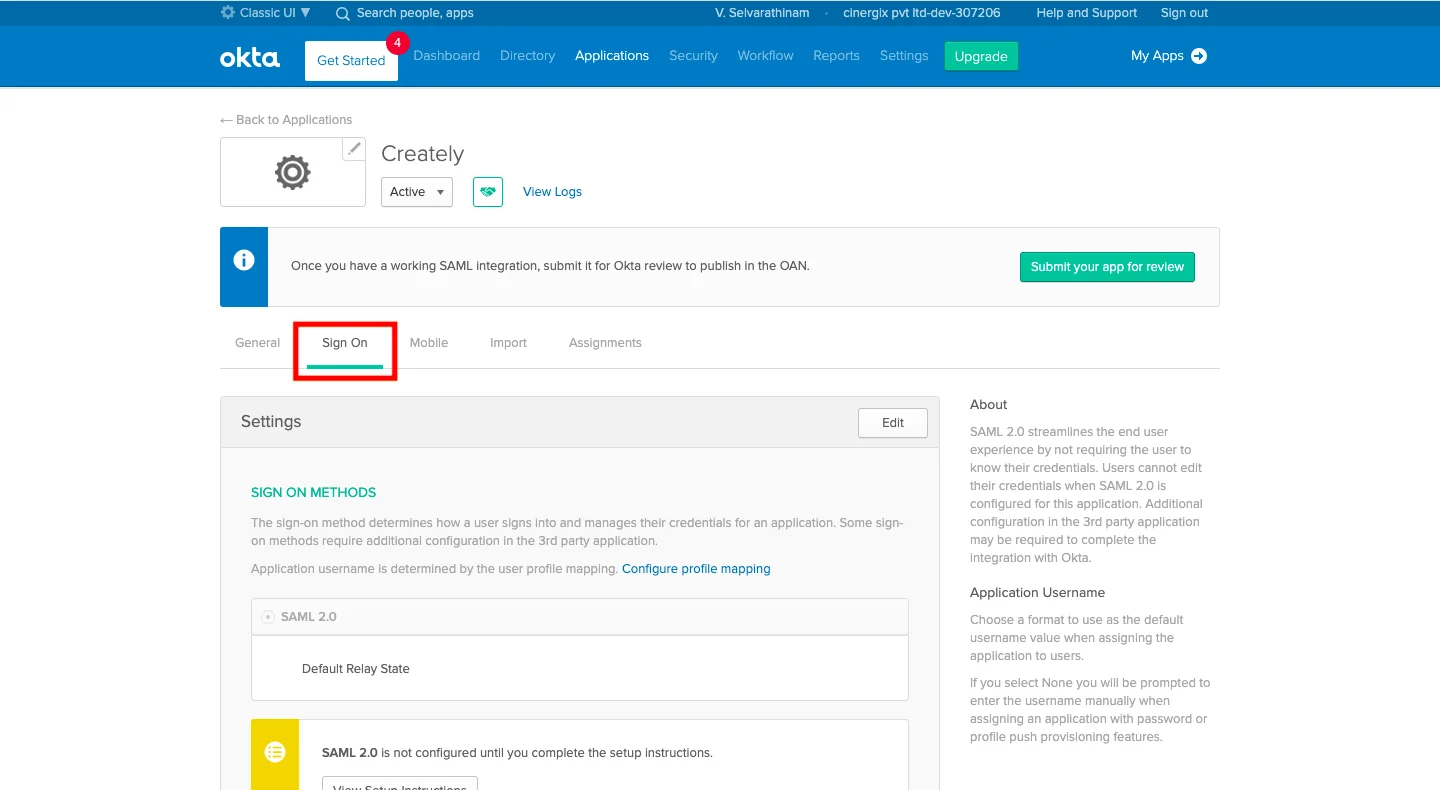
- Navigate to the Sign On tab of your new application.
- Scroll down to SAML Setup. Right-click the Identity Provider metadata link and select Copy Link Address.
Note Please share this copied Metadata URL with the Creately team to complete your integration.
Step 3: Assign Users to Creately
To grant your team access to Creately:
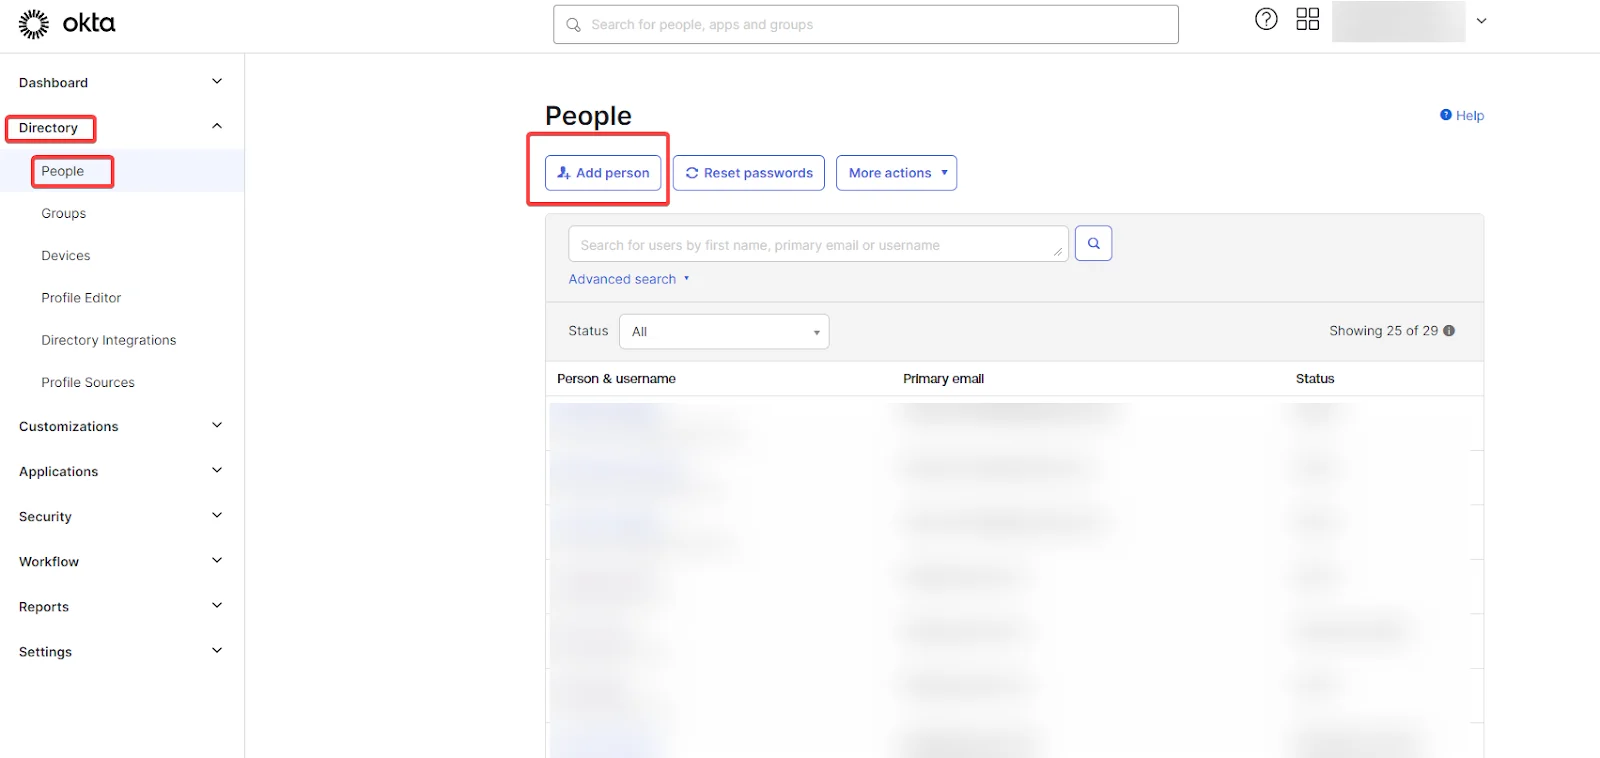
- Go to Directory > People (or stay within the App’s Assignments tab).
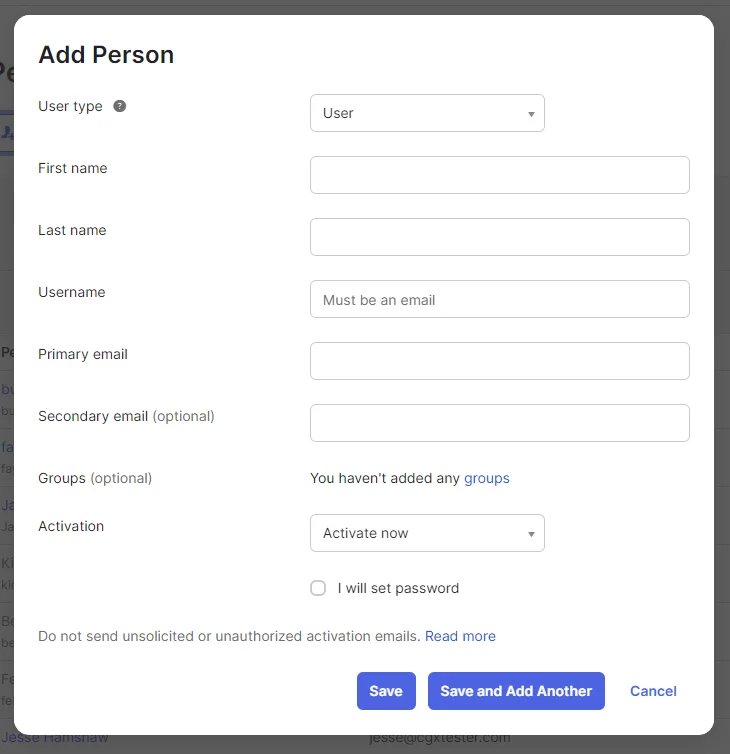
- Select the users or groups you wish to assign.
- Click Assign, verify the user details, and click **Save or click ** Save and Add Another to add another user.
Login Test
To verify that the integration is active, use the test URL corresponding to your region:
- US Region: https://creately.auth.us-east-1.amazoncognito.com/login?response_type=token&client_id=7t8q2a01vn0eho5cavpmcni4a5&redirect_uri=https://creately.com/login/sso/success/
- EU Region: https://createlyeu.auth.eu-west-1.amazoncognito.com/login?response_type=token&client_id=64ldogn1dbs5jg3ouje2pilf3h&redirect_uri=https://creately.com/login/sso/success/
- AU Region: https://createlyau.auth.ap-southeast-2.amazoncognito.com/login?response_type=token&client_id=7ghfubmmi4ern71b06pitv9o8u&redirect_uri=https://creately.com/login/sso/success/
Setting up SSO with Creately in OneLogin
This is the step-by-step walkthrough for configuring OneLogin as your Identity Provider (IdP) to enable Single Sign-On (SSO) for Creately.
Step 1: Create the Creately Application in OneLogin
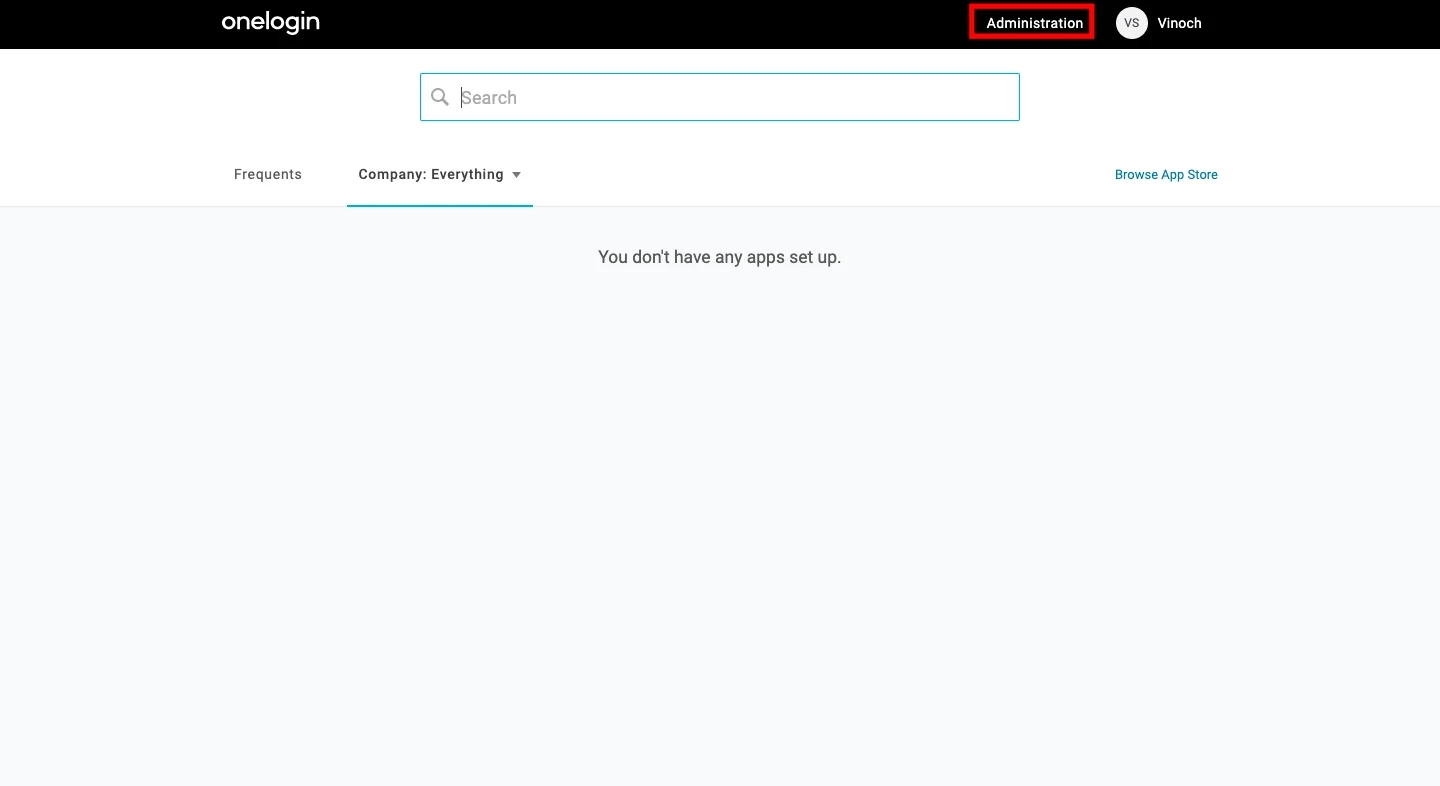
- Log in to your OneLogin Administrator Panel.
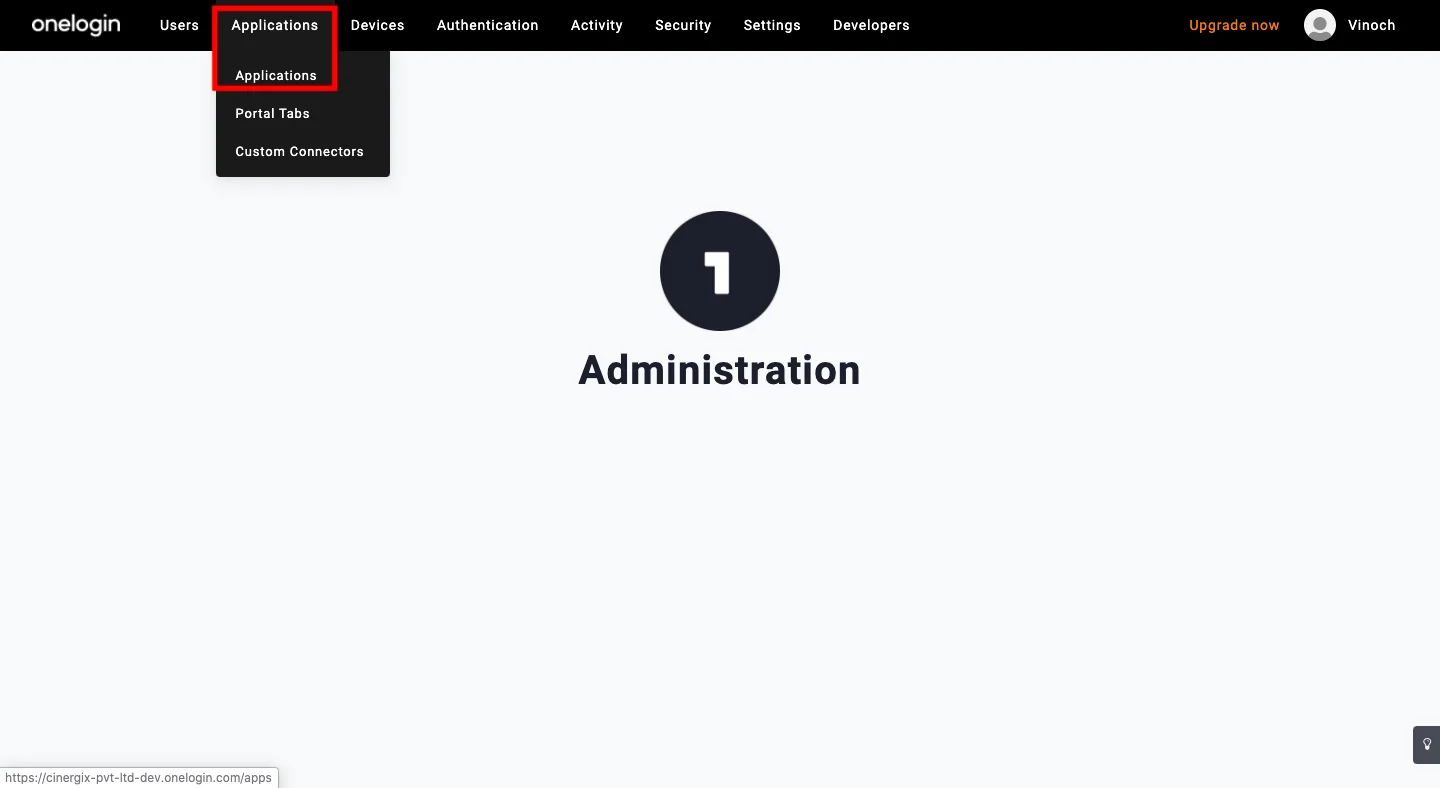
- Hover over Applications and select Applications from the dropdown menu.
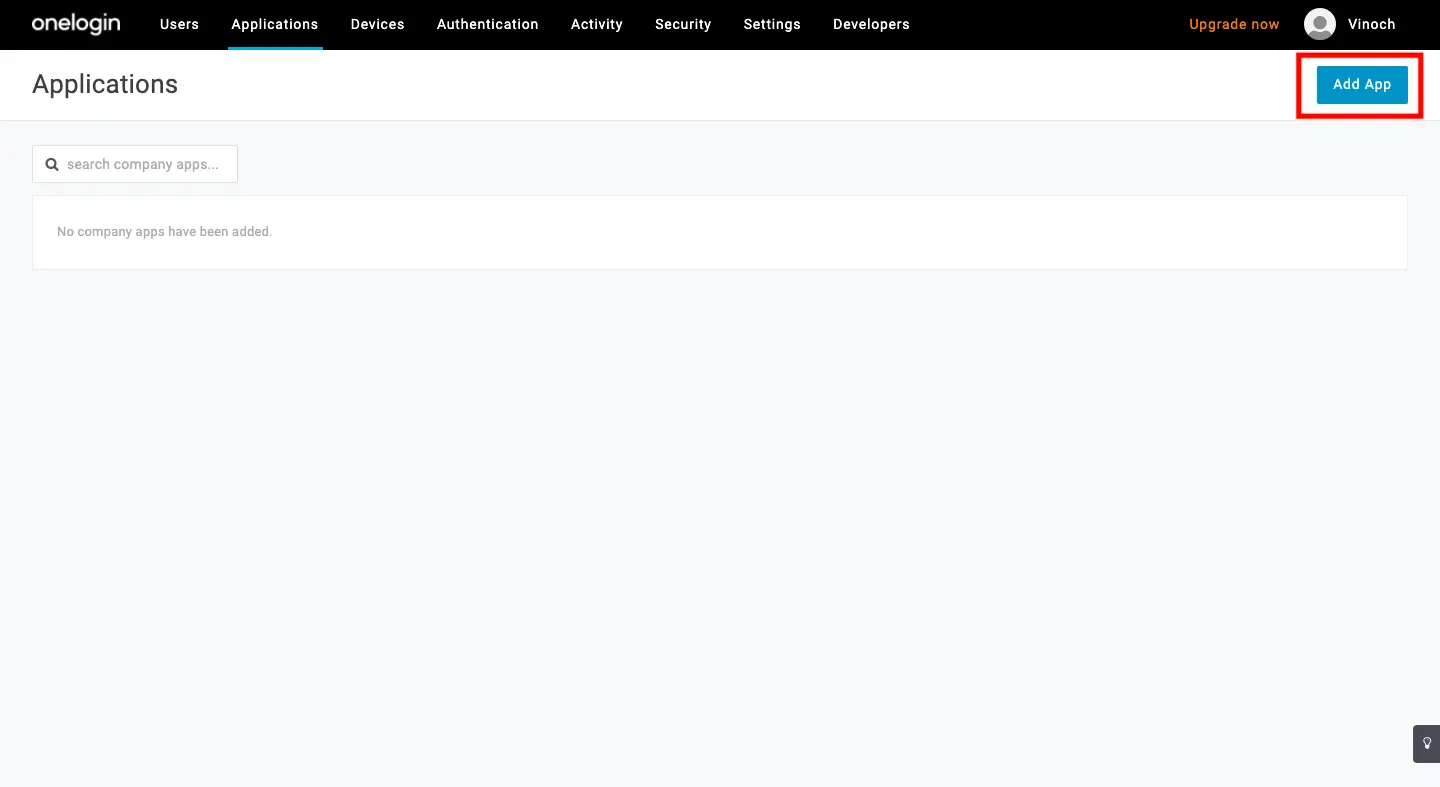
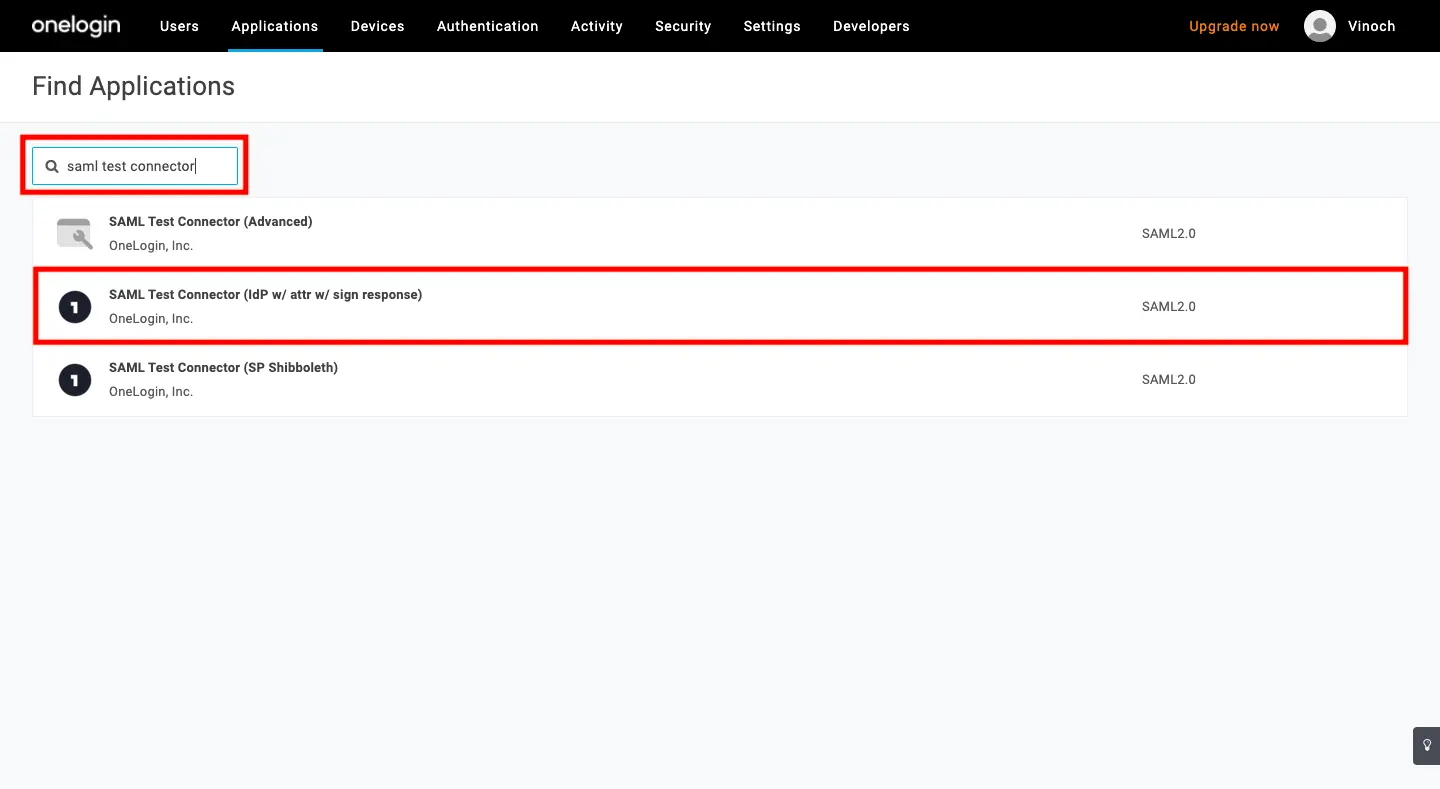
- Click the Add App button.
- In the search bar, type SAML Custom Connector and select SAML Custom Connector (Advanced) (or SAML Test Connector (IdP)).
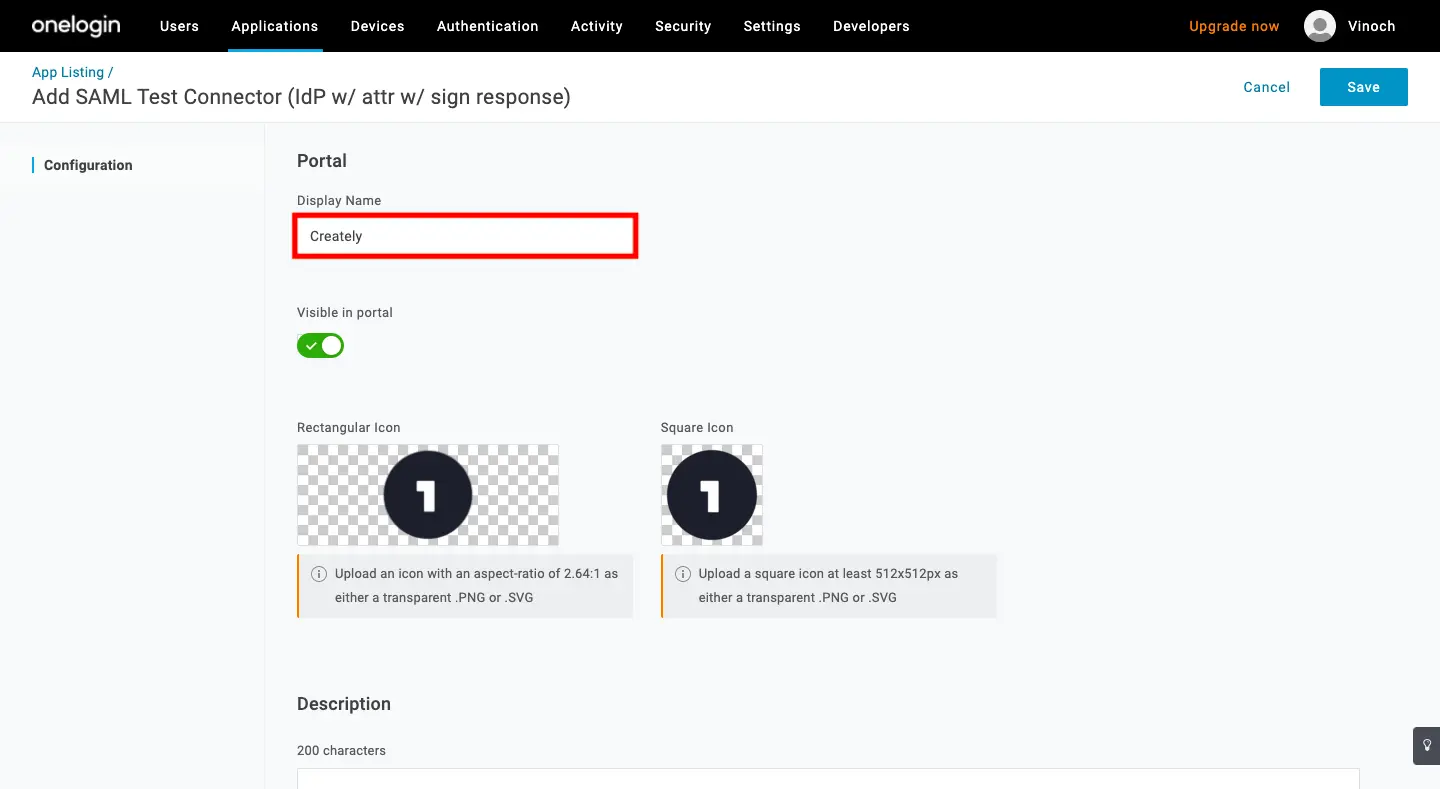
- Enter Creately as the Display Name and click Save.
Step 2: Configure SAML Settings
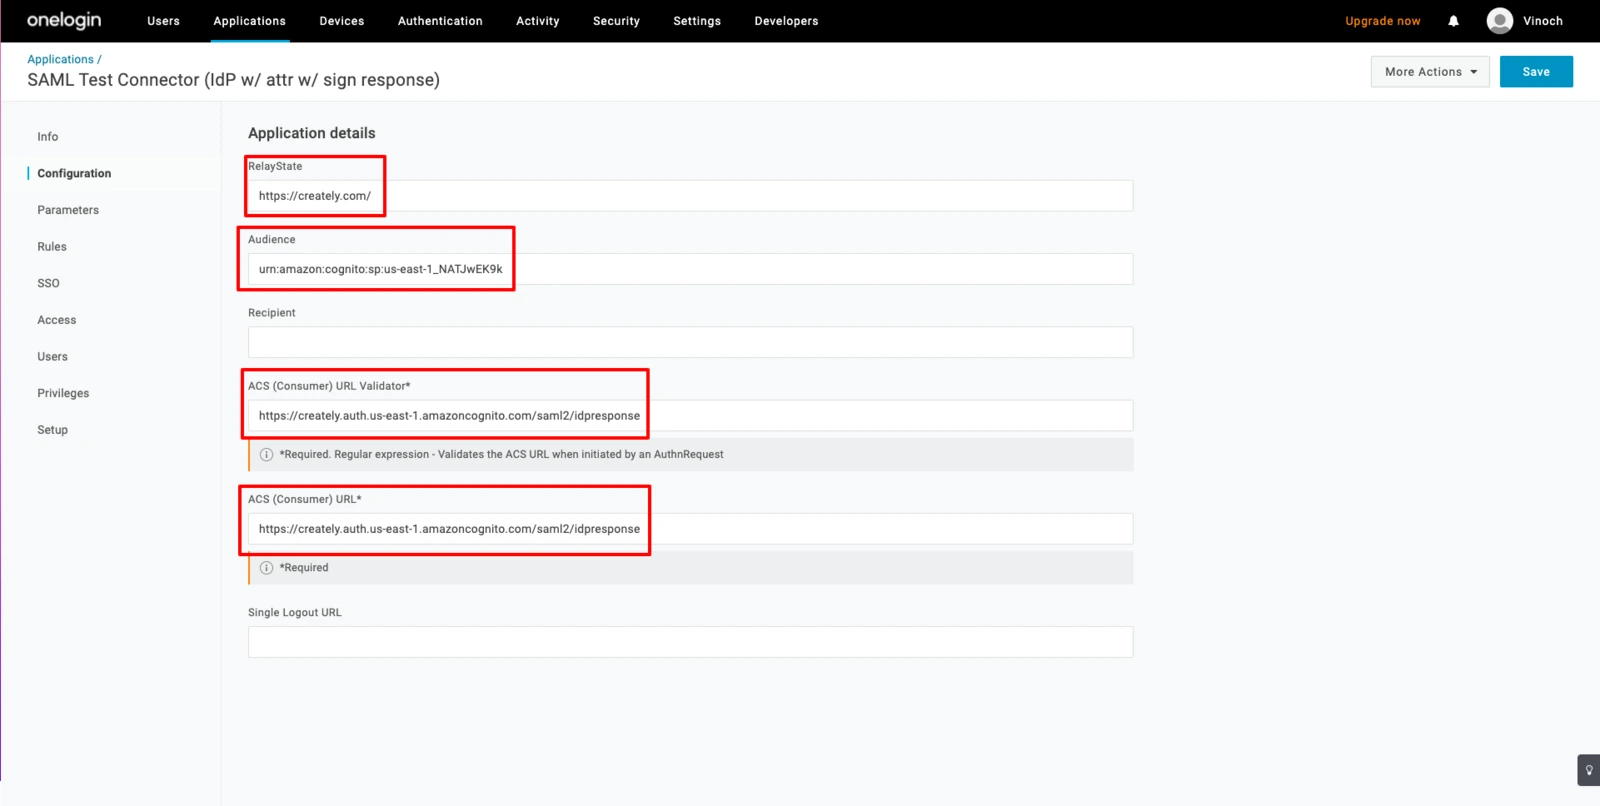
- Select the Configuration tab from the left sidebar and enter the following details:
| Field | Value |
| RelayState | https://creately.com |
| Audience (Entity ID) | urn:amazon:cognito:sp:us-east-1_NATJwEK9k |
| ACS (Consumer) URL Validator | https://creately.auth.us-east-1.amazoncognito.com/saml2/idpresponse |
| ACS (Consumer) URL | https://creately.auth.us-east-1.amazoncognito.com/saml2/idpresponse |
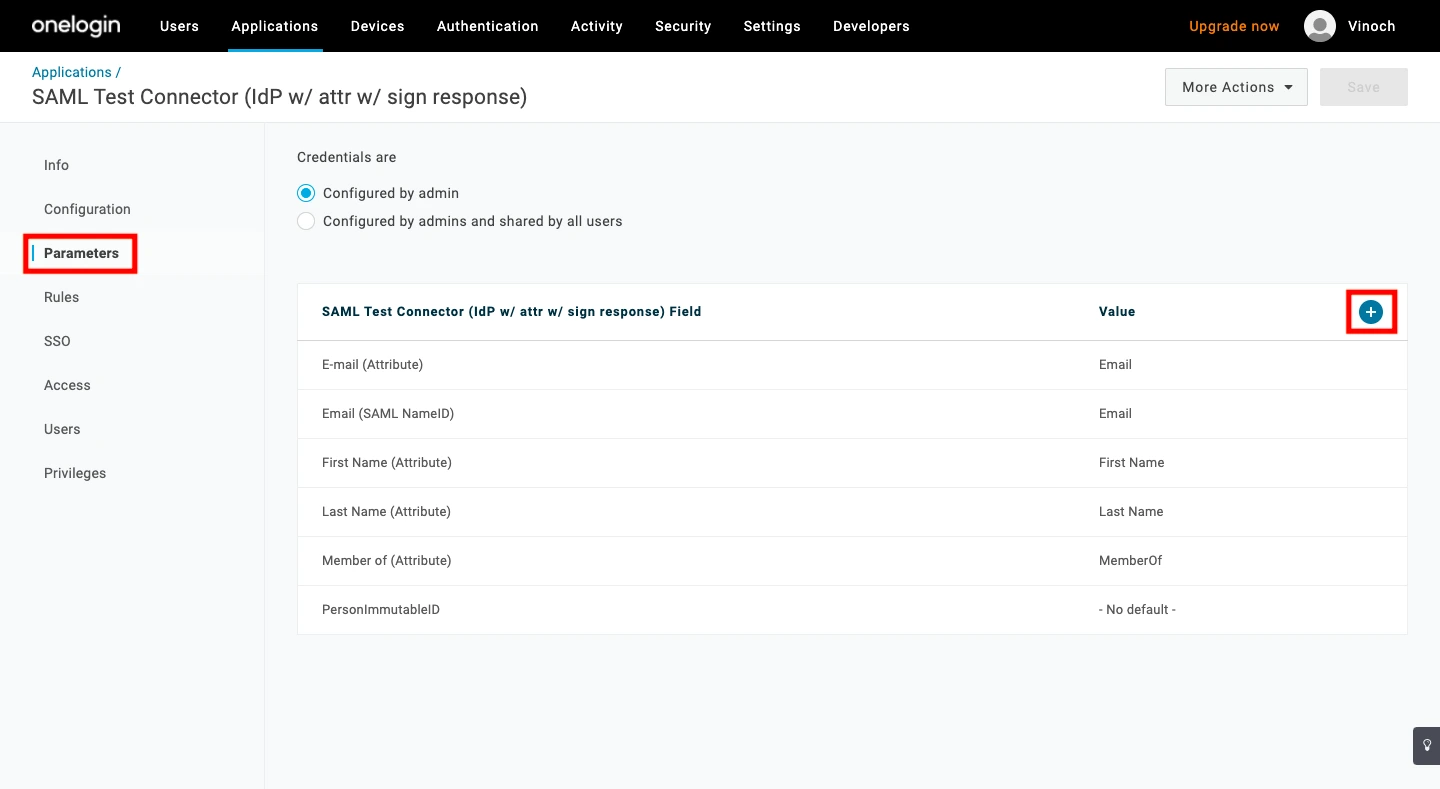
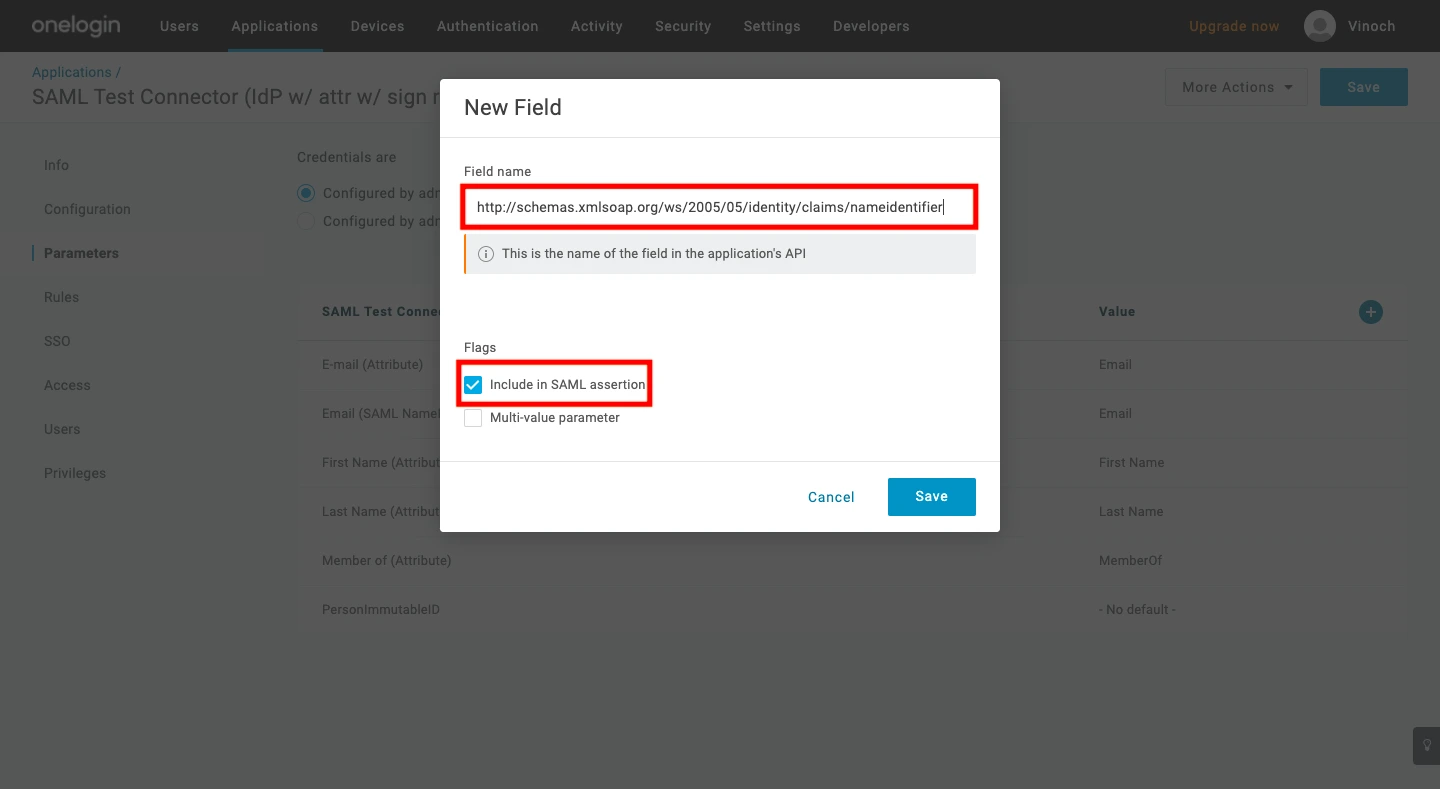
- Select the Parameters tab and click the Plus (+) icon to map the user email.
- Enter the following for the new parameter:
- Field Name: http://schemas.xmlsoap.org/ws/2005/05/identity/claims/nameidentifier
- Flags: Check the box for Include in SAML assertion.
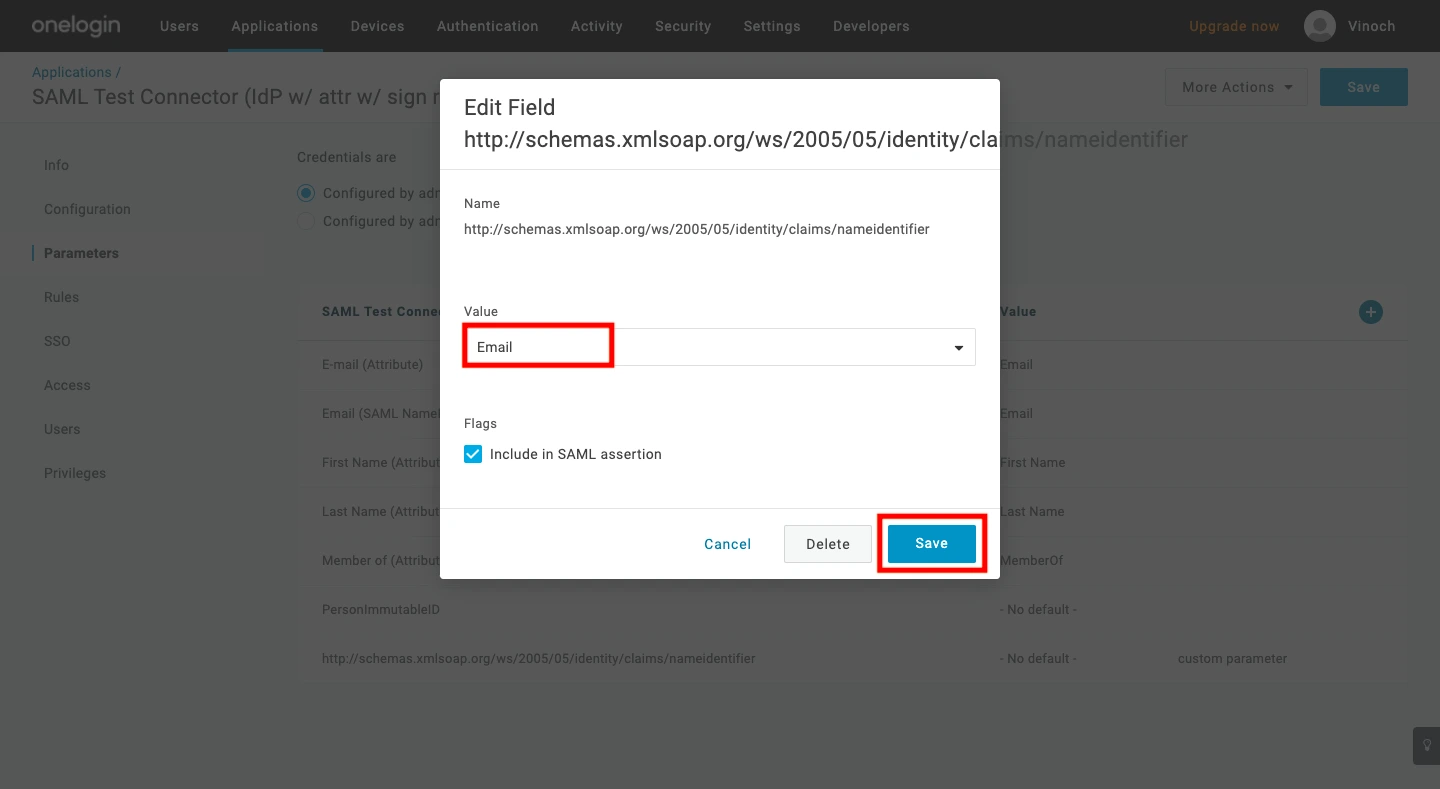
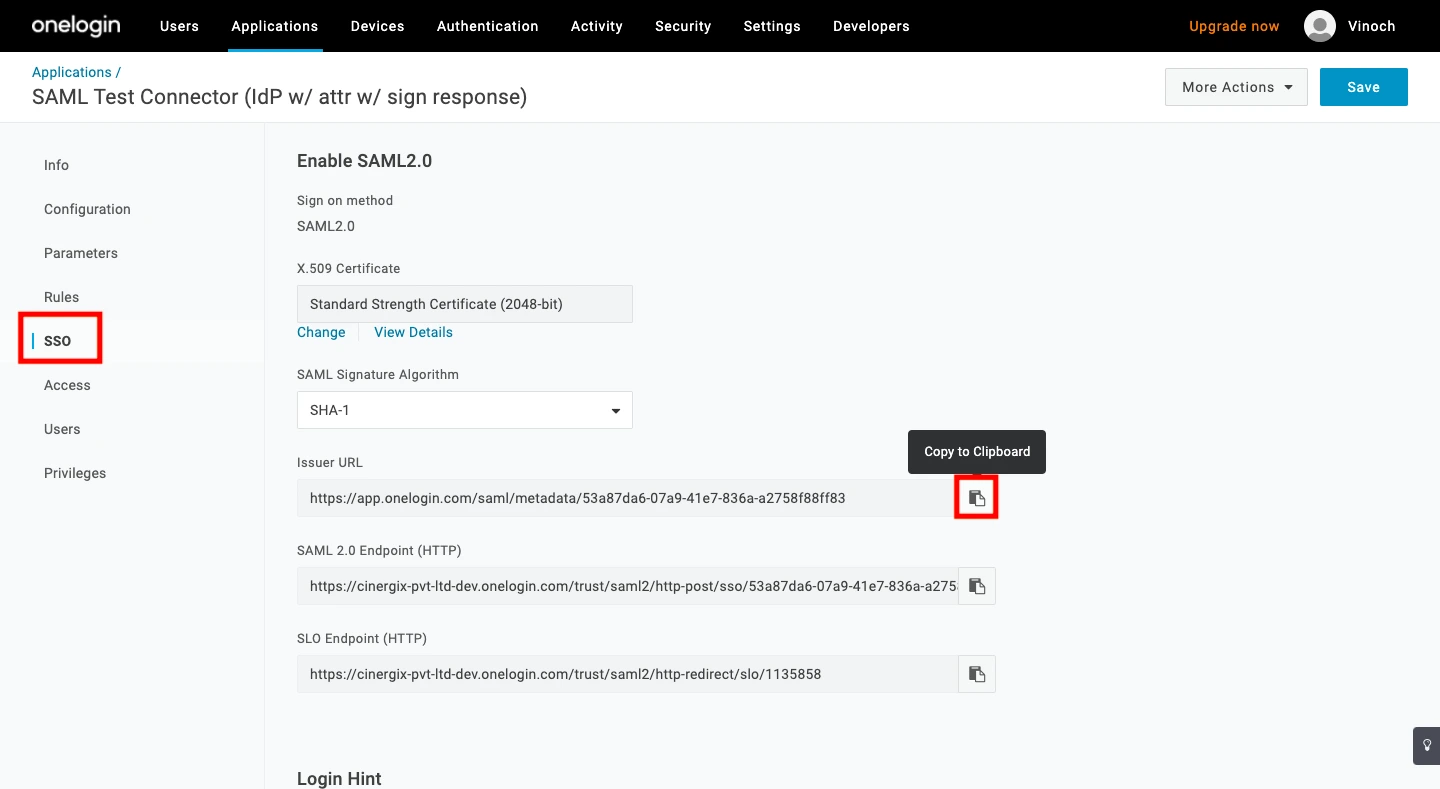
Then Click Save. 4. On the next screen, select Email from the Value dropdown and click Save again. 5. Navigate to the SSO tab and copy the Issuer URL.
Note Please share the Issuer URL with the Creately team to finalize your setup.
Step 3: Assign Users to Creately
To grant access to your team members:
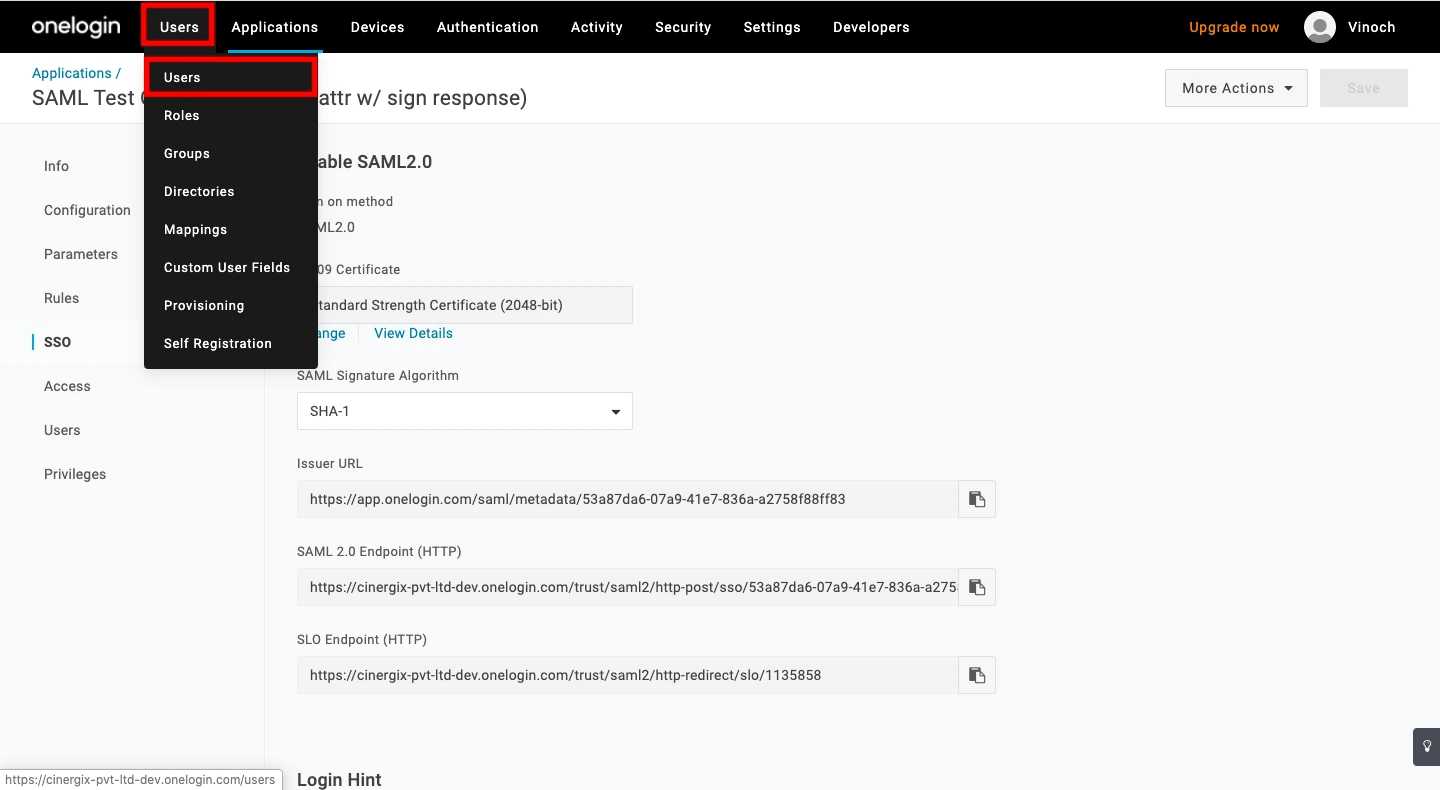
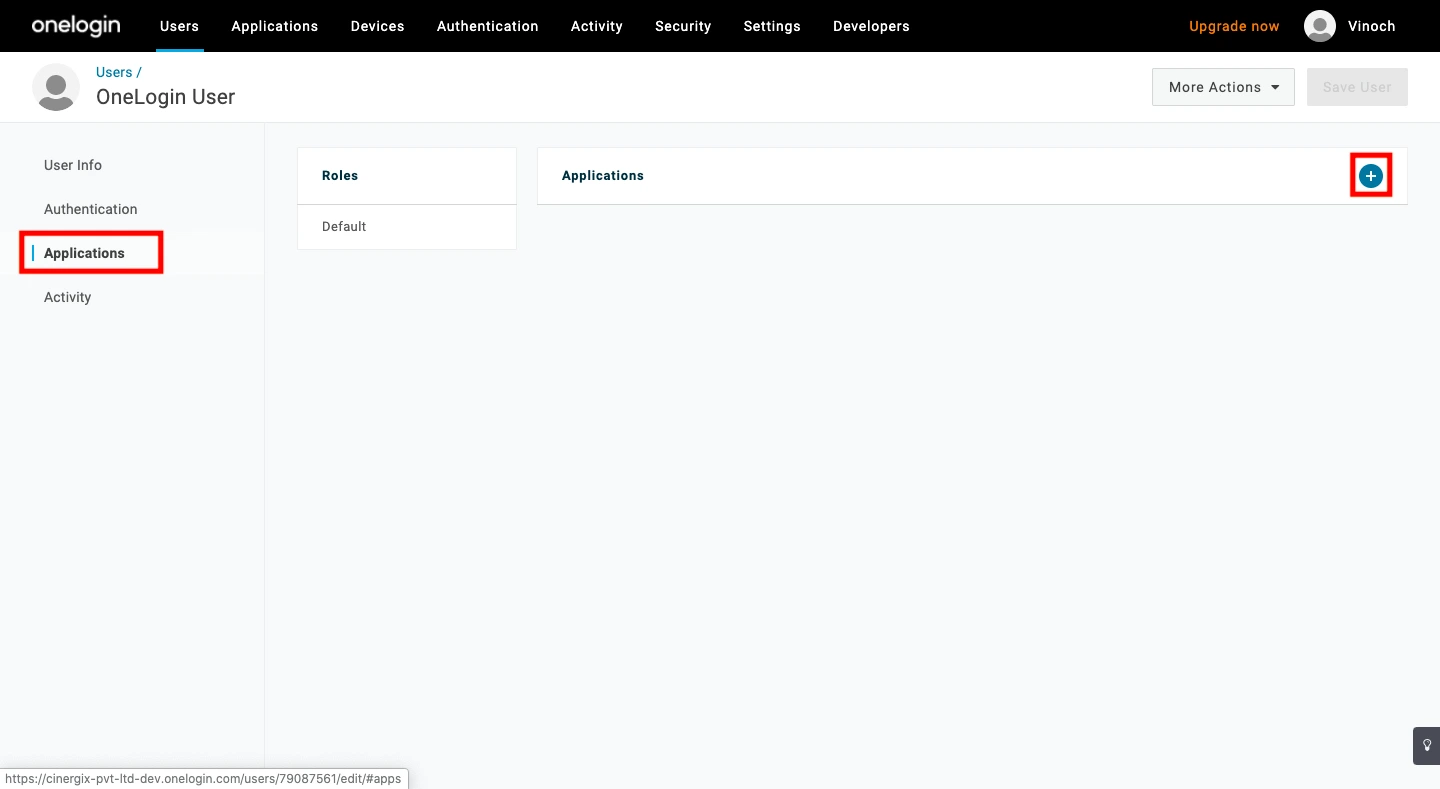
- Navigate to Users > Users in the top menu.
- Select a user you wish to authorize.
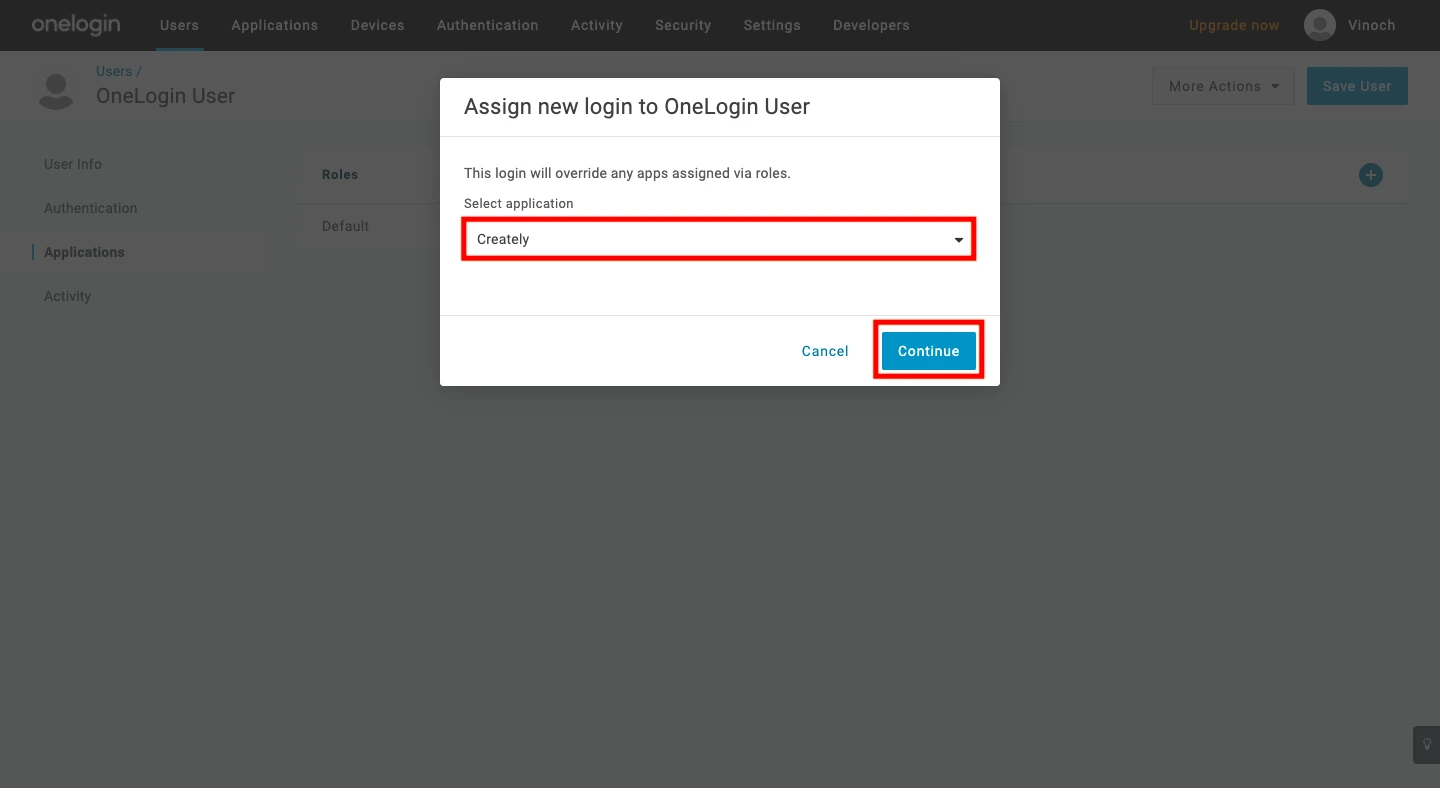
- Select the Applications tab in the user profile and click the Plus (+) icon.
- Choose the Creately app from the dropdown list, click Continue, and then click Save.
- Then verify the information and click Save.
Login Test
To verify the integration, use the following URL to test your login in a web browser: