How to Make a Genogram on Mac
In the steps below, we’ll guide you through everything—from opening the app to building your family structure and sharing your genogram—right from your Mac, with no downloads required.
Step 1. Open Creately on your Mac
Whether its intel macs (older macs) or Apple sillicon (M series) macs creating genograms are easier with Creately. There’s no need to download or install anything, just open your browser, select a genogram template, and start building.
Open Safari or any browser you normally use on your Mac.
If you already have an account, just click Log In and enter your details or if you don’t have an account yet. You can create one for free with your email or by signing-up in with Google.
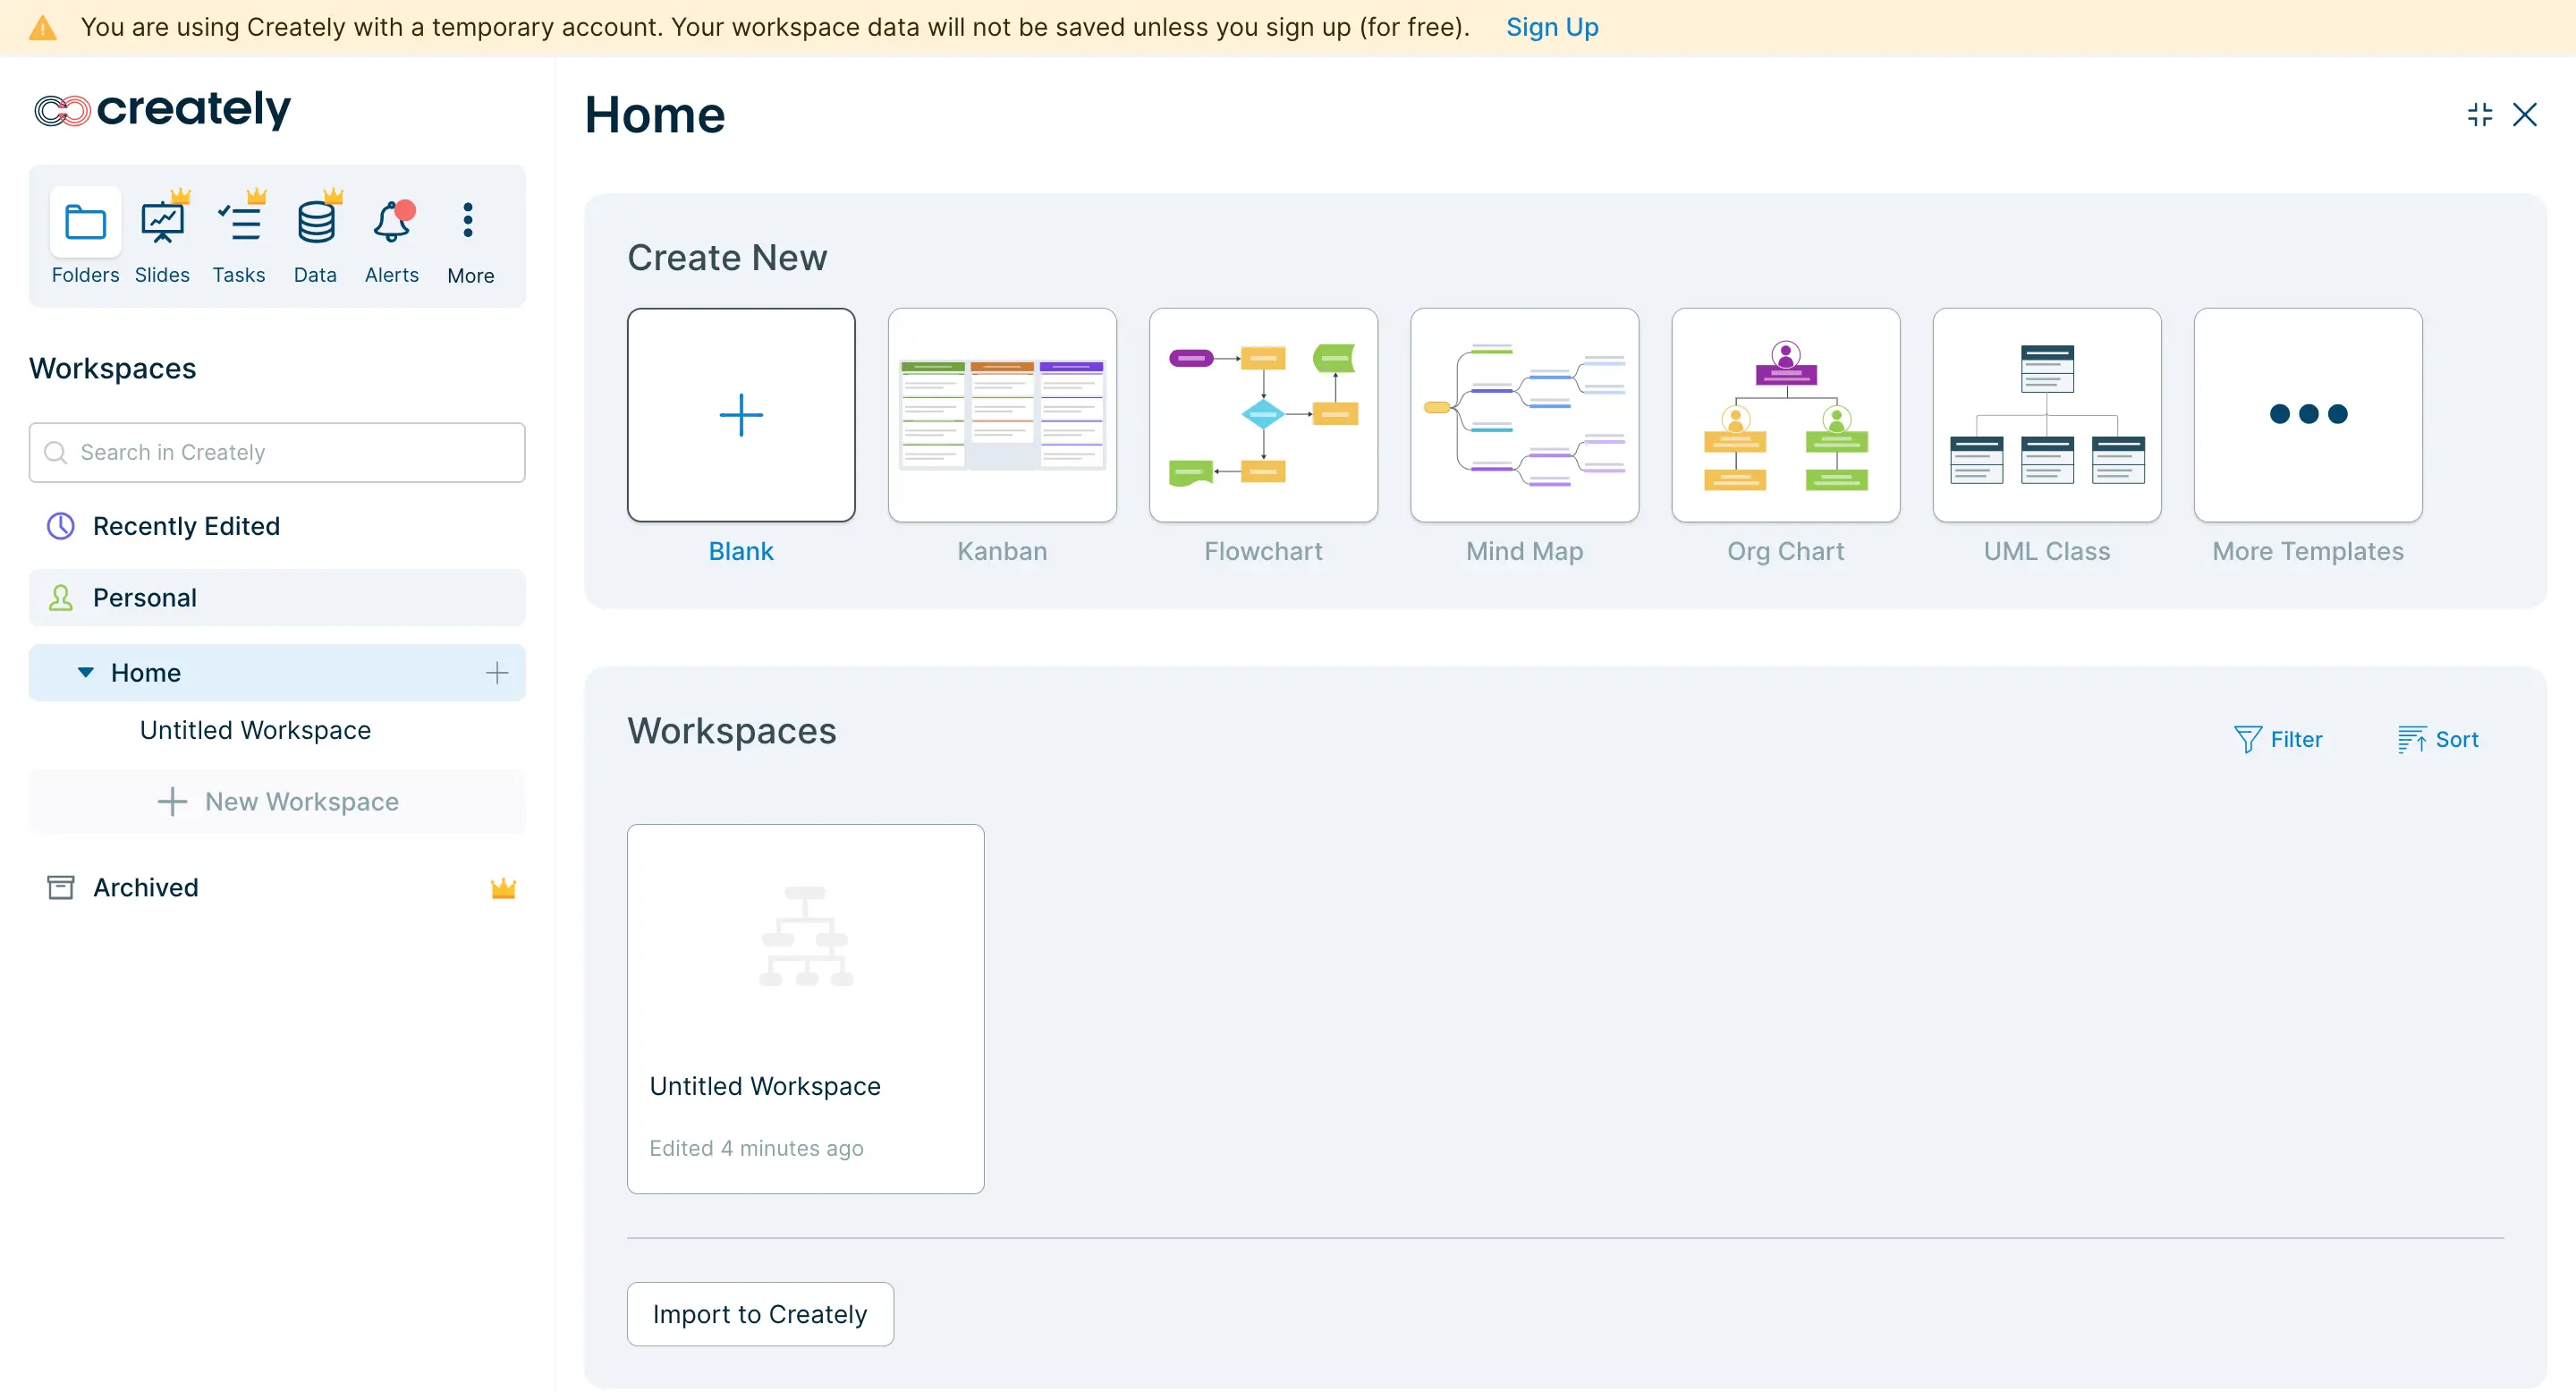
Step 2. Create a new workspace for your genogram
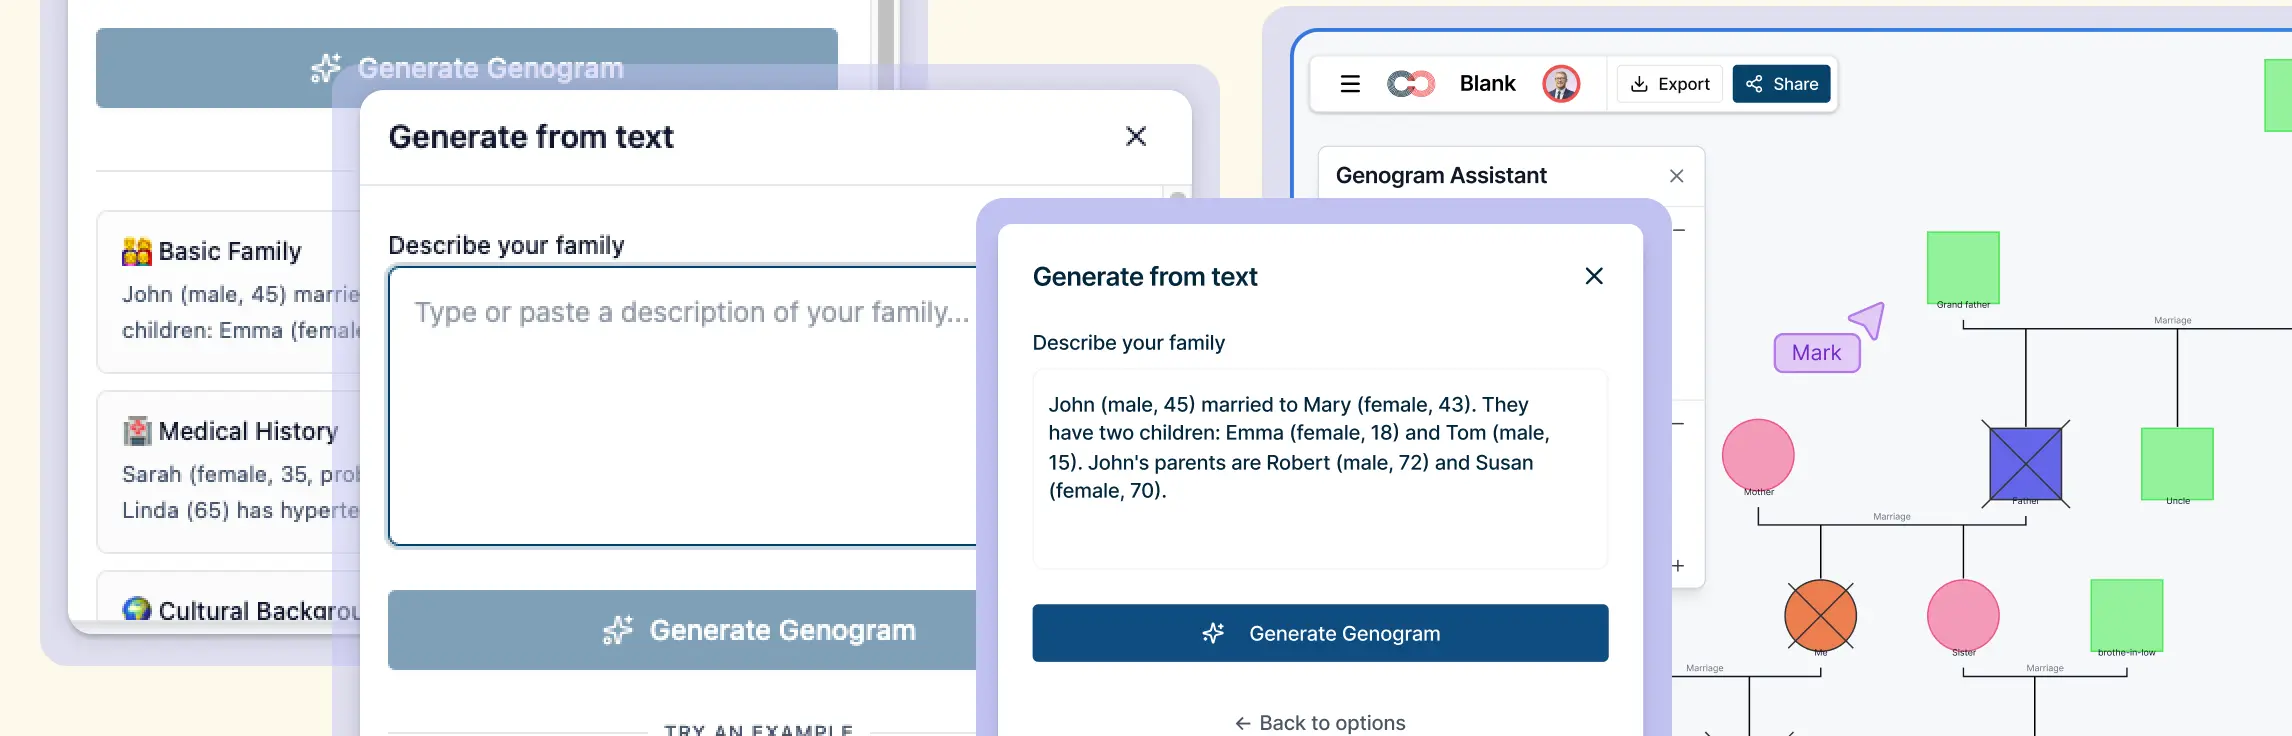
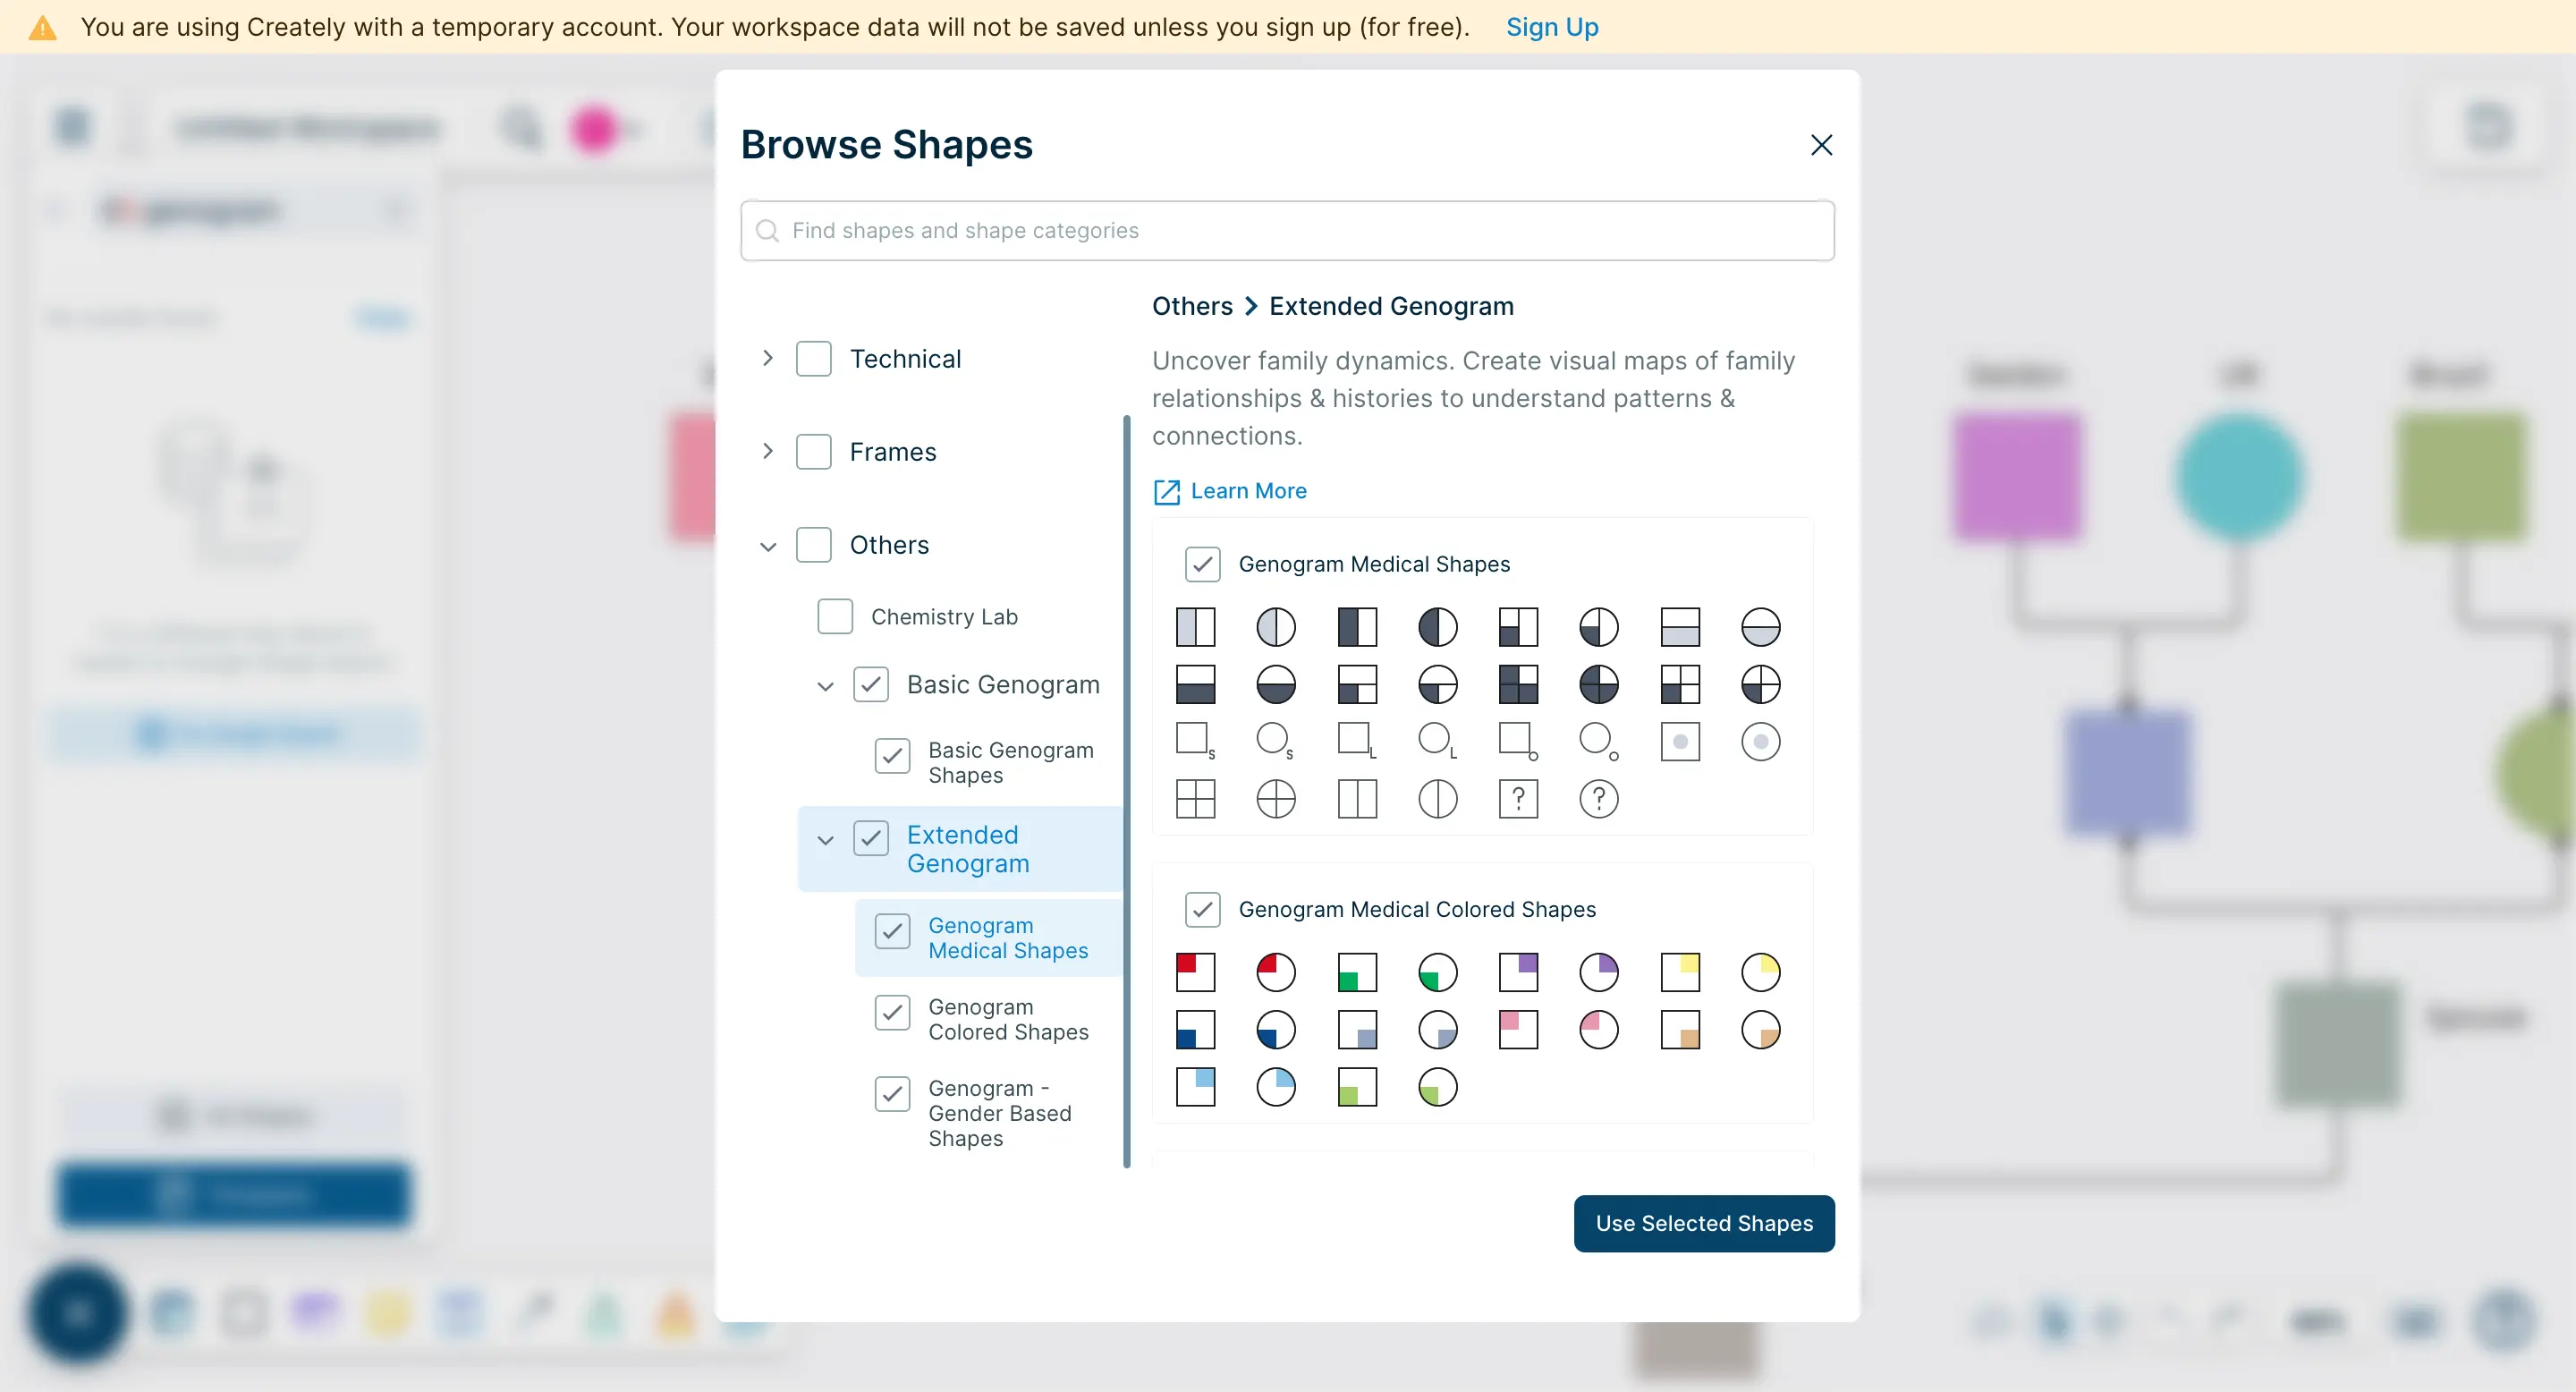
- Choose ready-made genogram templates if you want a quick starting point, or just click Blank Document if you prefer to build it yourself. From “All Shapes” select the Genogram shape library.
- From your dashboard, click the + New button at the top left to create a new workspace or you can start with a genogram template which you can access through “More Templates”.
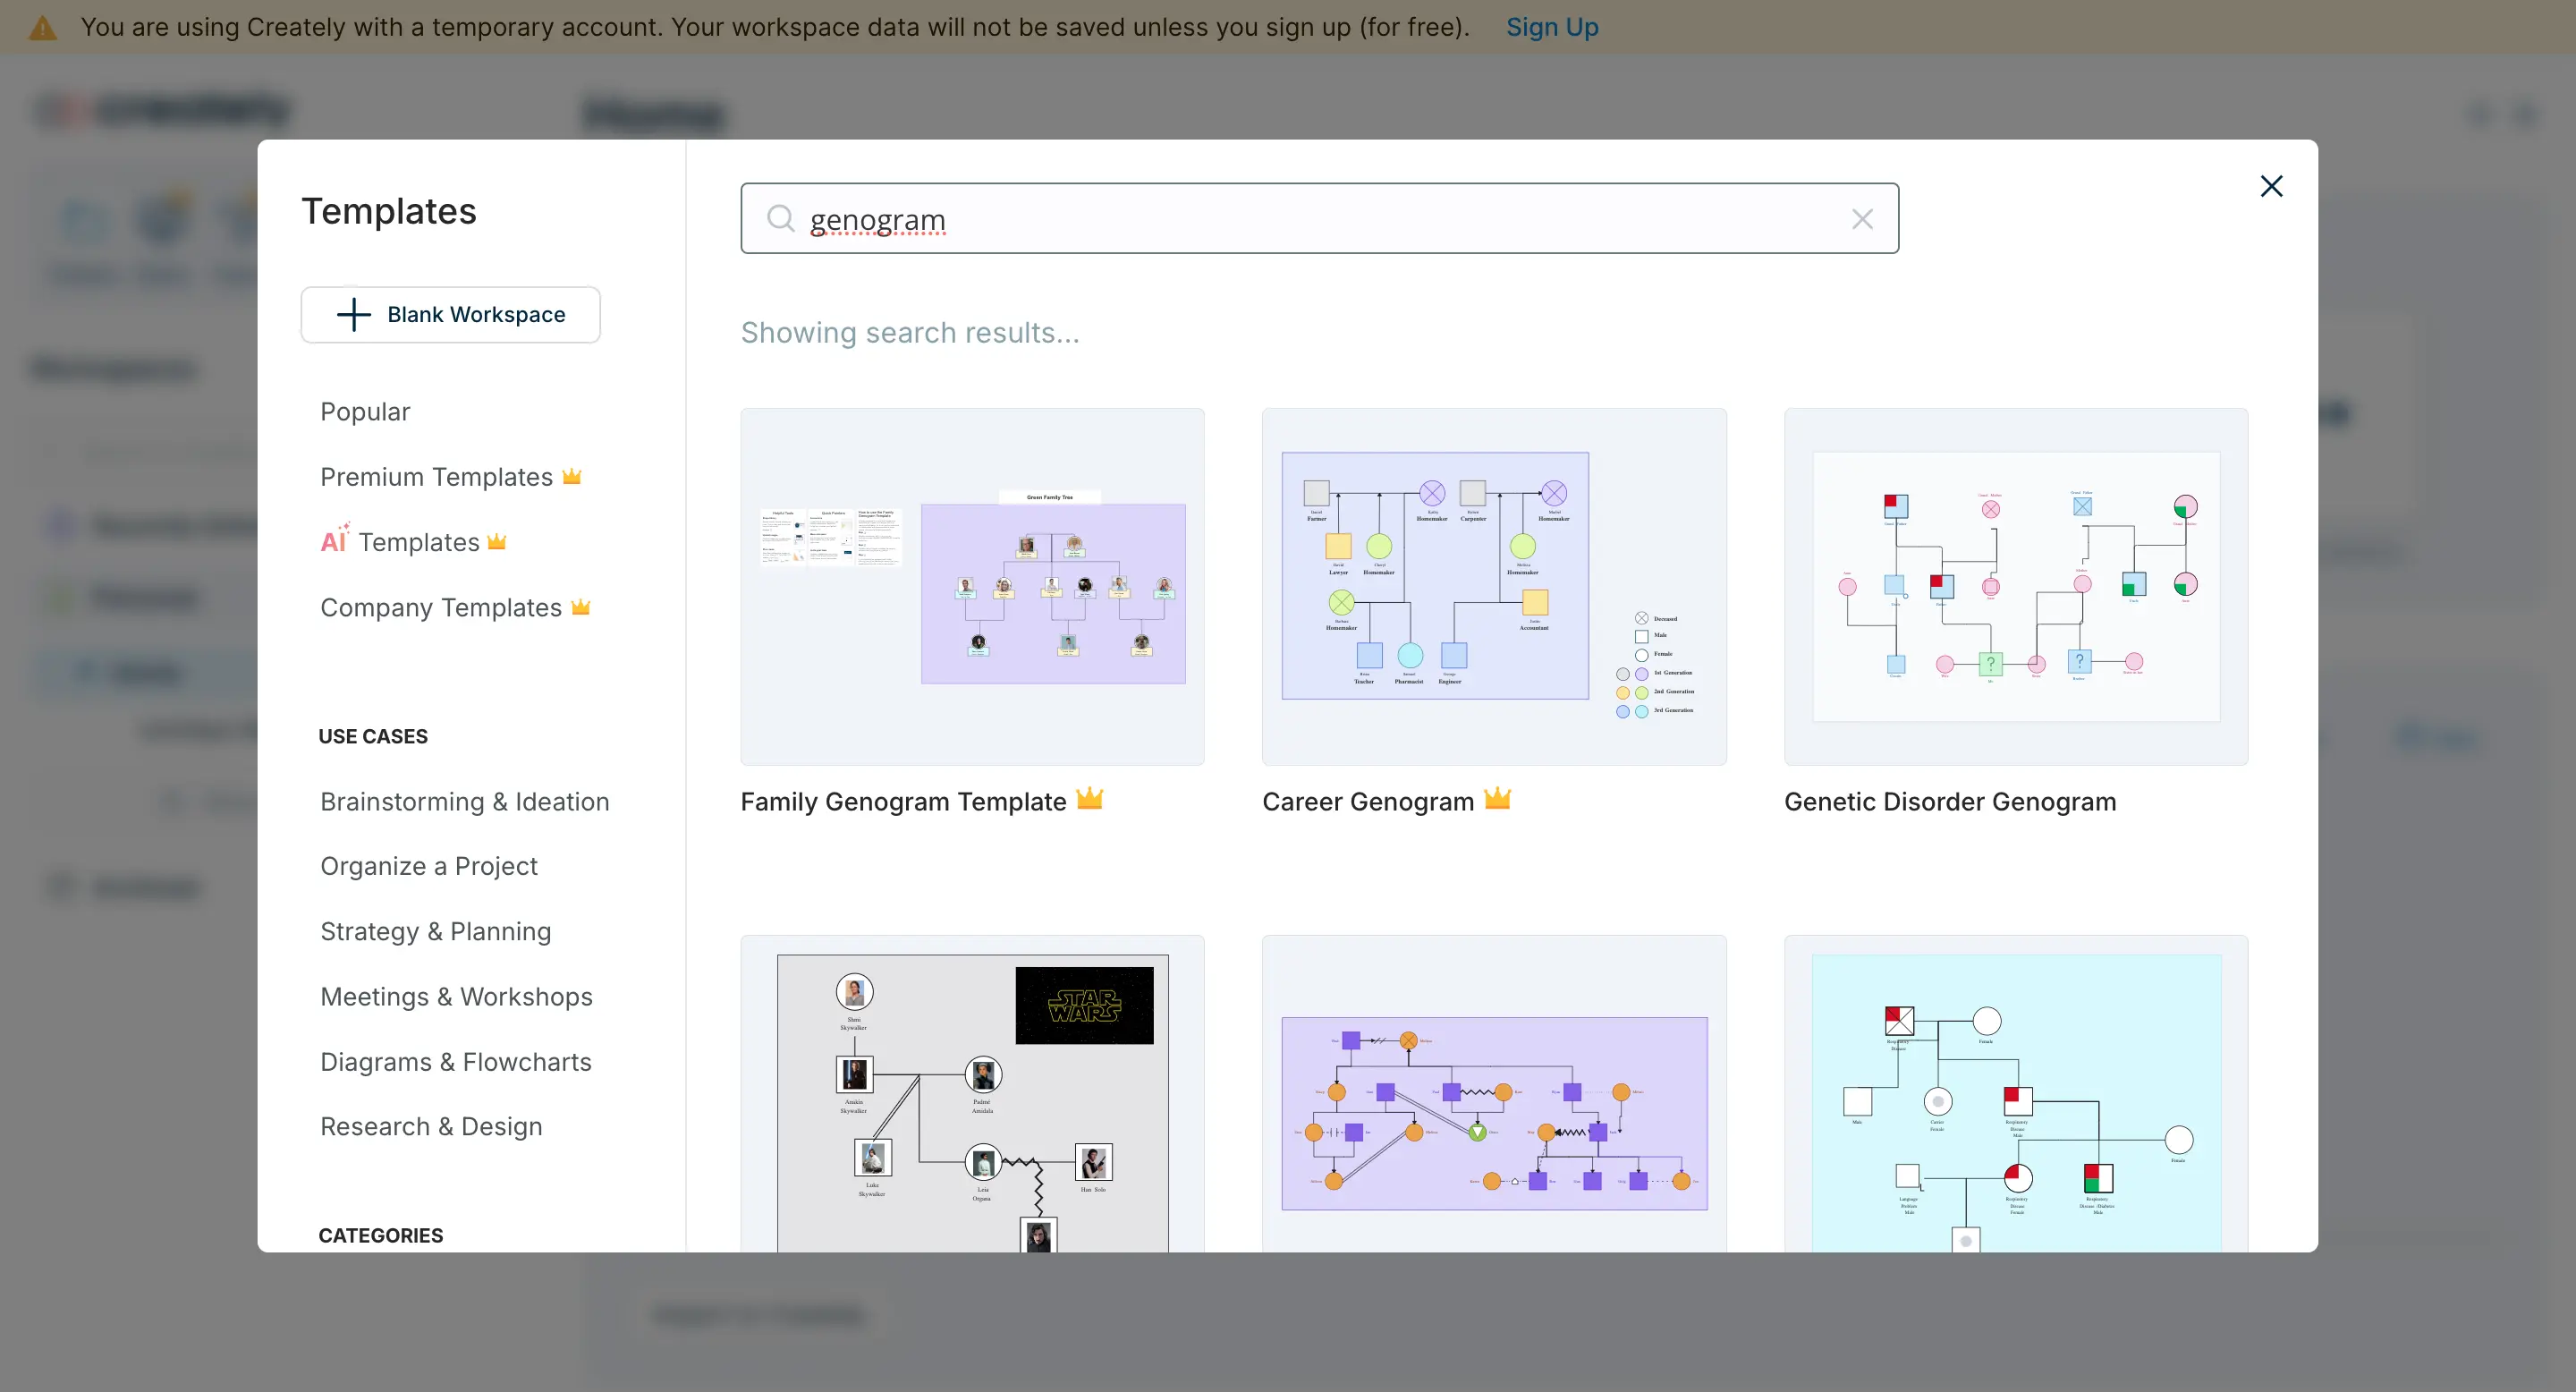
- You’ll see a blank canvas open. Click on the Plus Button at the left bottom corner and click on “Templates”. Type “genogram” in the search bar.
Step 3. Add people to your genogram
Let’s start adding your family members.
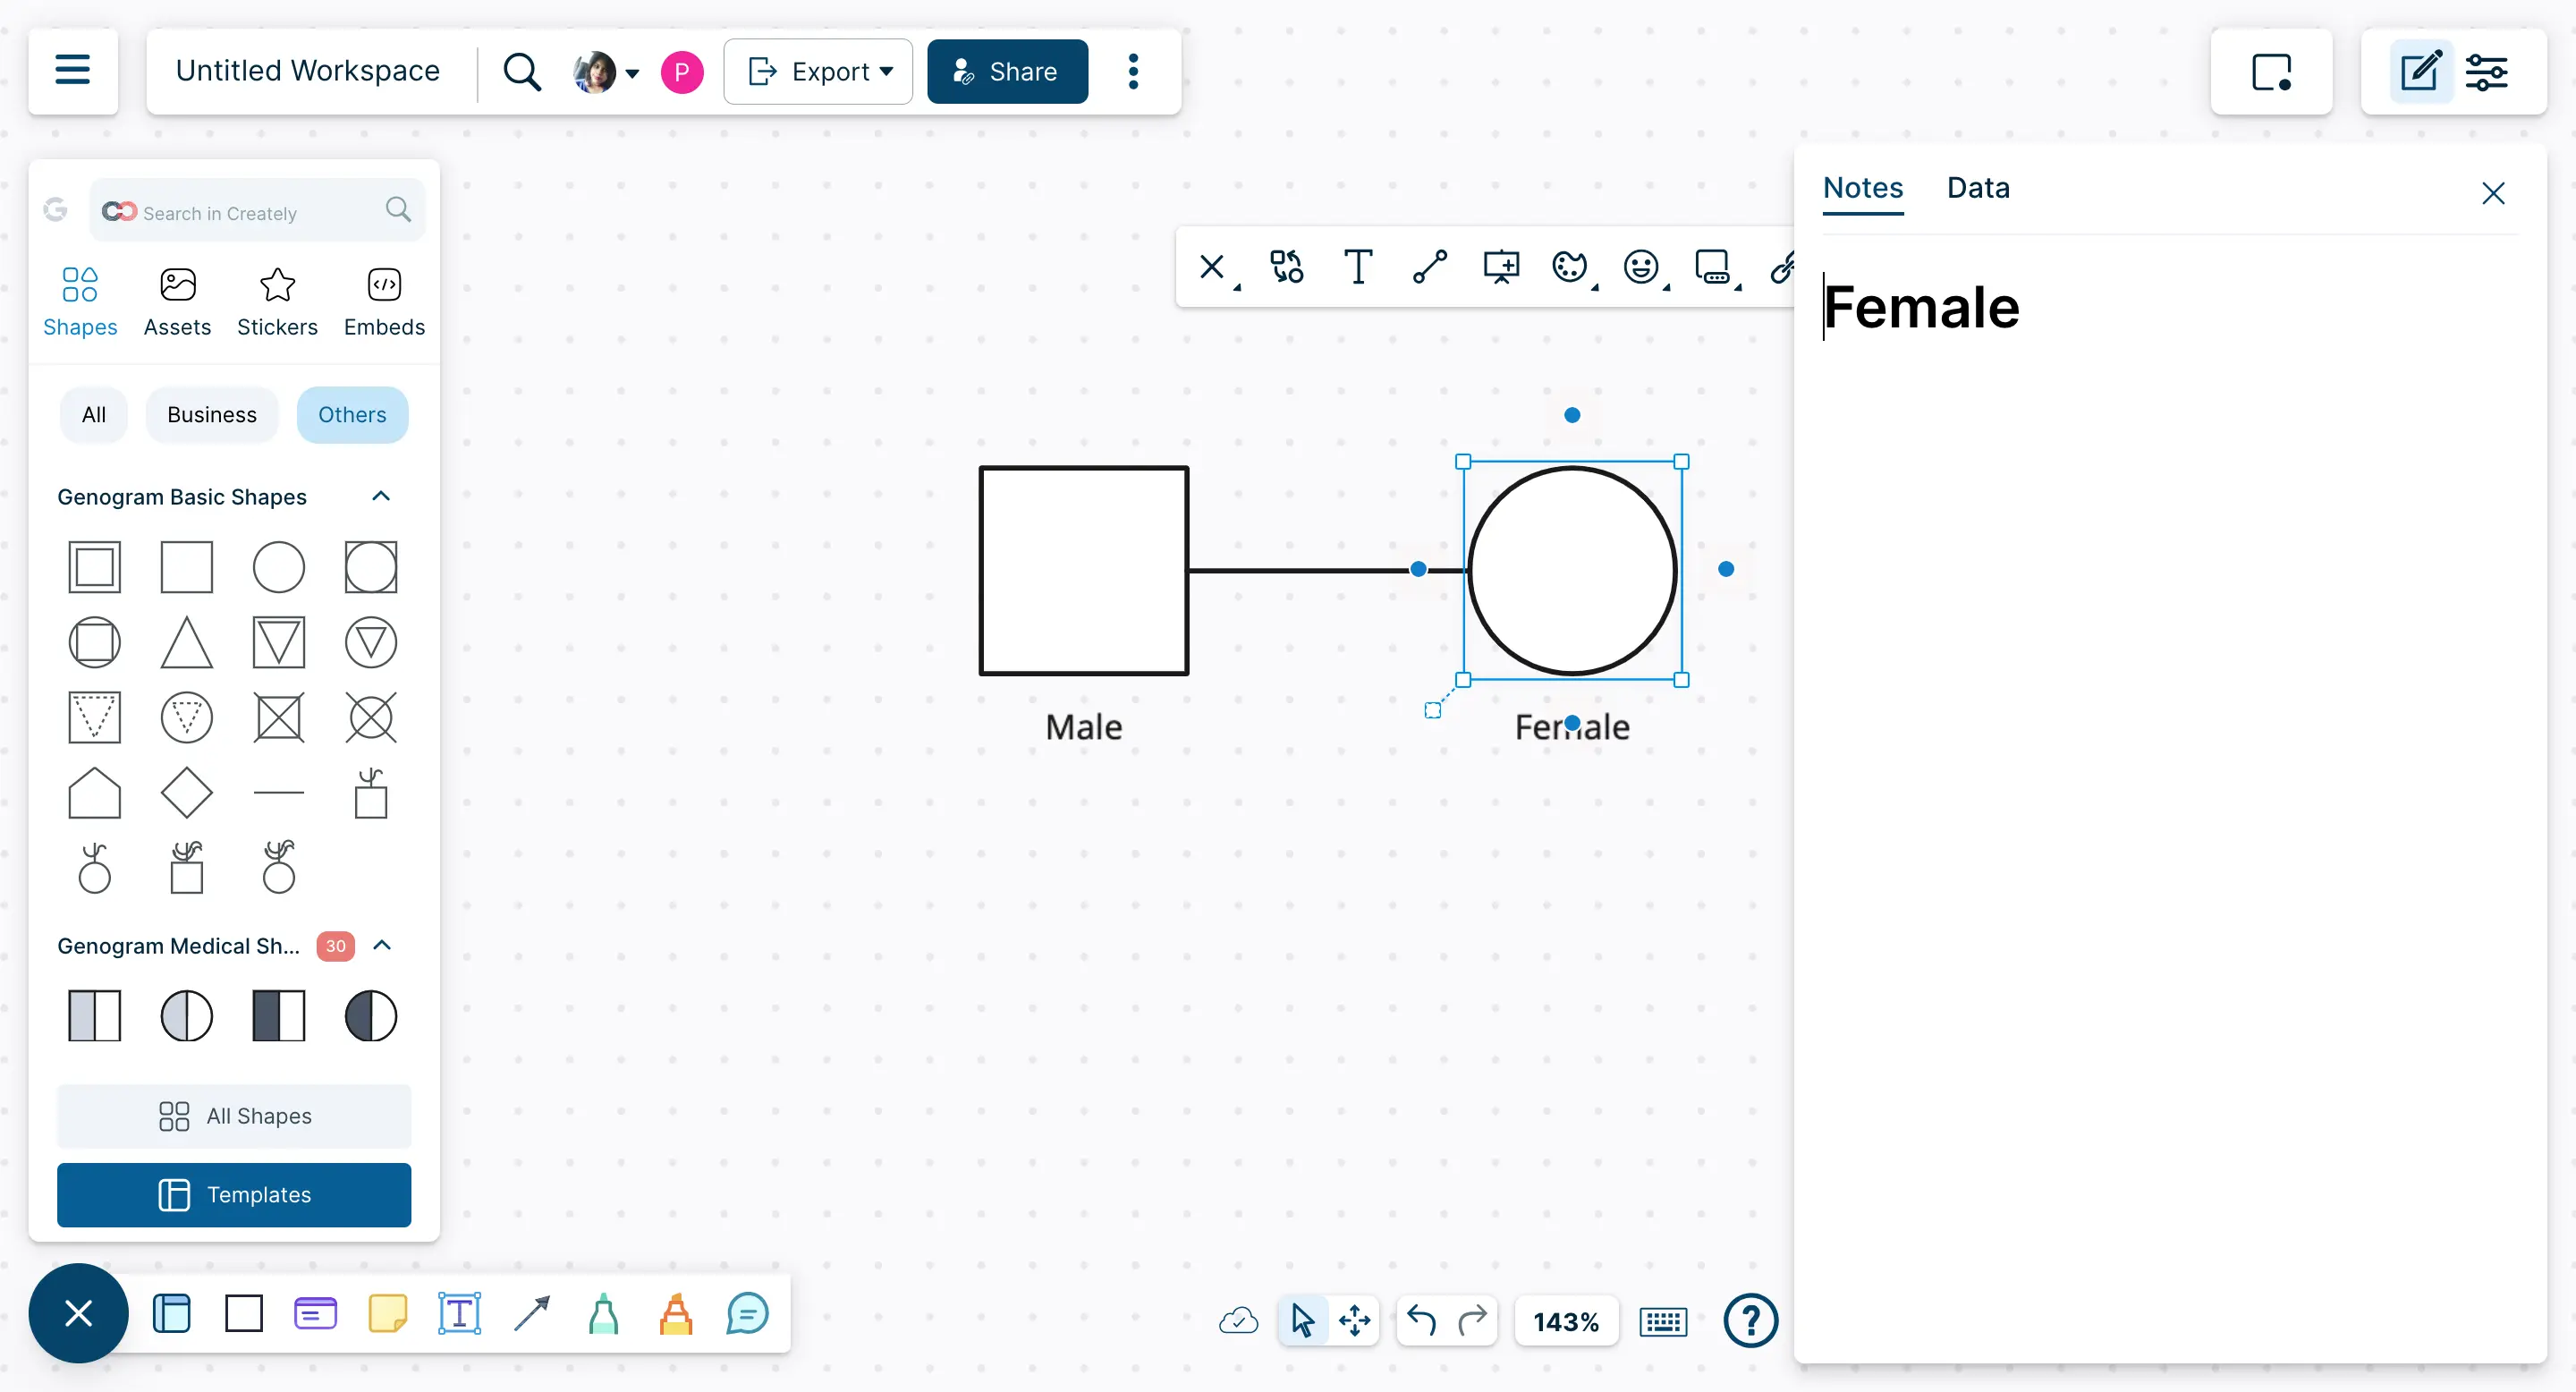
- On the shapes panel you’ll find standard symbols like squares (for males), circles (for females), and other icons for specific life events or attributes.
Click and drag a shape onto the canvas for each family member.
Double-click on a shape to type in a name, date of birth, or any other basic information.
If someone is no longer living, you can use the Contextual toolbar to mark them as deceased.
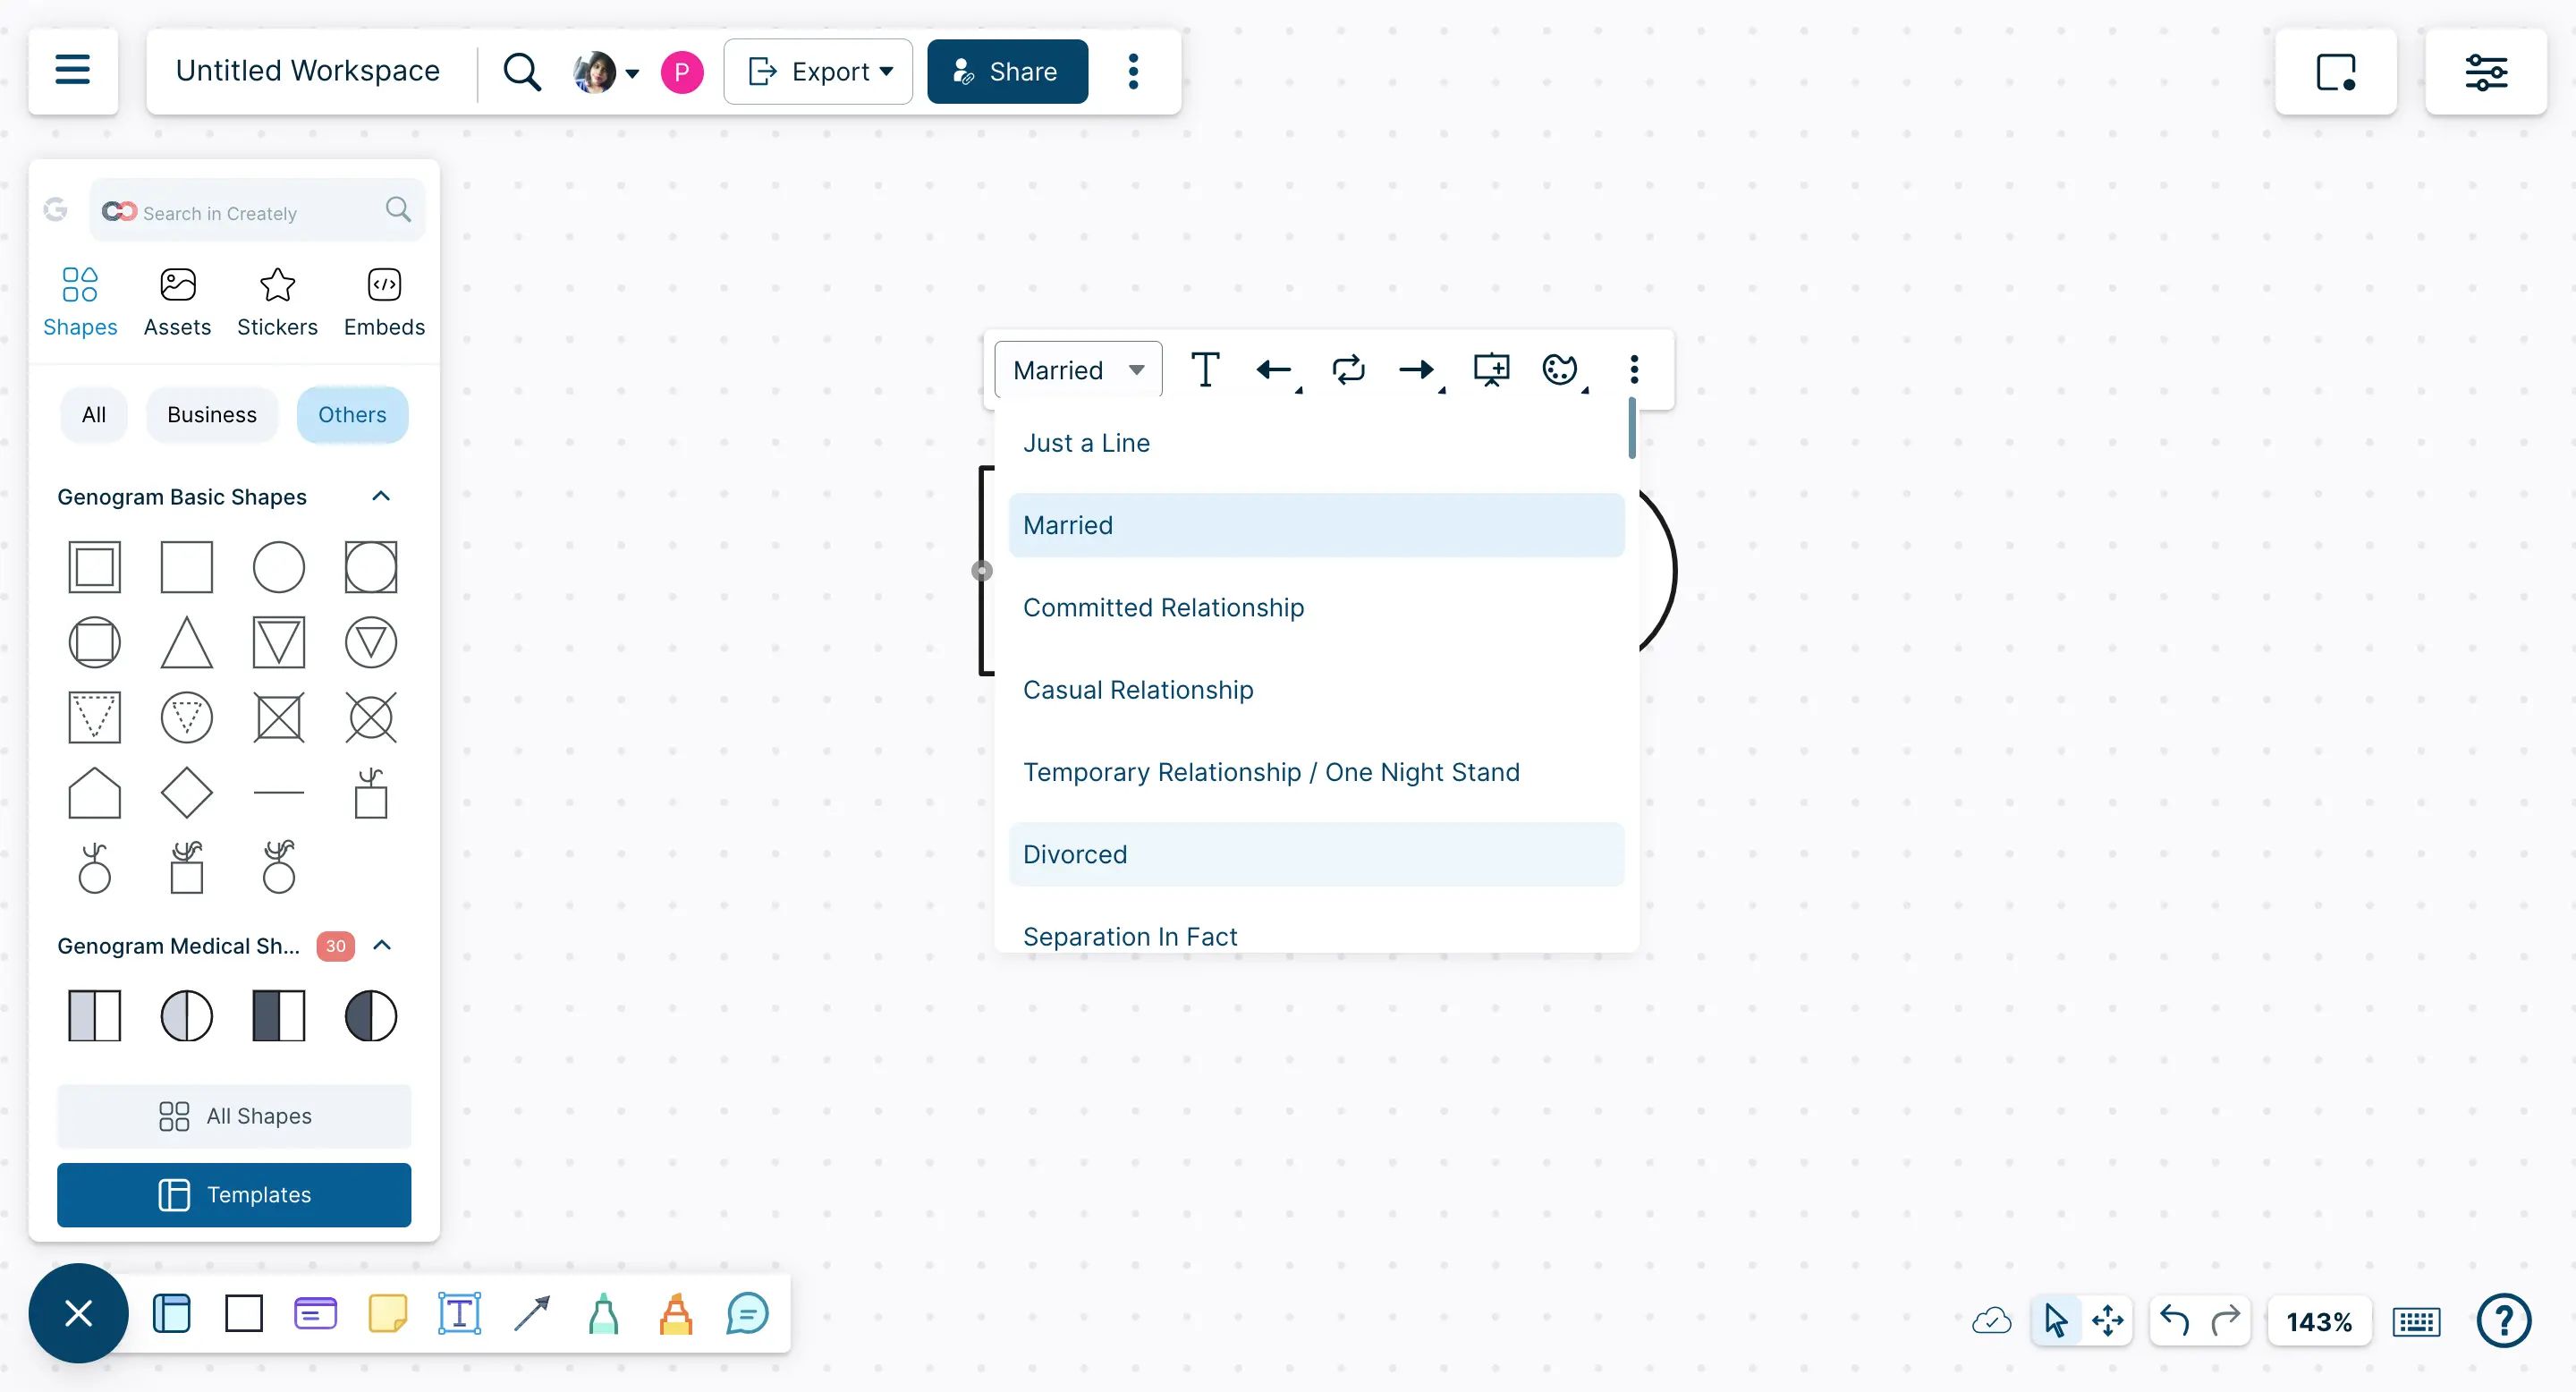
Step 4. Connect family members with relationship lines
Now it’s time to show how everyone is connected.
To connect two shapes (like parents), click on one and select the connector option from the contextual toolbar.
Use solid lines for marriage or partnerships, horizontal lines for sibling relationships, and vertical lines for parent-child connections.
You can also represent separation, divorce, or cohabitation by choosing different types of lines from the toolbar.
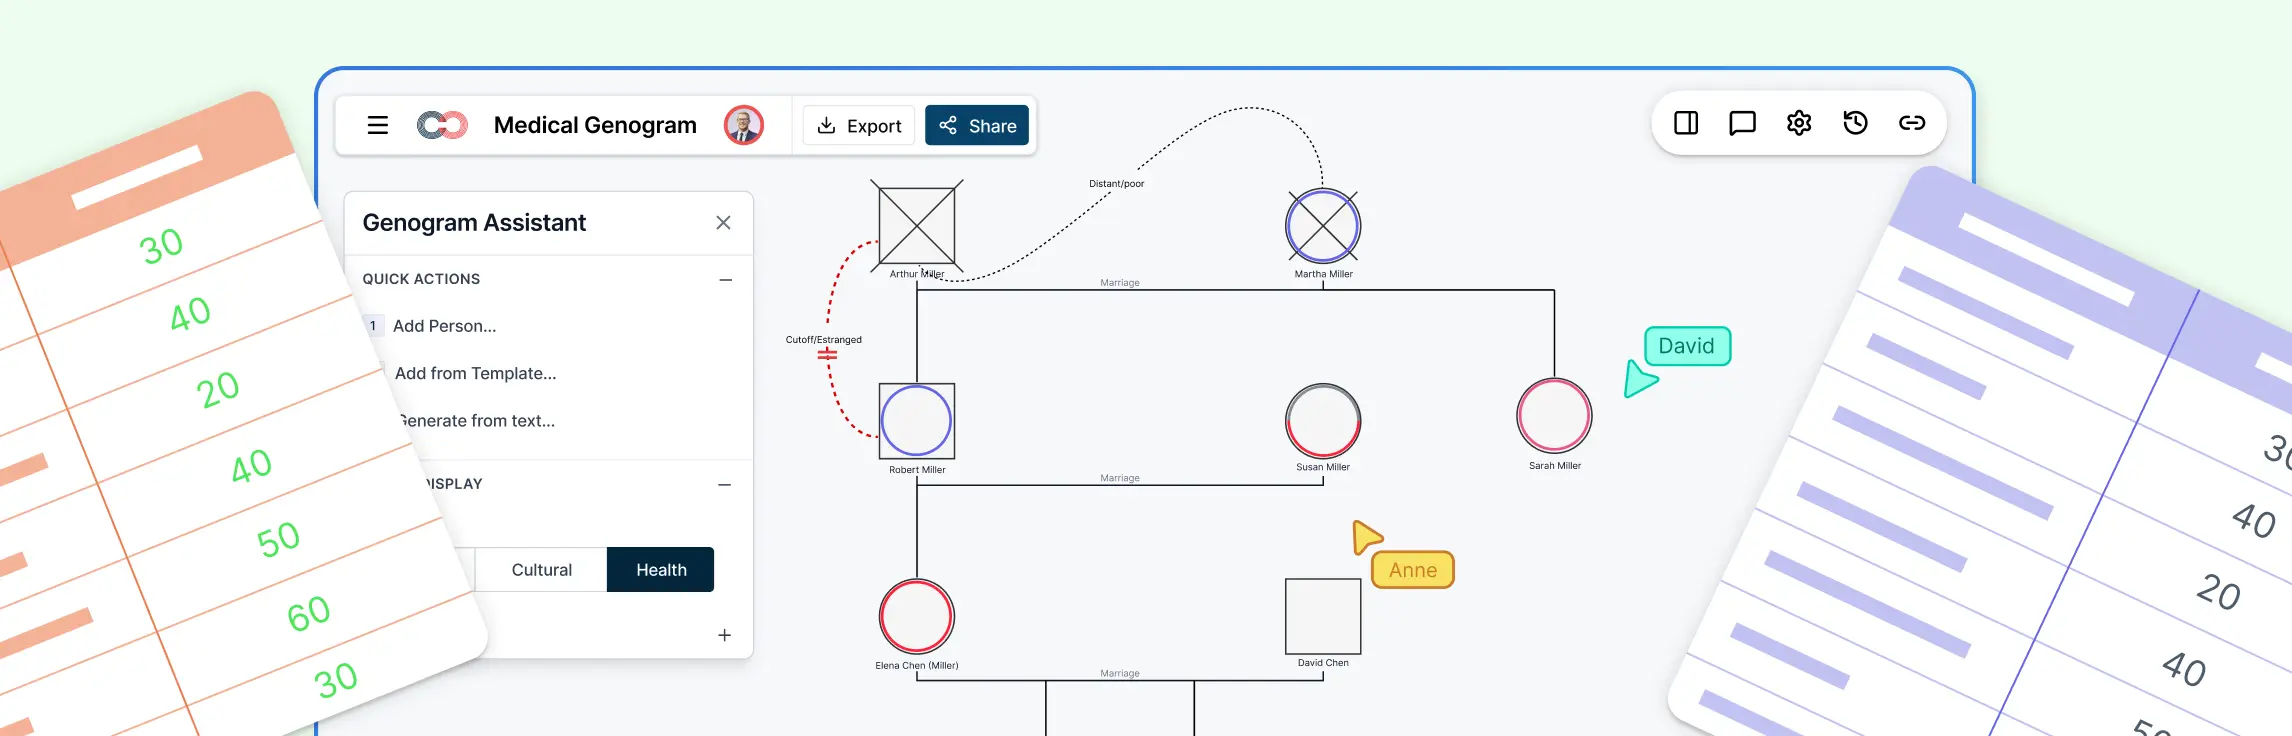
Step 5. Add extra details and emotional relationships
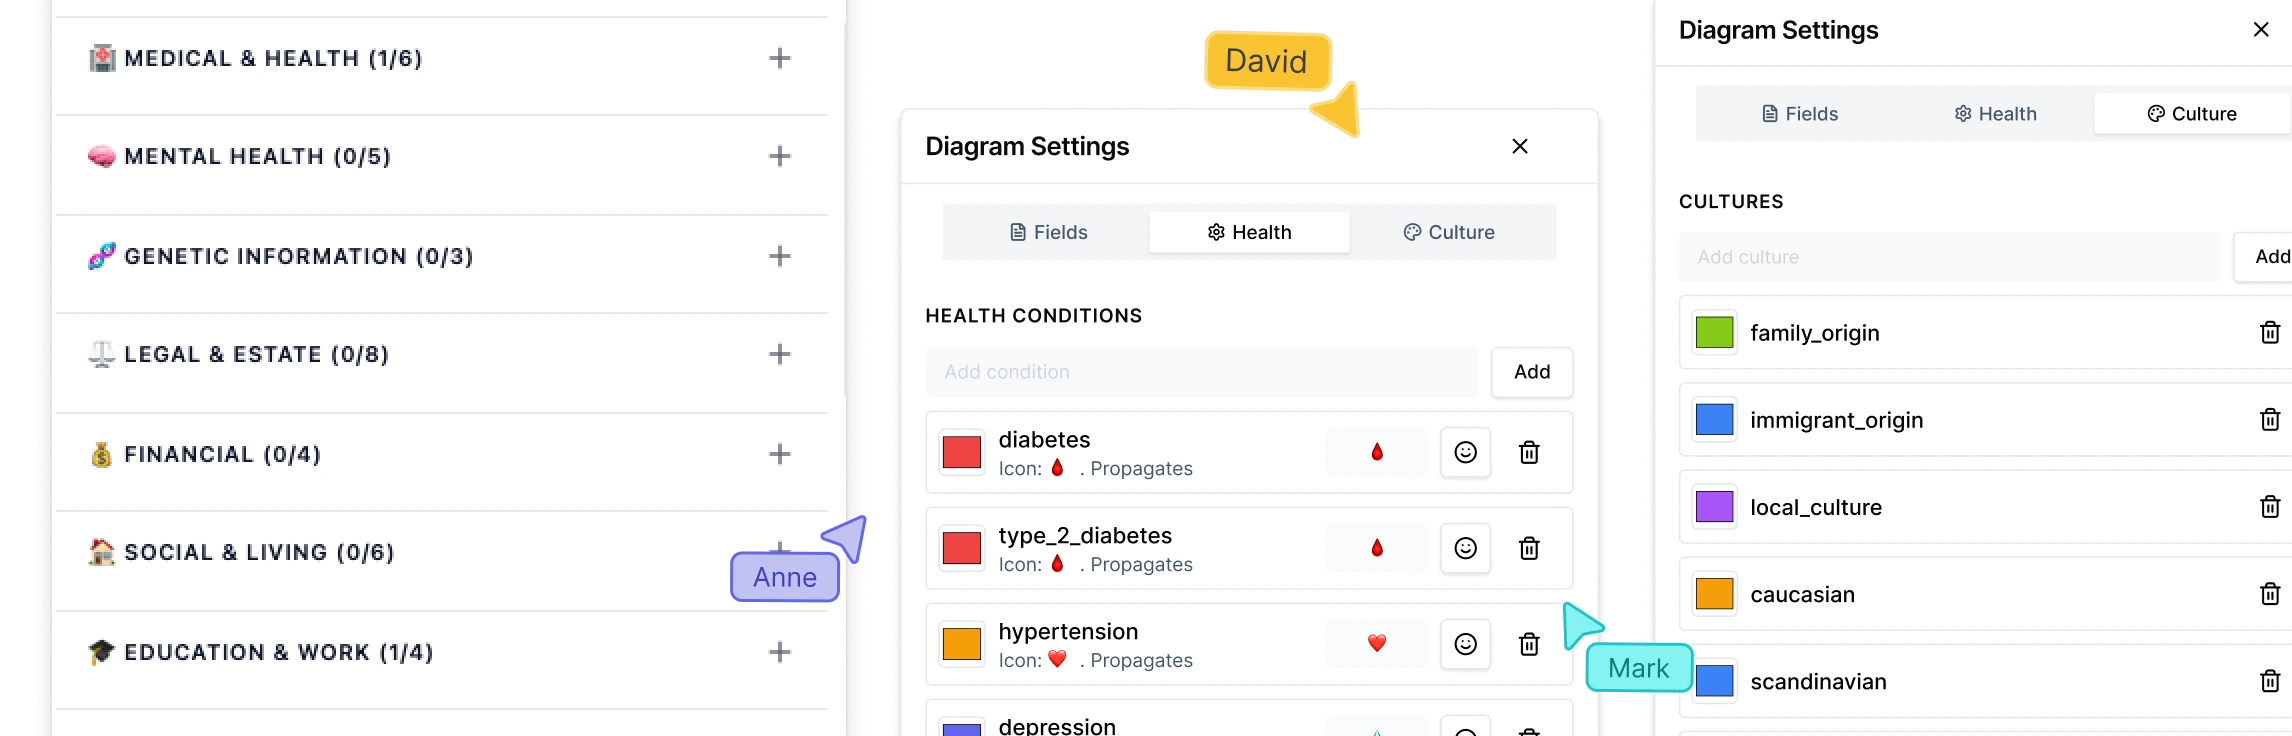
- Click on a person’s shape, then go to the ‘Notes Panel’ or simply type inside the shape to include details like health conditions, personality traits, or behavioral patterns.
You can use different colors to represent patterns—like green for people with a certain condition or blue for a shared trait.
If you want to show emotional relationships (like closeness, conflict, or cut-off), look for the emotional relationship lines in the connector type drop-down menu on the contextual toolbar.
Drag these special lines between two people, and label them if needed.
Step 6. Organize the layout
As your genogram grows, it can start to feel a bit messy. Here’s how to tidy things up:
Arrange people by generation—grandparents at the top, then parents, and children at the bottom.
Use Creately’s grid lines and alignment tools to keep everything neat. These tools appear when you move shapes around.
If it helps, zoom in or out using the slider at the bottom right of the screen, so you can see the whole family clearly.
Step 7. Save, share, or export your genogram as a PDF, PNG, or SVG
Once you’re finished, or even halfway through, it’s a good idea to save your work.
Creately automatically saves as you go.
To share your genogram with someone else (like a teacher, counselor, or family member), click the Share button.
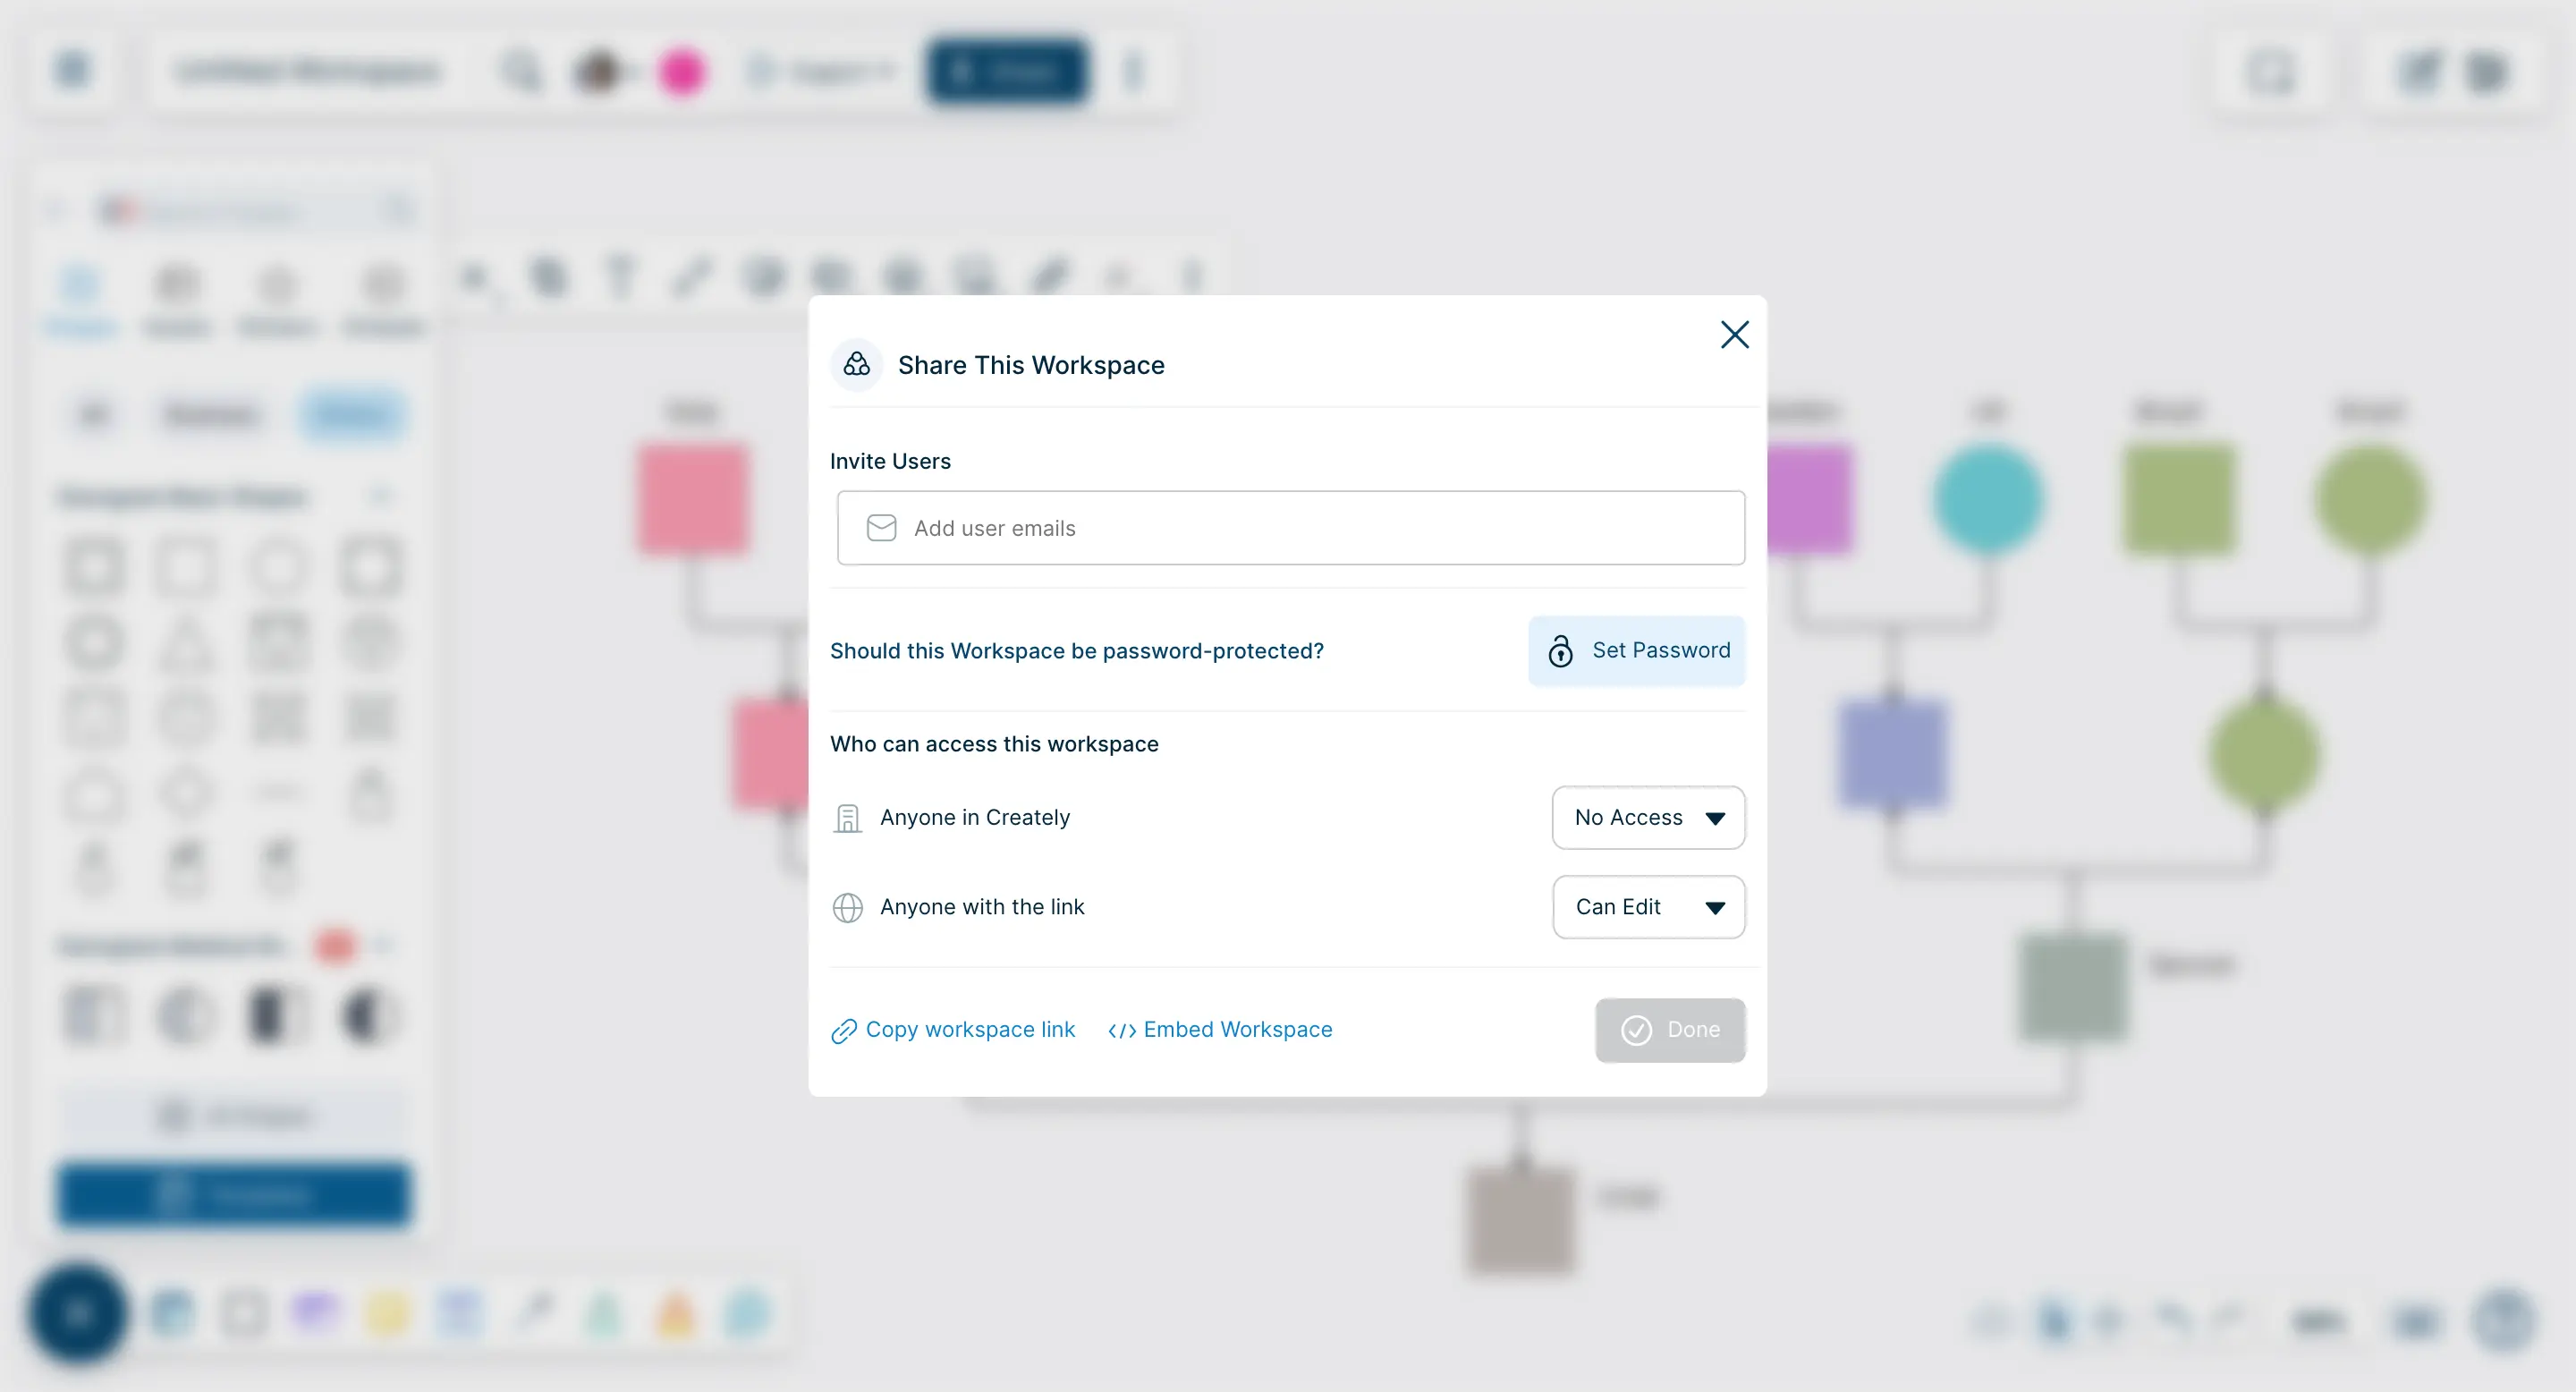
You can copy a private link, or invite someone by email. You can choose whether they can just view or also edit.
To download a copy, click Export, then choose a format like PDF, PNG, or SVG. This is great if you want to print it or include it in a report.
Templates to Get You Started
Now that you know how to make a genogram on Mac with Creately, here are a few templates to help you get started on your genograms.
Genogram Example


Genogram for Social Work Practice

3 Generations Genogram Template

Medical Genogram Template

Genogram Template for Relationship Types

Tips for Using Creately on Mac
Using Creately on your Mac is simple and smooth since the platform is fully web-based. Here are a few tips to help you get the most out of it when creating your genogram:
1. Use Creately’s built-in genogram symbols
Creately provides ready-made genogram symbols and different line styles to represent people and their relationships. You don’t need to draw anything manually—just drag and drop the symbols from the shape library into your canvas.
2. Customize everything easily
On a Mac, you can quickly click and select any shape or line to customize it. Use the quick access toolbar that appears above selected items to change colors, add labels, adjust line types, or insert icons and emojis.
3. Take advantage of smart connectors
As you build your genogram, Creately’s smart connectors help you keep everything aligned. When you connect two family members, the lines will automatically adjust if you move the shapes around—no need to redraw anything.
4. Add extra context with notes and data fields
Click on any person or connection to add extra information—like medical history, emotional dynamics, or life events. This helps turn your genogram into a rich, informative tool instead of just a visual layout.
5. Collaborate in real-time
On a Mac, you can invite others to view or edit your genogram by sharing a link. Whether you’re working with a teacher, therapist, or team member, everyone can collaborate in real-time from their own device.
6. Export and print easily
Need to include your genogram in a report or presentation? Just export it as a PNG, PDF, or SVG. You can then print it or attach it to your documents with high quality.