Planning a home network often starts with guesswork—what’s connected, what’s slowing things down, and where everything actually sits. A home network diagram removes that uncertainty by giving you a clear, visual view of how your devices connect and communicate. In this guide, you’ll learn how to create a home network setup diagram step by step, understand common layouts, follow practical best practices, and use free templates to map your setup.
What is a Home Network Diagram?
A home network diagram is a simple visual map of how all the devices in your home connect to each other and to the internet, using both wired (Ethernet) and wireless (Wi-Fi) connections. It shows things like your modem, router, switches, Wi-Fi extenders, and connected devices in one clear view, so you can instantly understand what’s going on. Instead of guessing when something slows down or breaks, a simple home network diagram helps you see the full picture, plan changes with confidence, and keep your network running smoothly as it grows.
For more on different network diagram types and use cases, read our network diagram guide.
Common Home Network Layouts for Different Setups
Before choosing or drawing your own home network diagram, it helps to understand the most common network setups used in real homes today. Each comes with different strengths, limitations, and ideal use cases depending on size, budget, and connectivity needs.
1. Basic Network Diagram
A basic home network diagram shows a simple setup where a single router—often provided by your Internet Service Provider (ISP)—acts as the central connection point. This router usually includes a built-in modem and wireless access point, allowing a few wired devices and multiple wireless devices to connect to the internet.
Advantages
- Affordable and easy to set up
- Suitable for small homes with limited devices
- Minimal hardware and cabling required
Disadvantages
- Limited number of wired connections
- Lower security due to ISP-controlled router
- Poor scalability for future expansion


2. Basic Network Diagram with Separate Modem and Router
This setup separates the modem and router, giving you more control over your home network. Your own router connects to the ISP modem, allowing you to manage passwords, security settings, and device connections more effectively.
Advantages
- Improved security and control
- Easy to manage for small households
- Cost-effective compared to advanced setups
Disadvantages
- Limited wired ports
- Router placement restricted by ISP entry point
- Wi-Fi range may be limited in larger homes

3. Wireless Network Diagram
A wireless network diagram shows devices connecting entirely over Wi-Fi without Ethernet cables. This layout prioritizes convenience and mobility.
Advantages
- No cabling required
- Easy to expand and rearrange
- Allows seamless movement across the home
Disadvantages
- Reduced speed with many connected devices
- Prone to interference
- Not all devices support Wi-Fi

4. Router–Switch Network Diagram
This more advanced setup adds switches and access points to the network. The router manages traffic, while switches connect multiple wired devices and access points extend Wi-Fi coverage.
Advantages
- Stable wired and wireless connectivity
- Better performance for multiple devices
- Ideal for multi-floor homes
Disadvantages
- Higher hardware cost
- More complex setup
- May require technical expertise

5. Advanced Network Diagram with Multiple Switches
An advanced home network diagram shows multiple switches and access points working together to provide strong wired and wireless coverage throughout the house.
Advantages
- Reliable and consistent internet access
- Wired fallback if Wi-Fi fails
- Suitable for high-demand households
Disadvantages
- Expensive compared to basic setups
- Complex to configure and maintain
- Often requires professional setup

6. Mesh Network Diagram
A mesh network diagram illustrates a main router connected to multiple mesh nodes placed around the home to deliver seamless Wi-Fi coverage.
Advantages
- Excellent coverage with fewer dead zones
- Handles many devices efficiently
- Easy to expand by adding nodes
Disadvantages
- Higher cost
- Setup can be time-consuming
- Overkill for small homes

7. Powerline Network Diagram
Powerline networking uses existing electrical wiring to transmit network data through wall outlets using powerline adapters.
Advantages
- Simple installation
- No need for new Ethernet cabling
- Useful where Wi-Fi struggles
Disadvantages
- Slower than Ethernet
- Performance depends on wiring quality
- Limited bandwidth

8. Phone Line Network Diagram (HomePNA)
Phone line networking uses existing telephone wiring to connect devices. While largely outdated, it was an early home networking method.
Advantages
- Easy to set up
- Does not interfere with phone calls
- OS-independent
Disadvantages
- Requires phone jacks near devices
- Limited range and scalability
- Mostly obsolete today

9. Direct-to-Modem Network Diagram
In this setup, a single device connects directly to the modem without a router, providing direct internet access from the ISP.
Advantages
- Very low cost
- Extremely simple setup
- No additional hardware required
Disadvantages
- Very poor security
- No firewall protection
- Not suitable for multiple devices

How to Draw a Home Network Diagram
Drawing a home network map becomes much simpler when you break it into clear, manageable steps. Follow these steps below using Creately’s network diagram software to visually map, label, and update your home network with ease.
Step 1: List All Devices in Your Home Network
Start by identifying every device that connects to the internet. This includes your modem, router, switches, Wi-Fi extenders, computers, phones, TVs, printers, and smart home devices.
Step 2: Decide How Each Device Connects
Determine whether each device connects via Ethernet, Wi-Fi, or both. At this stage, identify which layout your home network follows, such as a basic setup, fully wireless layout, router–switch setup, mesh network, or a hybrid combination of wired and wireless connections. This helps you understand traffic flow and clearly see where wired connections could improve performance and stability.
Step 3: Place the Router at the Center
Position your router at the center of the diagram, as it is the primary gateway to the internet in most home networks. All other devices should connect to it directly or indirectly based on your chosen layout.
Step 4: Arrange Devices by Location
Organize devices according to their physical location in your home, such as by room or floor. This makes the diagram easier to read and far more helpful when troubleshooting coverage or connection issues.
Step 5: Draw and Label the Connections
Use lines to represent how devices connect to each other. Clearly label Ethernet and Wi-Fi connections so the network structure is easy to understand at a glance.
Step 6: Review, Save, and Update the Diagram
Check the diagram for missing devices or unclear connections, then save it. Update the diagram whenever devices are added, removed, or moved to keep it accurate.
Tips for Creating a Home Network Diagram
Creating a home networking diagram is most effective when it stays clear, accurate, and easy to maintain. The following tips will help you create a diagram that remains useful long after it’s created.
Start simple and build gradually: Begin with core devices like your modem and router, then add switches, access points, and end devices. A clean foundation prevents clutter.
Use consistent symbols and labels: Stick to standard network symbols and clear device names so the diagram is easy to read and understand at a glance.
Clearly distinguish wired and wireless connections: Use different line styles or labels to show Ethernet and Wi-Fi connections. This makes troubleshooting much faster.
Group devices by room or floor: Organizing devices by physical location helps you visualize coverage gaps and plan upgrades more effectively.
Avoid overcrowding the diagram: Focus on clarity over detail. If the network is complex, consider breaking it into multiple diagrams.
Label important network details only: Include useful information like device names or connection types, but avoid unnecessary technical data that adds noise.
Design with future growth in mind: Leave space for new devices so updates don’t require redrawing the entire diagram.
Keep the diagram updated: Revisit your diagram whenever you add, remove, or move devices to ensure it stays accurate.
Things to Consider When Designing Your Home Network
Before setting up or diagramming your home network, keep the following factors in mind.
Number of devices: Identify how many devices will connect to your network. This determines whether a single router is sufficient or if higher-capacity routers or wired connections are needed.
Home size and coverage: Larger homes may require high-range routers, access points, or mesh systems, while smaller spaces can often rely on a standard router. A home networking diagram helps plan coverage in advance.
Protocol compatibility: Ensure your networking devices support common and modern protocols such as Wi-Fi standards (Wi-Fi 5/6), Ethernet standards, IPv4/IPv6, and security protocols. Compatibility between routers, access points, smart devices, and IoT equipment helps prevent connection issues and ensures smoother performance across the network.
Speed, security, and stability: Plan for reliable performance, strong security, and stable connections. Poor speed or weak security may require better hardware or plan upgrades.
Future readiness: Design your network with growth in mind. Adding extra cabling or connection points early makes it easier to support new devices later.
Upgrade flexibility: Choose scalable equipment that supports easy upgrades without major disruptions as your network needs evolve.
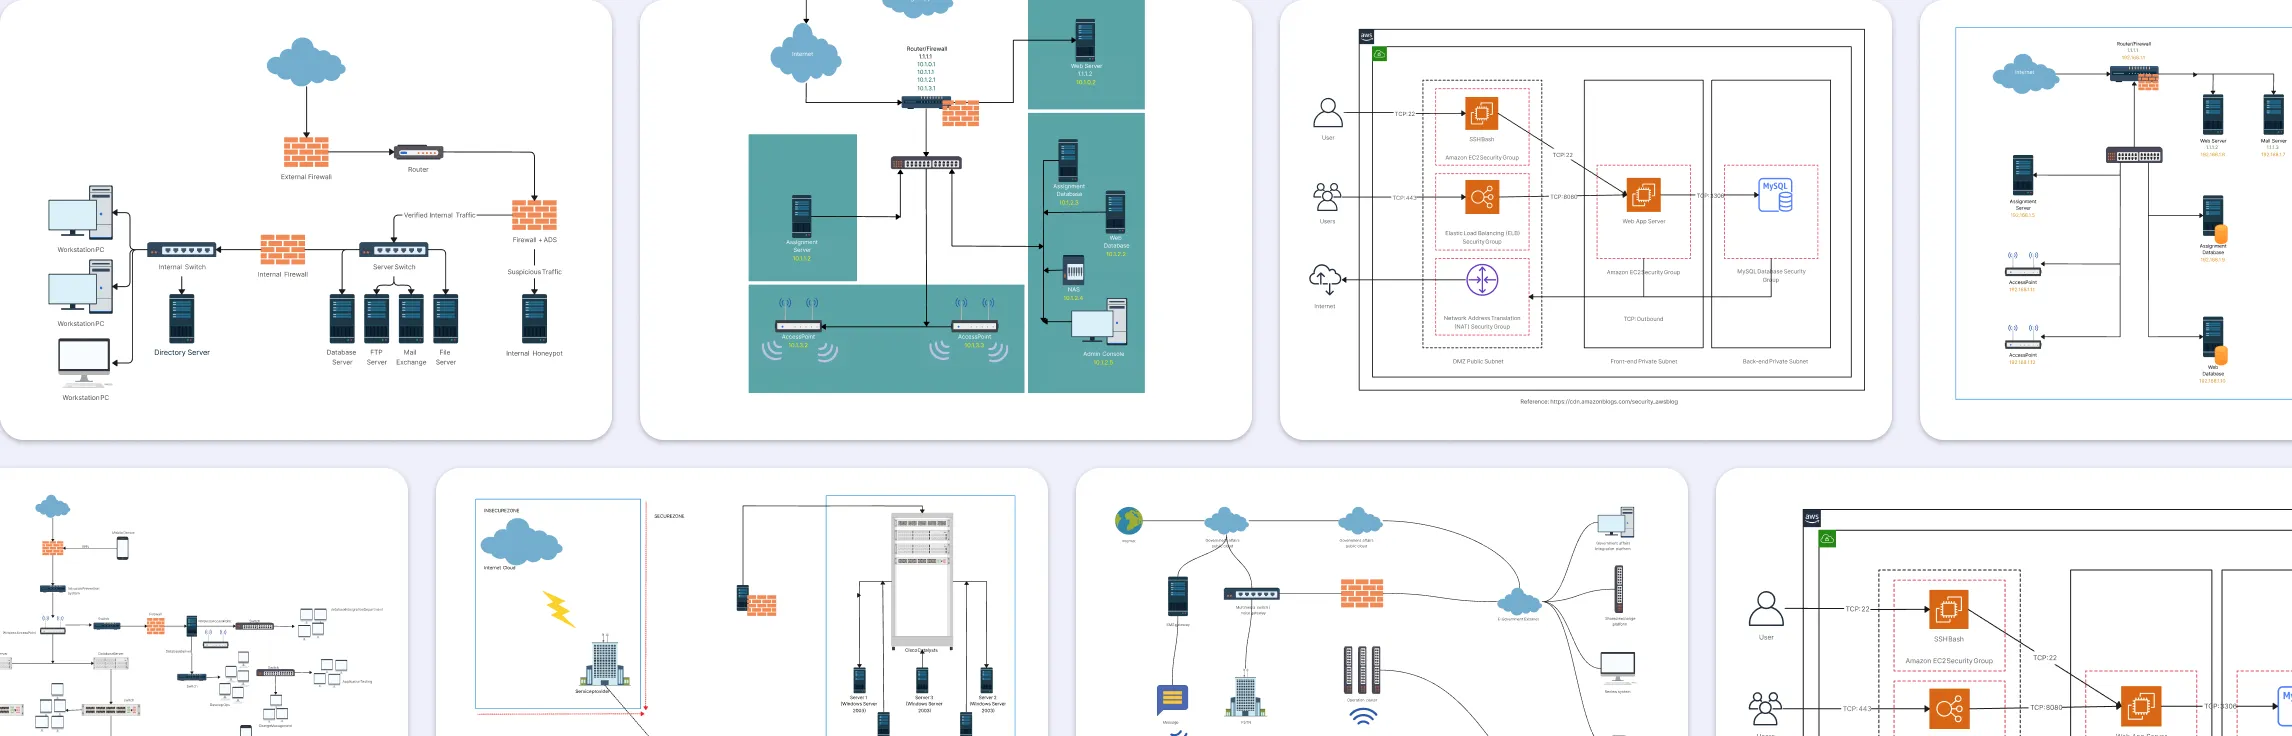
Free Network Diagram Templates to Get Started


Helpful Resources for Building Network Diagrams
Learn about the different types of network diagrams with examples.
Discover the different types of network topology and their use cases.
Learn about the Wide Area Network Diagram and its applications.
FAQs about Home Networking Diagrams
Should I include internet service provider (ISP) equipment in my diagram?
How does a home networking diagram help with upgrades?
What devices should be included in a home network diagram?
What is the difference between a home area network and a personal area network diagram?
Resources
Ding, Jie, et al. “The Application of Wifi Technology in Smart Home.” Journal of Physics: Conference Series, vol. 1061, July 2018, p. 012010, https://doi.org/10.1088/1742-6596/1061/1/012010.
Mortier, R., et al. “Control and Understanding: Owning Your Home Network.” 2012 Fourth International Conference on Communication Systems and Networks (COMSNETS 2012), Jan. 2012, https://doi.org/10.1109/comsnets.2012.6151322.